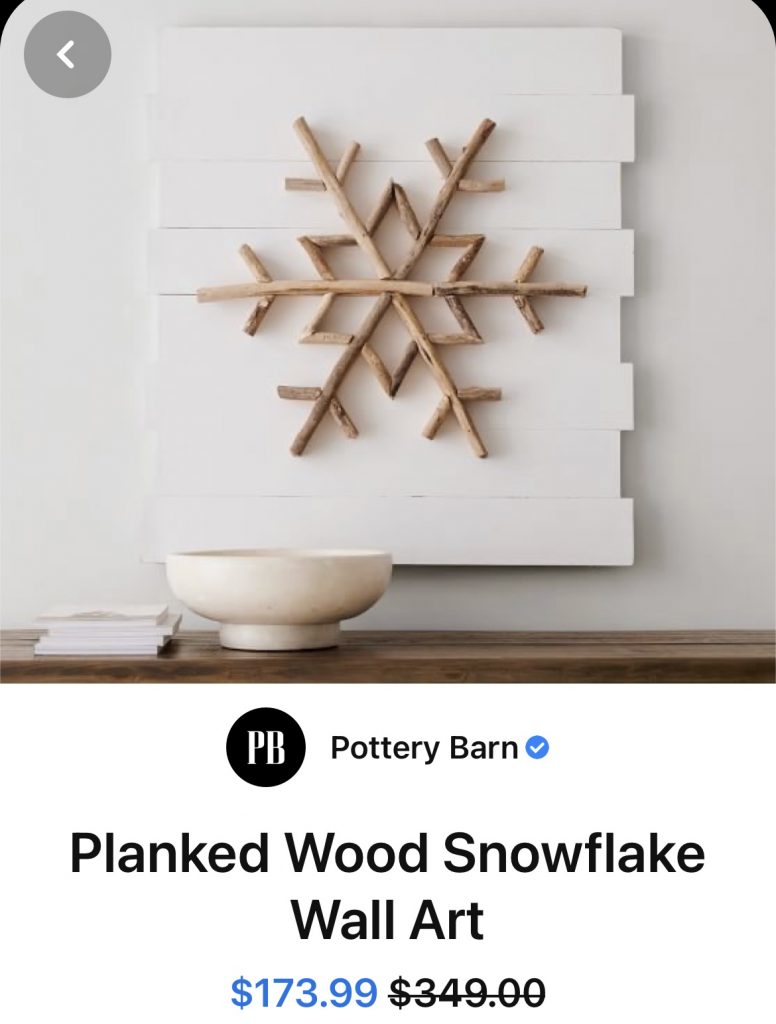
As I was scrolling on Pinterest as one does… This little snowflake sign caught my eye.
You know what else caught my eye?!?! THAT PRICE!!!!
I knew I could make something similar for wayyyyyyy cheaper. So what does this Southern gal do?! She rounds up some sticks from her yard, plugs in her hot glue gun, and gets to work!
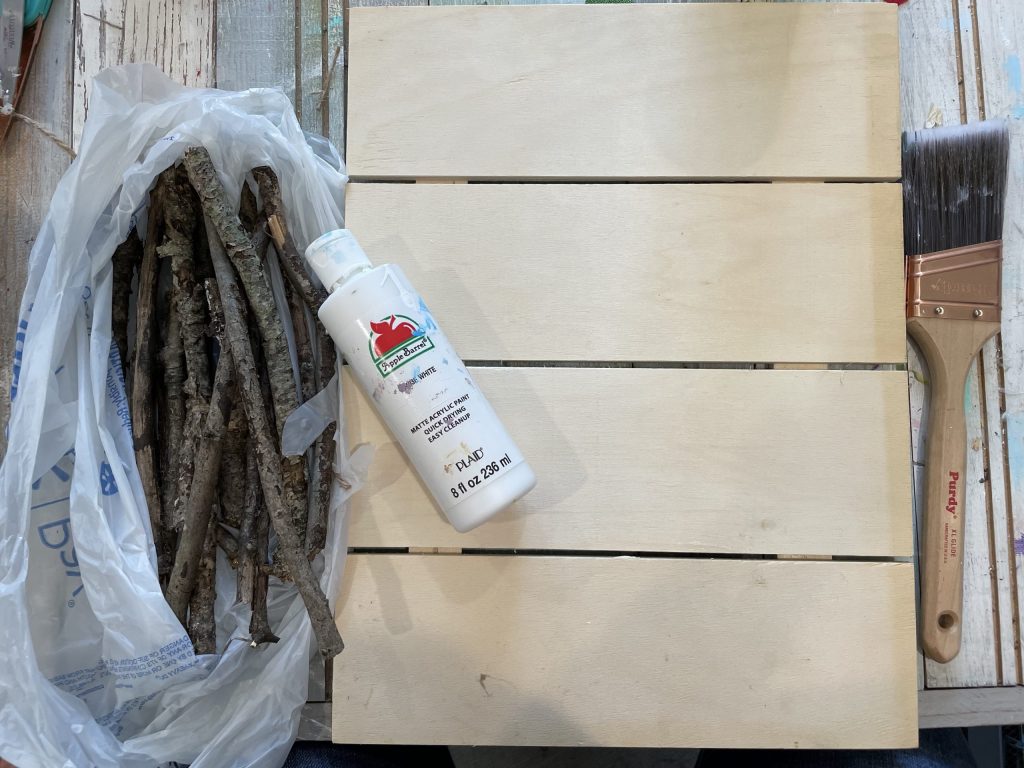
Here’s what you’ll need…
- wooden sign of any kind
- sticks
- hot glue gun
- white paint

Can’t you already tell that this will be SO MUCH CHEAPER than the one from Pottery Barn?
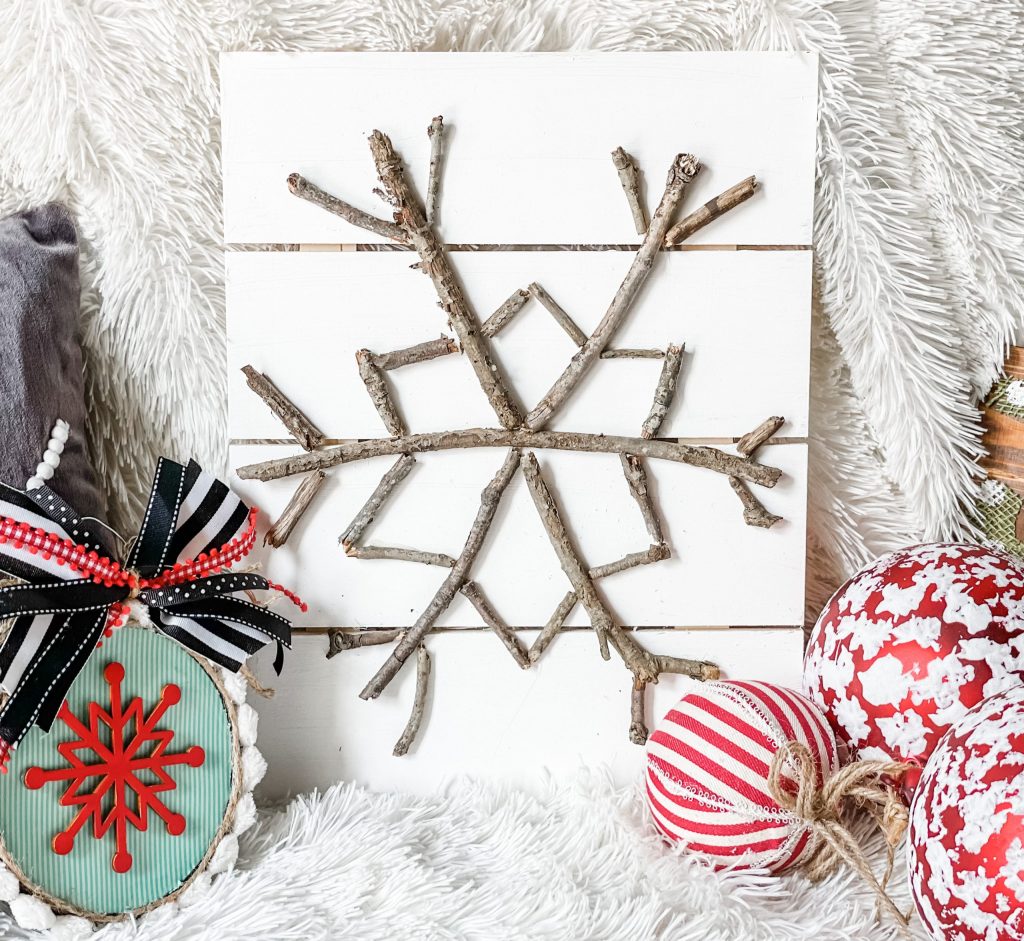
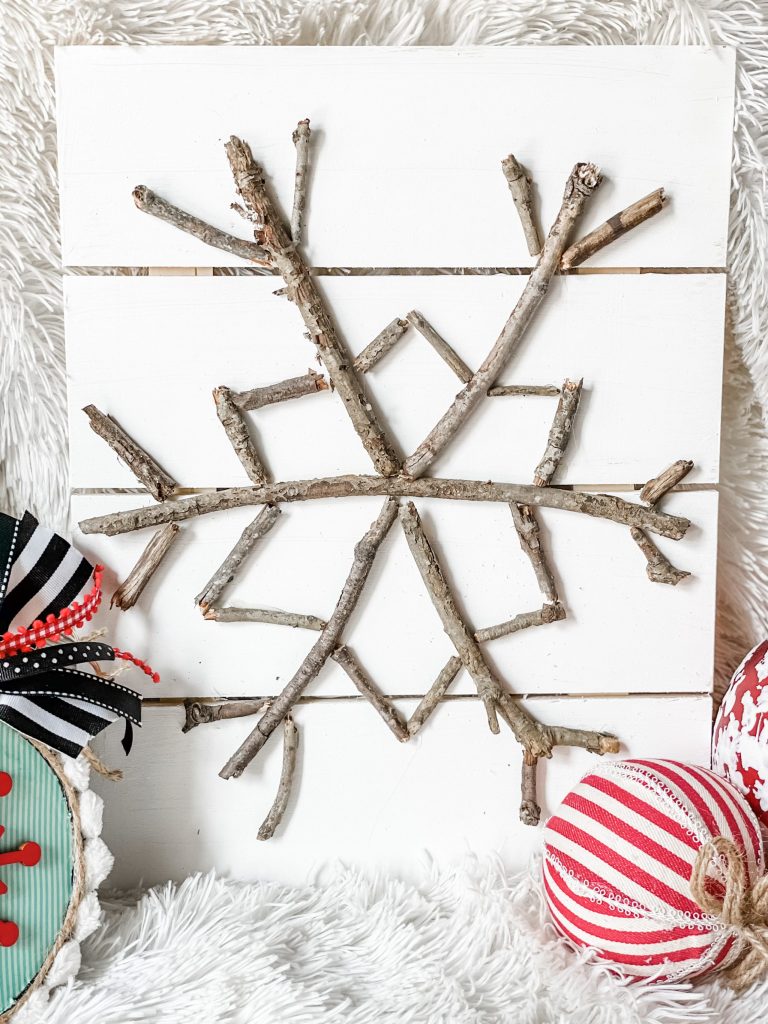
Step 1: paint your sign white… or any color for that matter!
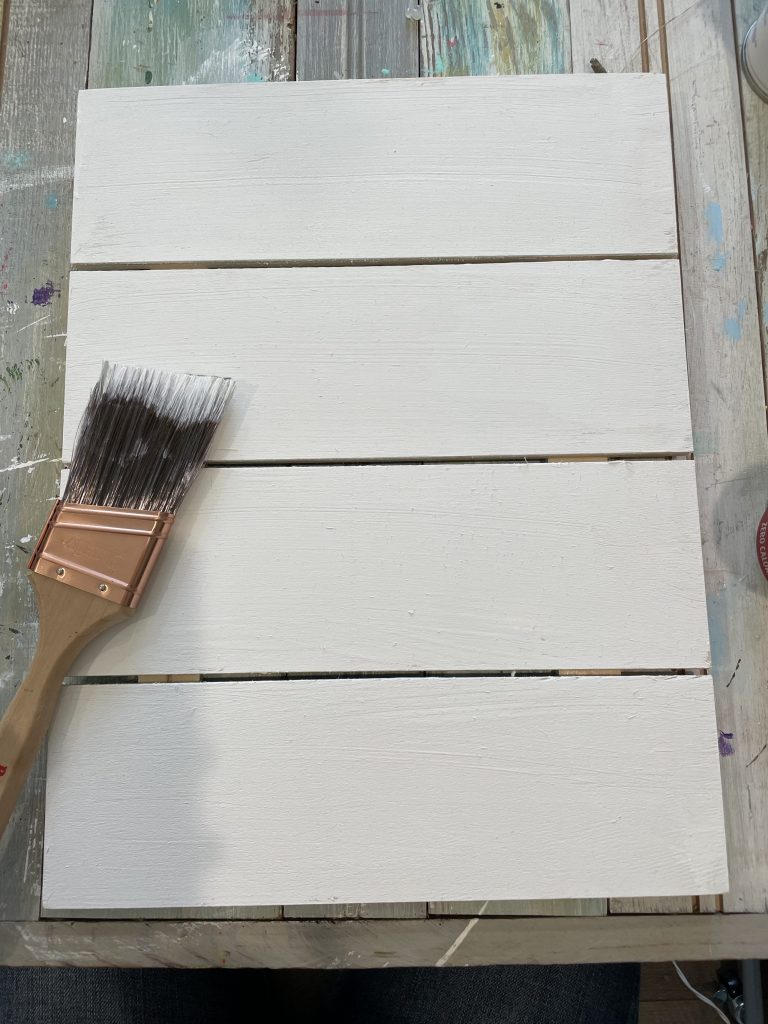
Mine only needed one coat!
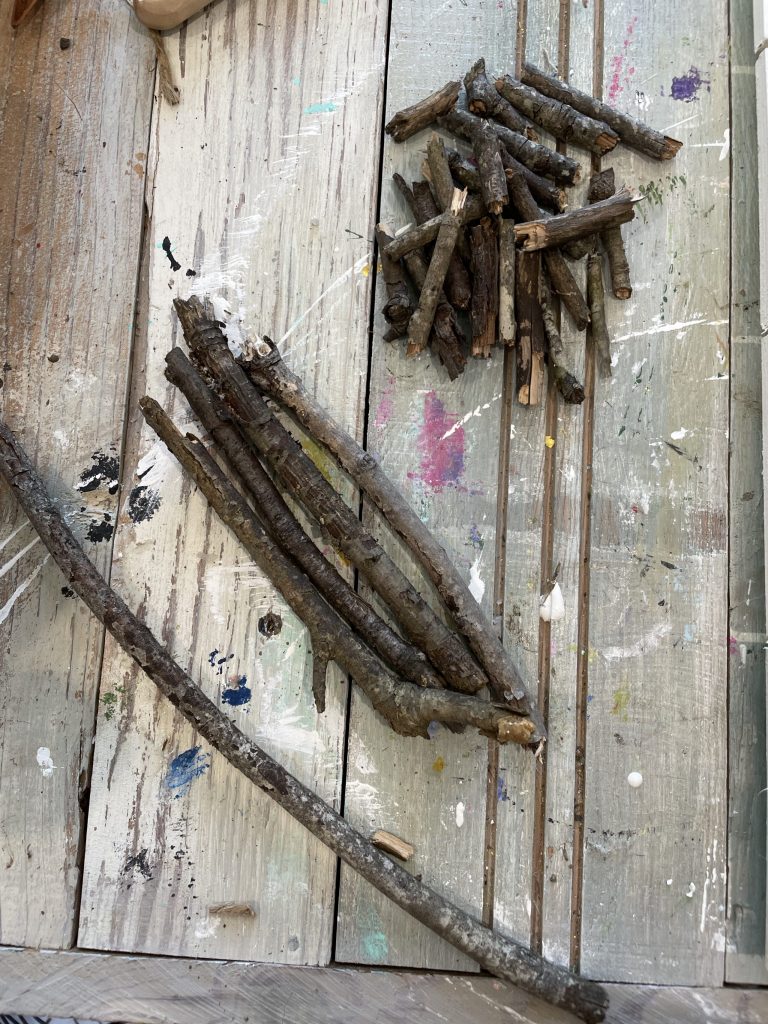
While your board is drying, go ahead and break up pieces of your sticks! You’ll need one long one, four medium sized, and about 24 tiny ones!
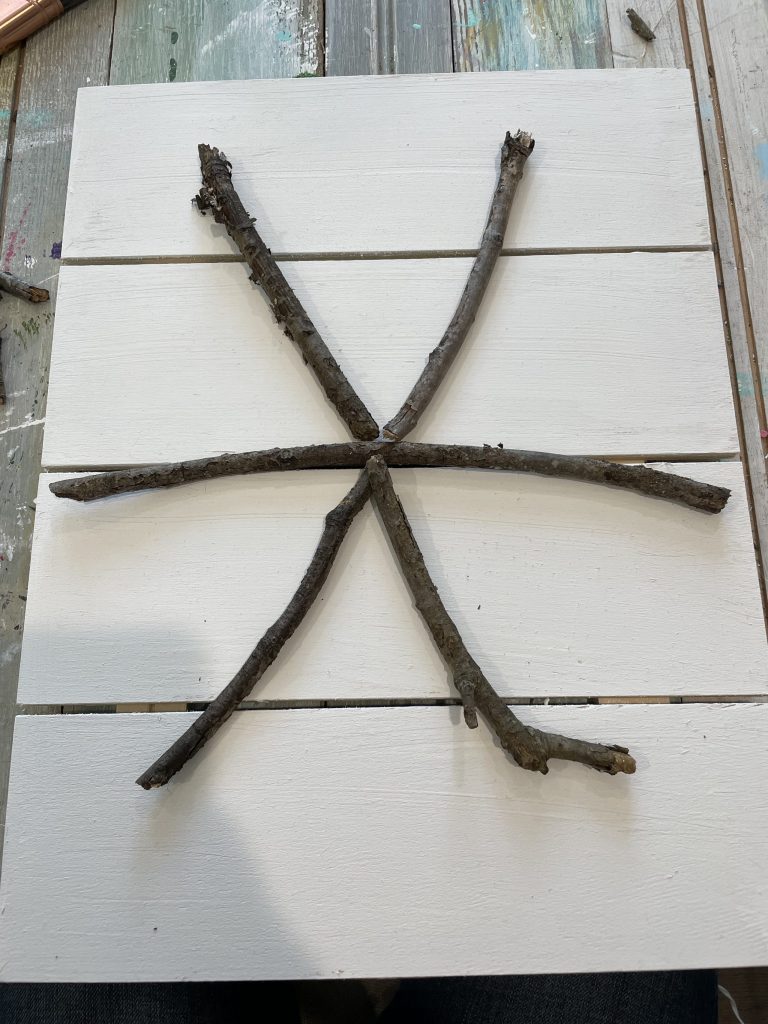
Now, it’s just time to assemble! Start with the base of your snowflake… with the longest stick being horizontal in the middle. and the other 4 creating an “X” shape!
Go ahead and hot glue them into place.
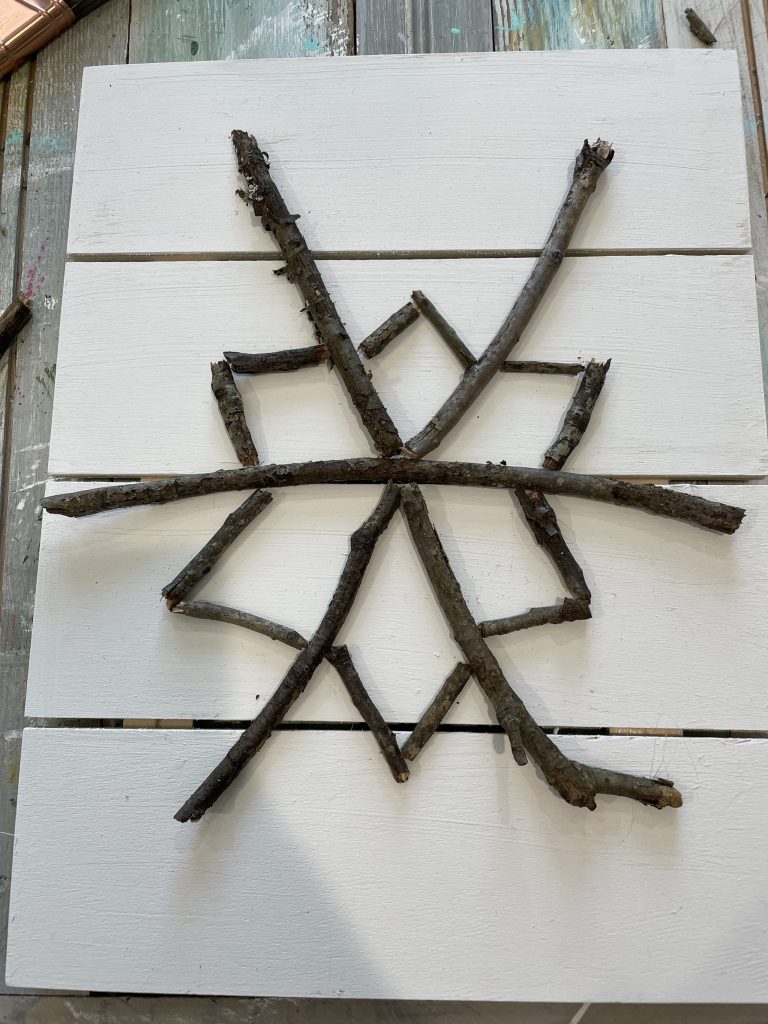
Now, let’s work on the middle! I tried to mimic the snowflake sign from Pottery Barn… so I made the tiny pieces into points like the picture shows!
Again… hot glue them down!
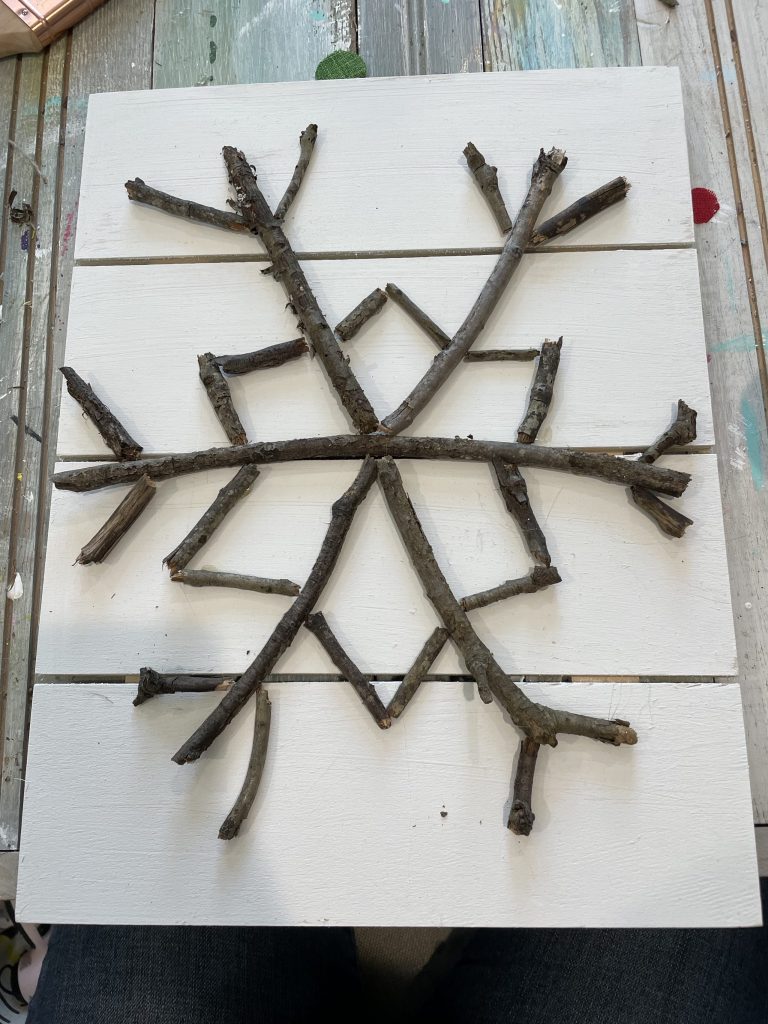
Last but not least… finish off the snowflake with the end points!
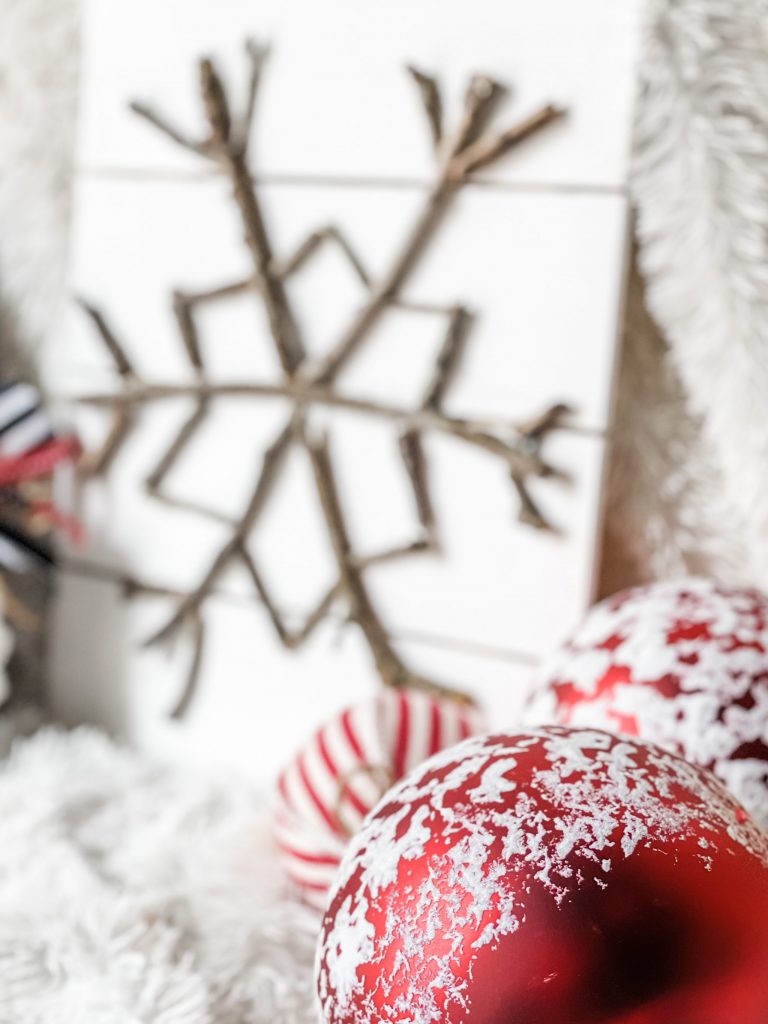
Y’all…. I don’t think you’re ready for this cuteness.
First of all… this project cost me NOTHING, because I already had everything on hand. But- even if you were to go out and buy everything, you’d still be at around $10 bucks or so.
I enjoy taking things with a high price, and challenge myself to make them myself… and honestly, I think we did GOOOOOD with this one!!!
Overall, this project was meant to INSPIRE you… There are many things I see in stores, and think “I can make that.” And truth be told… I much rather MAKE something and have fun making it, than to spend big bucks on something that is already made. Anyone feel me?!?!
BE SURE TO PIN!


Last Updated on July 13, 2021

Beautifull!! You are so clever!
So cute! I’m going to make this!
So cute! Going to do this one.
Ur sign was really cute & in all reality I like urs a lot better ur videos r awesome thank u very much
Love it! Adorable!!
The pottery barn inspired snowflake you made is absolutely gorgeous and beautiful.
How simple & fun!!!! LOVE IT!!!! Thank you for sharing❤️
I like yours better, more realistic…… I would have to be out of my mind and filthy rich to pay that for the Pottery Barn sign….wowsers. I think I will go make one of those myself now!! Love it! craft on girl!
Your snowflake is terrific. Going to make mine tomorrow,maybe. I have a lot of Christmas gifts to get done. My little “Joy” board is done and don’t know how to send picture. My deer has Deformed eyes are crooked nose other than that it looks all right.
This post inspired me to pick up some sticks! I created a similar magnificent snowflake as well! Sooo easy! And cheap to boot!