This diy is literally one of my VERY favorites to date. I was blown away with how cute and easy it was.
As you know, pillows are a gals best friend. We need them everywhere. I kind of think of them as my stuffed animal in adulthood. Anyone with me on that?
Well, my friend Tammy with Polka Dot Wreath Co. messaged me the other day on Facebook and told me about a diy that she wanted me to try. She had done it, and she said she just KNEW it would go over with my page. Well, I did it…and OMG…I am thrilled with the results and will now be looking for ALL THE PLACEMATS!
So, here is what you need:
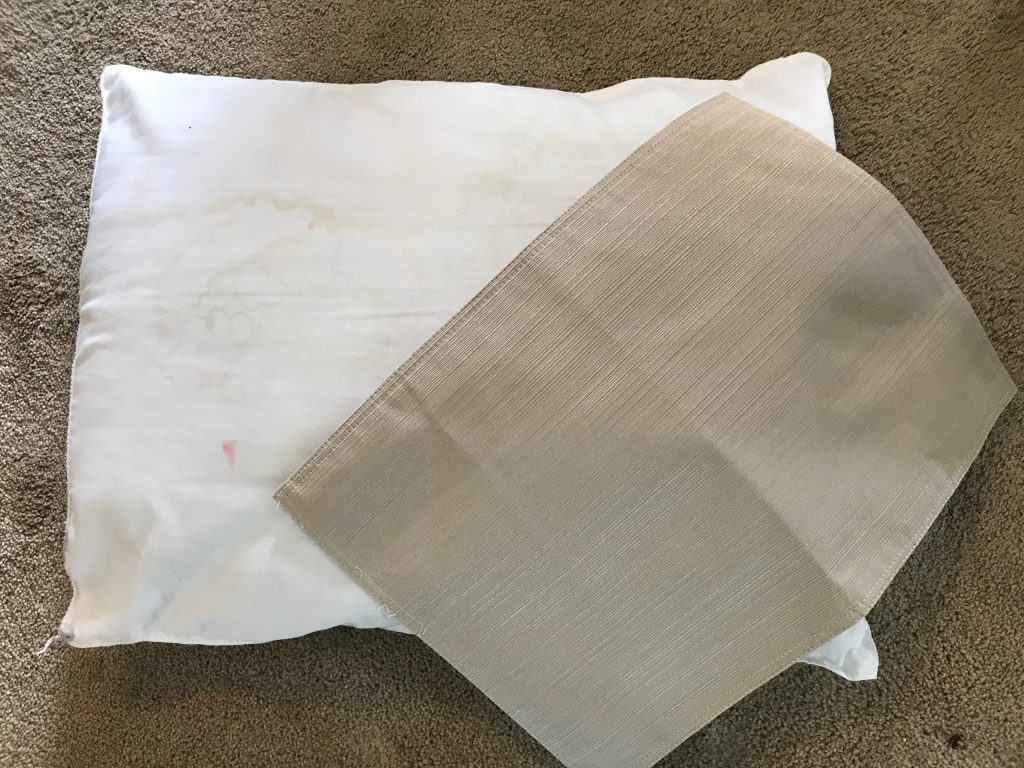
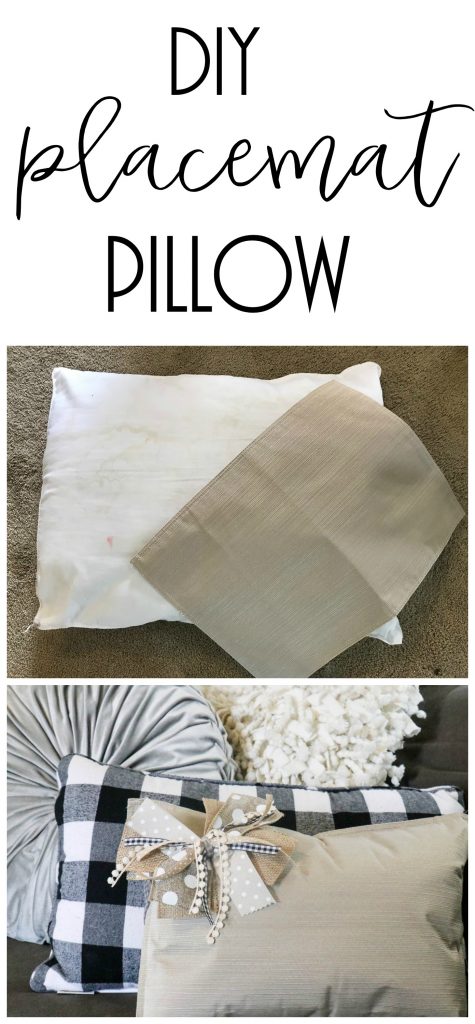
Placemats (get ones that are sturdy…and if double sided, that is even better. But they do need to have a seam that you can cut down)
Hot Glue Gun (The cordless one that I love is right here on Amazon)
Old Pillow (you can also use ANY pillow- even new…you just need the filling)
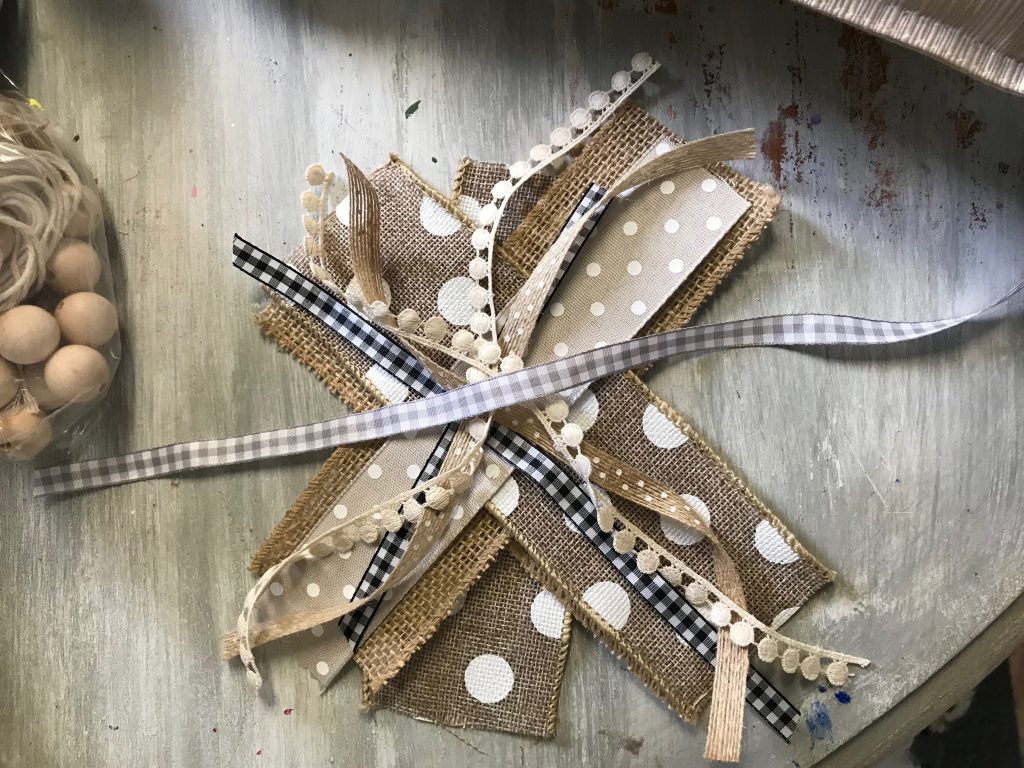
Embellishments for outside (you only need these if you want to spiffy it up)
Now….you may be thinking- WHY does she have such a sad, ugly, dirty pillow? Well, I knew deep down that one day I may need it…HAHA. And bam! It is perfect for this!
Now, here comes the fun part! Let’s make this pillow!
First, you need to take an exacto knife (or sharp knife) and cut down the seam just a little ways…enough that you can stuff it full and get into the corners.
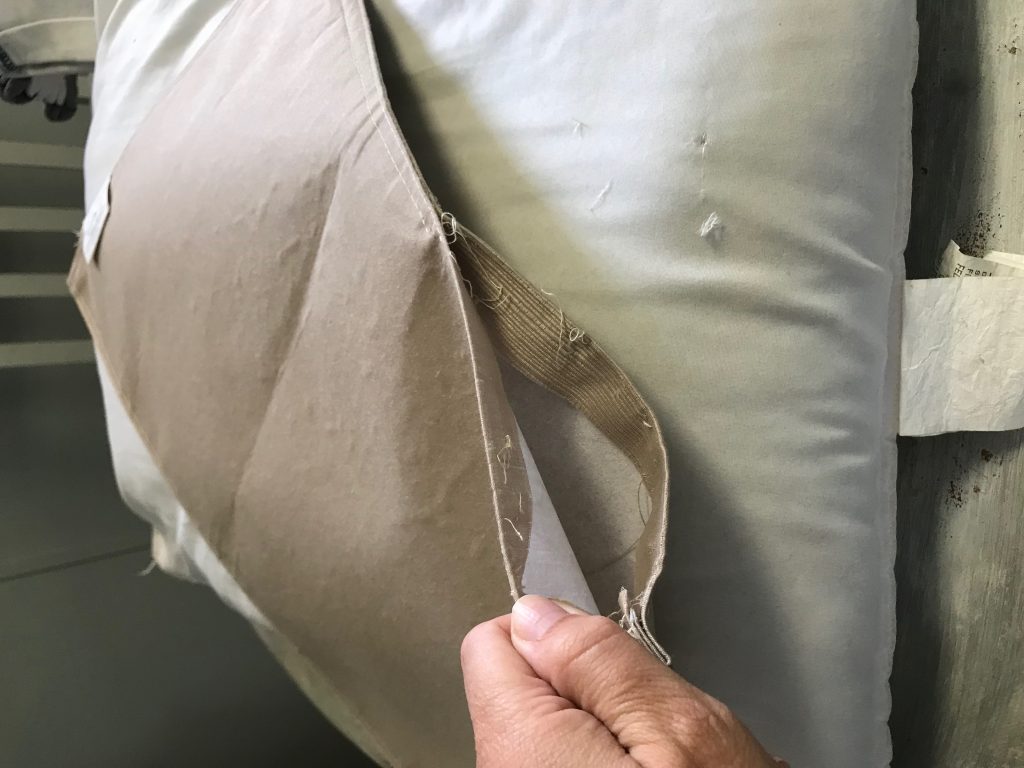
This is what it looks like after you have taken your pillow apart and stuffed it inside. Just make sure you get into the corners so they don’t lay down on ya!
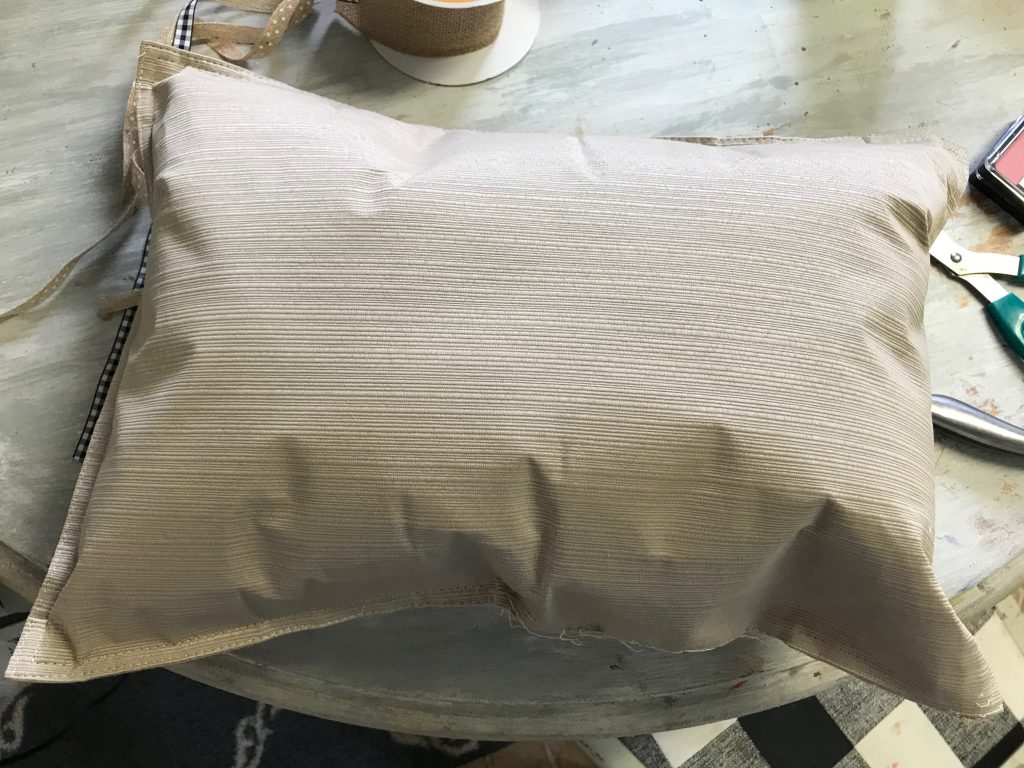
Now you will just take the seam and hot glue it back together. Do it little at a time so you can make sure you it is closed really well!
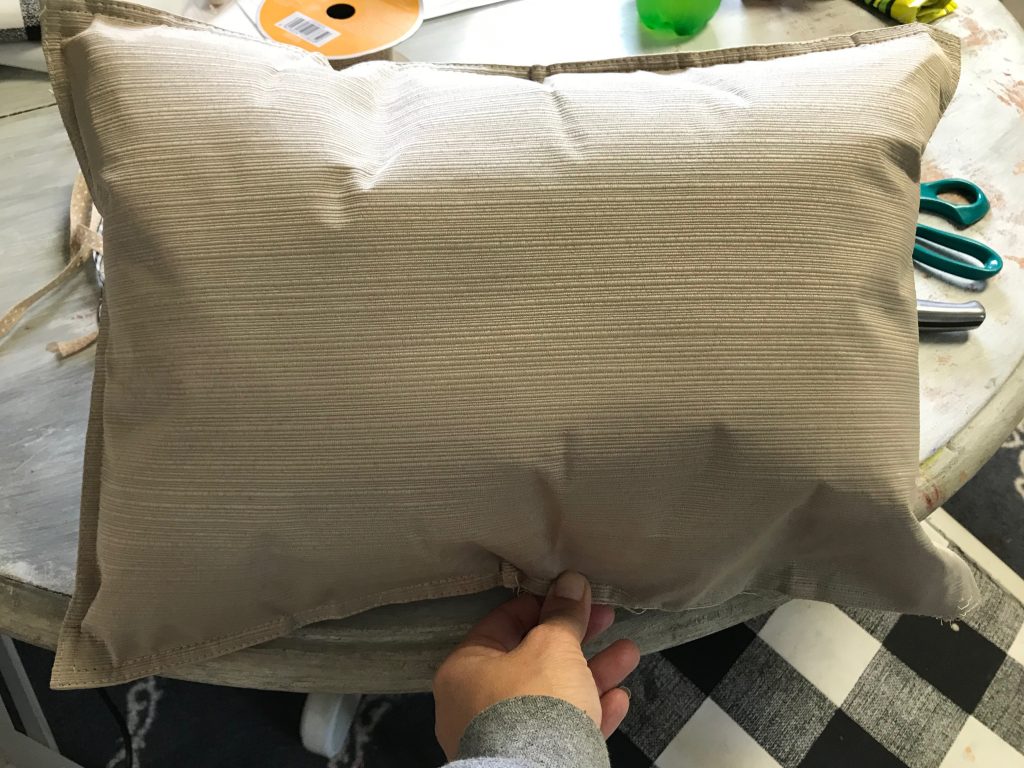
After you have it all glued together, just flatten it out at the bottom with your fingers to make sure it is all closed up tight.
Now, this next part is optional, but it really adds extra cuteness to your look!!
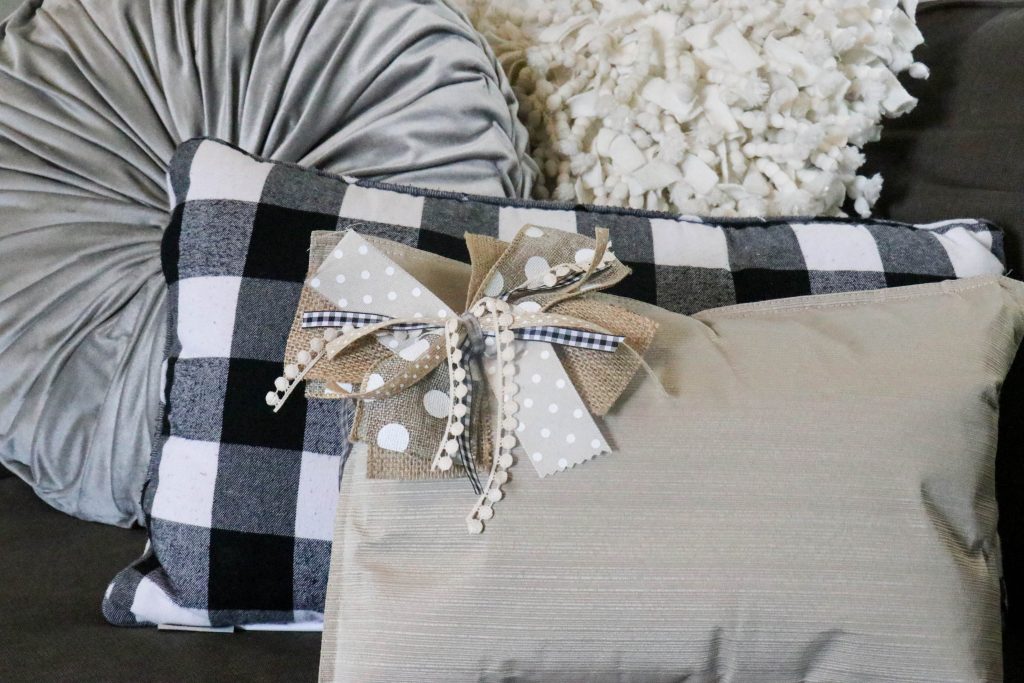
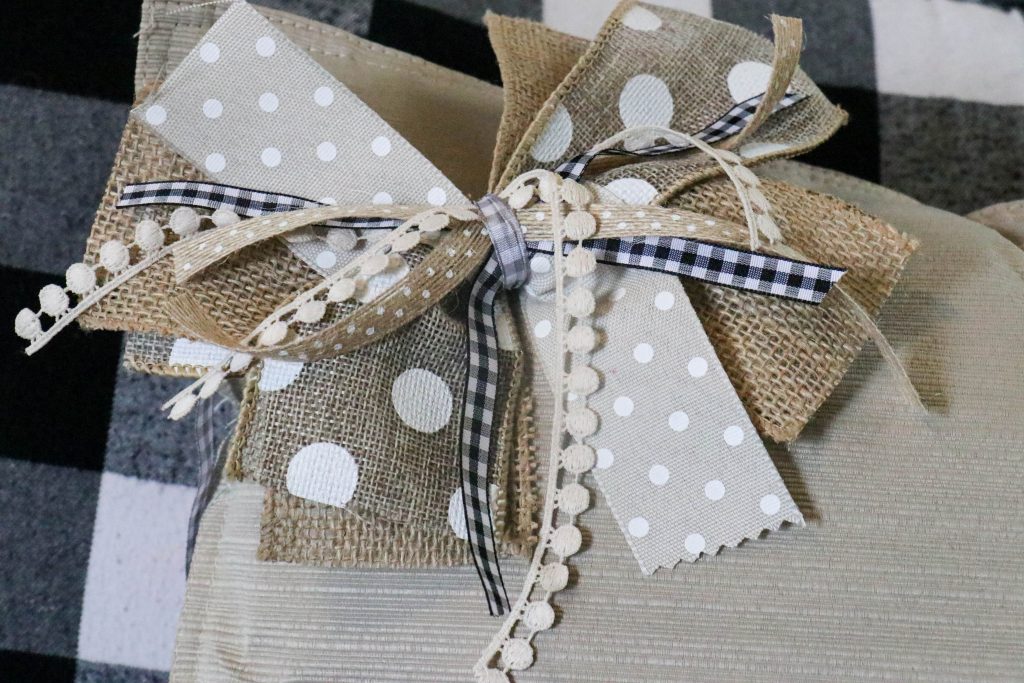
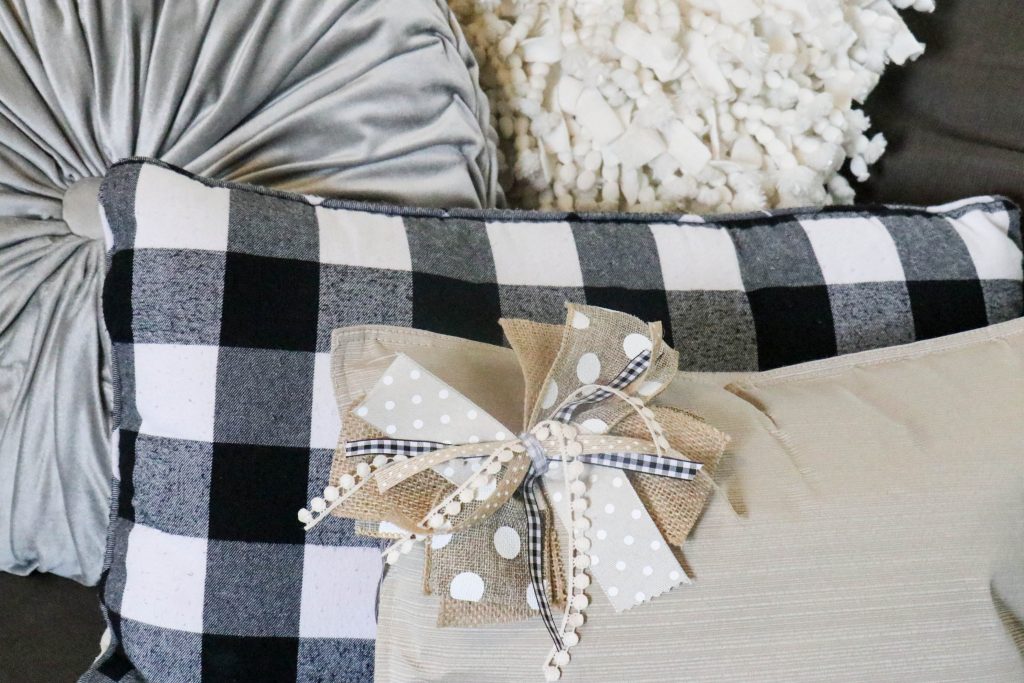
I decided to add the “re-fabbed bow” to my pillow, because I just LOVE MY BOWS! I could not have asked for a cuter look on this neutral pillow!
You can see my bow tutorial right here!
After making my bow, I simply put a little pin on the back to attach it to the pillow. I did it this way so that I could interchange it for whatever season! Can’t you picture this with a cute CHRISTMAS BOW?!?!?!
And here is the finished product! Is this not the easiest and cutest project ever???
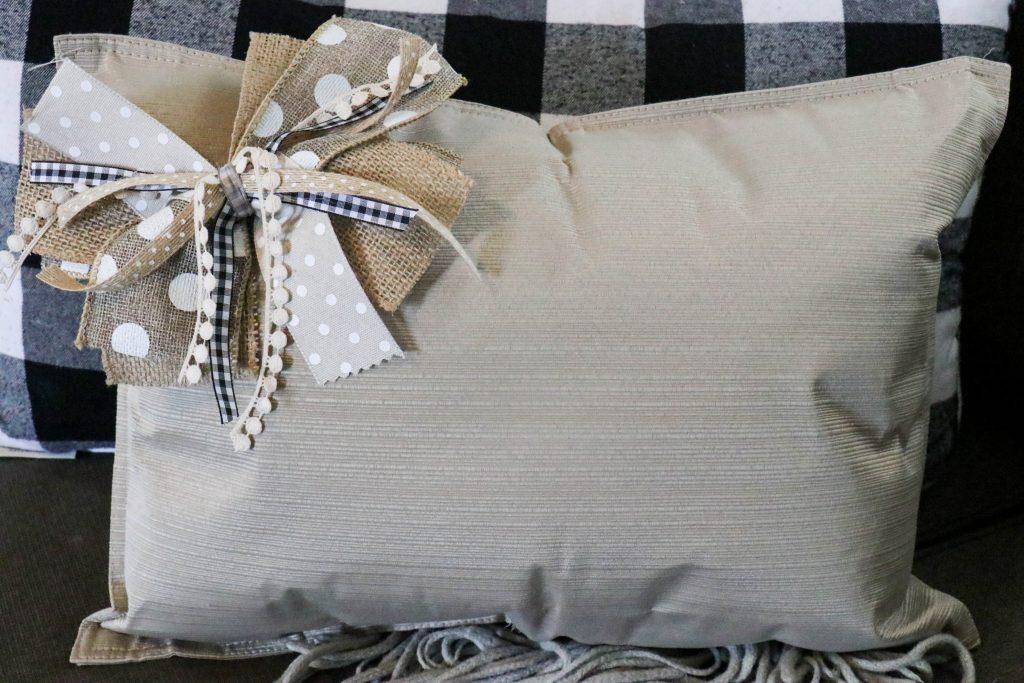
Doesn’t this bow add so much cuteness?
PIN ME FOR LATER!
Make sure you are following along on Social Media!
Facebook/Instagram/Pinterest/Email
Last Updated on November 4, 2020

You could even make outdoor pillows with the vinyl placemats ?. Love the idea!
Yes definitely!
I love that you have all these fun and easy ideas for us . Your a very kind person!I love you Brooke
Love Love this !!!!!!
I don’t sew either, Brooke! Love the pillow!
I just got back from Dollar general and saw the cutest set of lemon placemats. As I was looking at them, I thought I love these but I don’t use placemats. You just gave me an idea! I’m gonna go back tomorrow and pick them up. I think they were 3.95 a set. Thanks for the inspiration. Jill
Nothing short of genius!!! One of the best ideas I’ve ever seen, especially cuz I love pillows!! All kinds, all sizes, all colors!!! Thank you for sharing Brooke! ❤️
So adorable ???
Adorable, Brooke!! So very cute!! ❤️
I can’t sew either! Brooke, this is the cutest project EVER! I love the bow – it’s a great finishing touch. XO!
Omg ????????????????
Omg!! I love the vinyl !! I always hate how my ( outside pillows get dirty!!!!!! So I can’t wait to share this idea with my WHO MAKES ALL MY CUSHIONS ANYWAY.. ???? she will love the idea better than me ???? but I’ll get the pleasure to go shopn now gor “ALL KINDS OF PLACEMATS… goodbye target, Kohls, Belk, an whoever else that sells them so high priced pillows .. NO MORE buttttttt I might buy your placemats lmbo ????
I can now afford to have some extra porch pillows!! THANK YOU for the idea!!
I am going to try it out but add a design to the front
So fun!! Cool idea ❤️
Awww…simple elegance ❤️ love the idea. Your the bombdiggitty ???? crafter❣️ Thanks, Brooke keep shining ☀️
My sewing machine is about 48 years old, seems like a part of me , I have moved 5 times in 54 years, it doesn’t sew so well any more, but thanks for the tutorial , I won’t need my machine , , see you , I’m going shopping for place mats , lol,????
Love this idea!
This is brilliant! I love how this turned out and the possibilities are limitless! ???? ????
Thank you! So many options! ❤️
Adorable! I have yet to try this, but want to.
Yes!!!