I’m not much of a Halloween decorator… but when I DO decorate for Halloween, I stick to the “cute, NOT creepy” decorations.
You won’t find anything scary in my house for Halloween… but what you WILL find, are some super CUTE ghosts, whimsy spiders, and lots and lots of pumpkins!
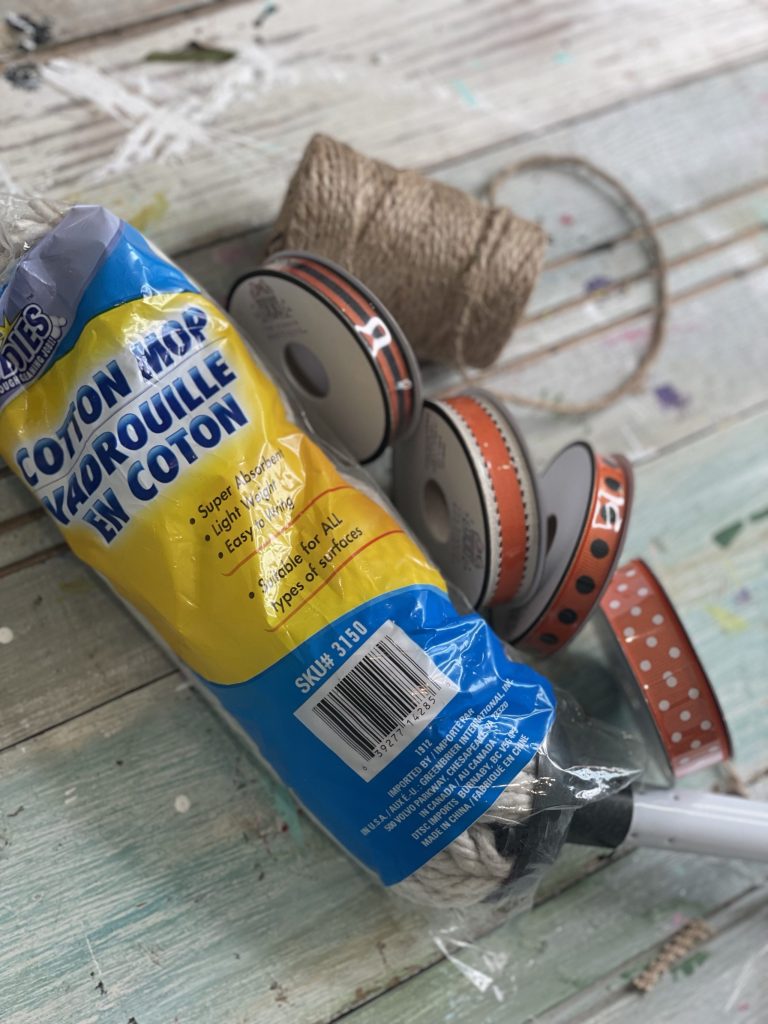
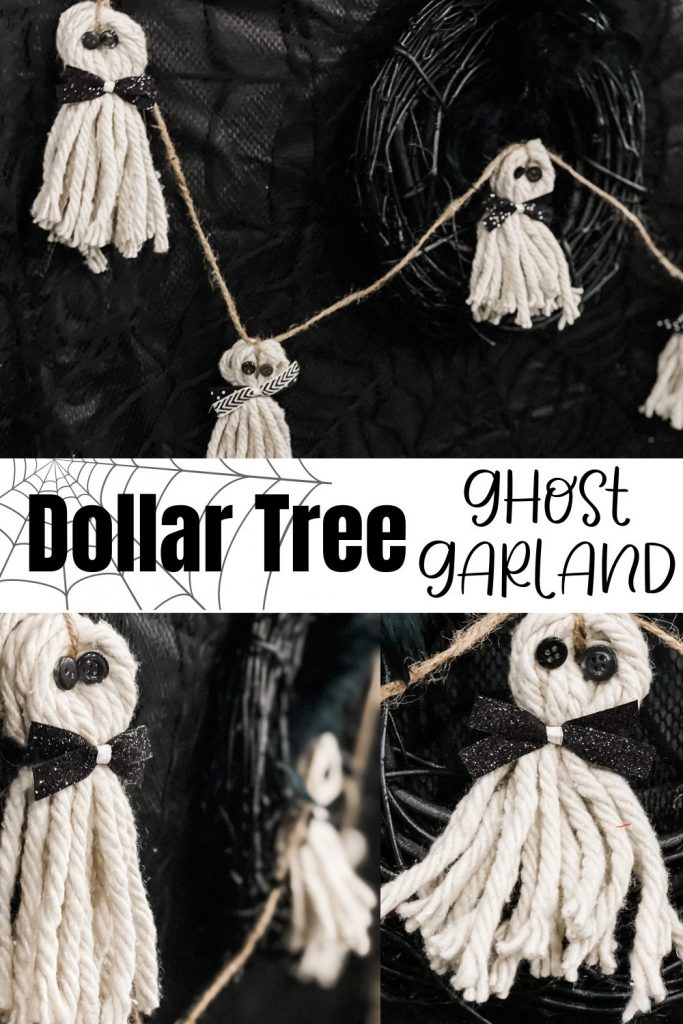
Today, we’re sticking with the ghosts. Every single thing you need to make this ghost garland is actually from the Dollar Tree!!! Which is amazing- because I don’t like spending a lot of money on Halloween decor anyway!
Here’s what you’ll need…
- Dollar Tree mop
- Twine
- Buttons
- Ribbon of your choice (I thought I was going to use all orange and black… but changed my mind towards the end!)
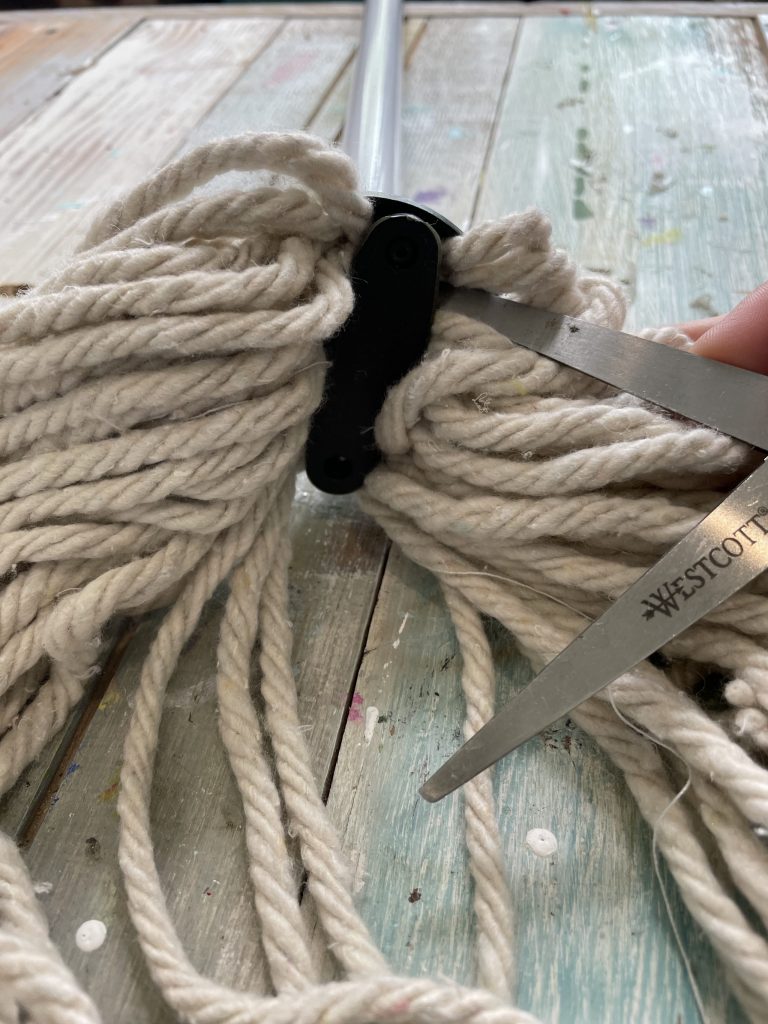
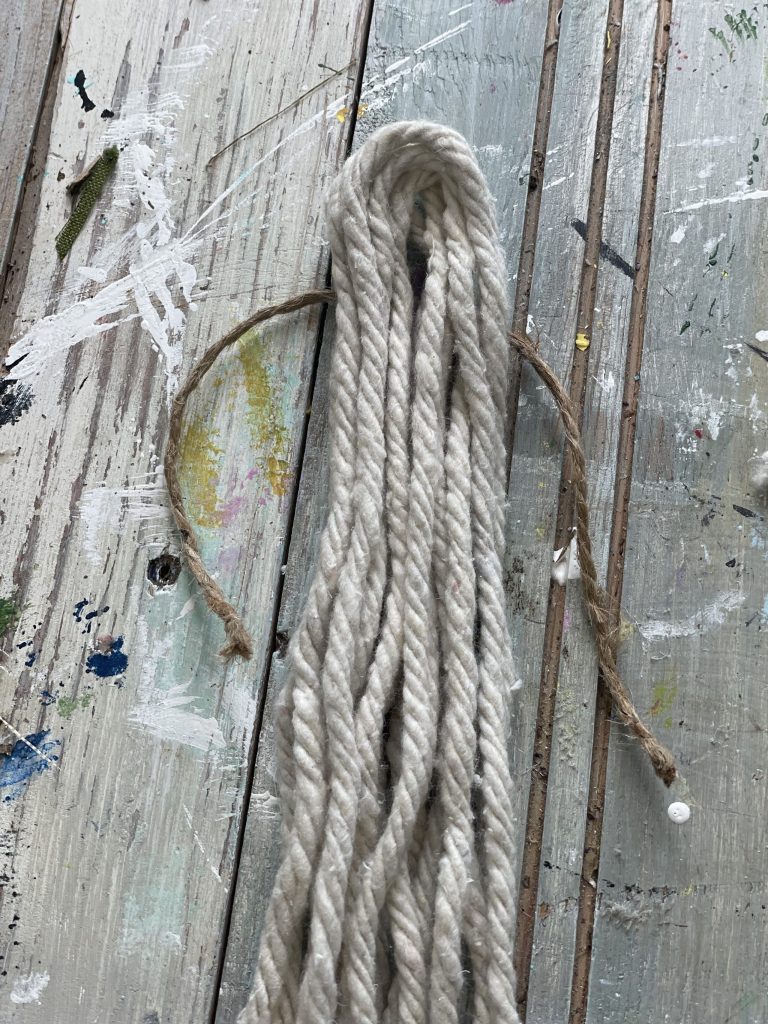
What you’ll need to do FIRST is pop out this little piece from the center of your mop. It comes out super easily!
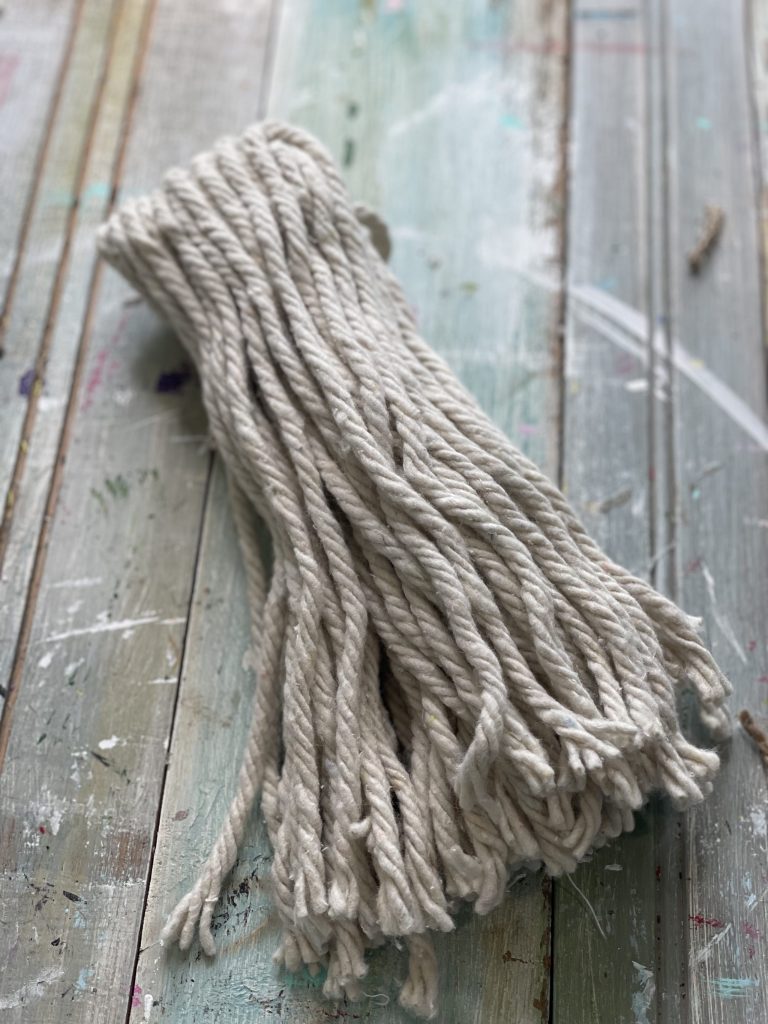
This is what it will look like when you have it dis-assembled from the mop pieces!
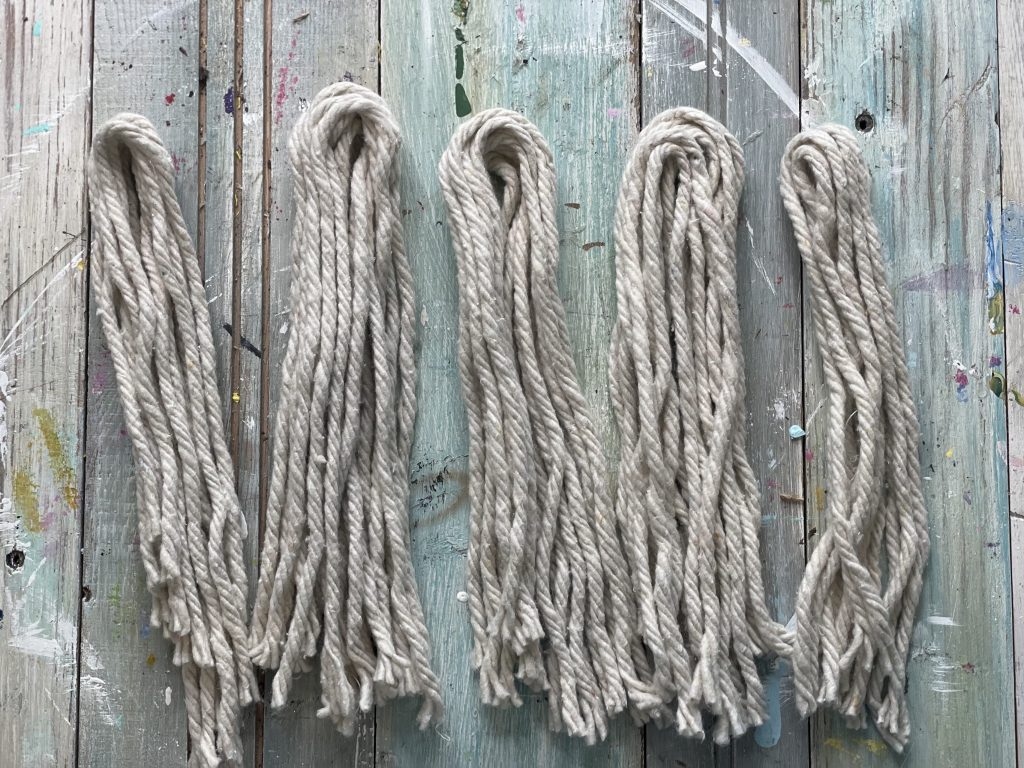
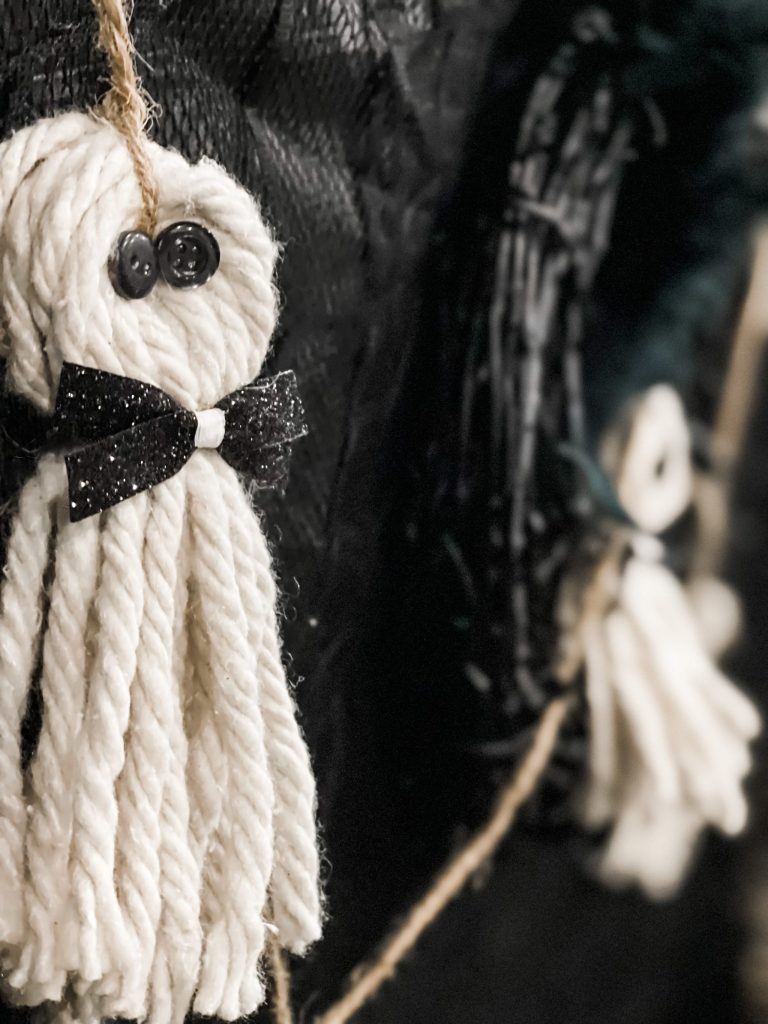
This part is totally up to you, but I’m showing you how I did it. I wanted 5 little ghosts for my garland… so I split up the mop strands into 5 different sections- keeping them pretty equal in size.
Time to form our ghosts! Take a small piece of twine, and tie the top of the strands tightly to form a head.
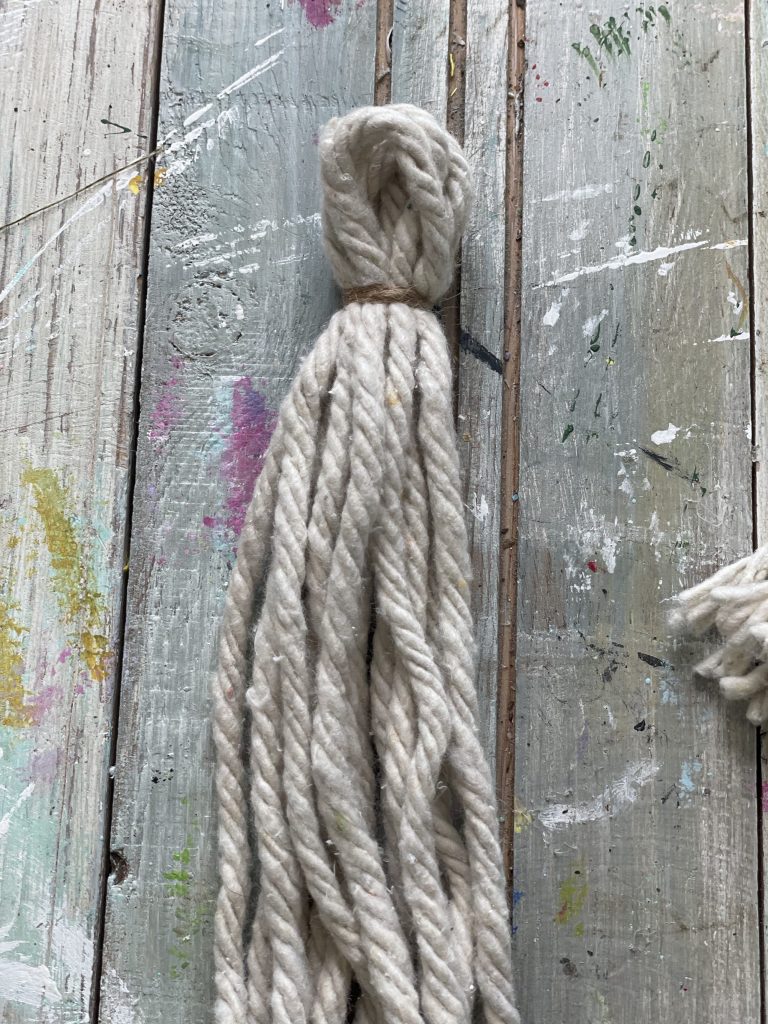
Like this! Continue doing this to each ghost.
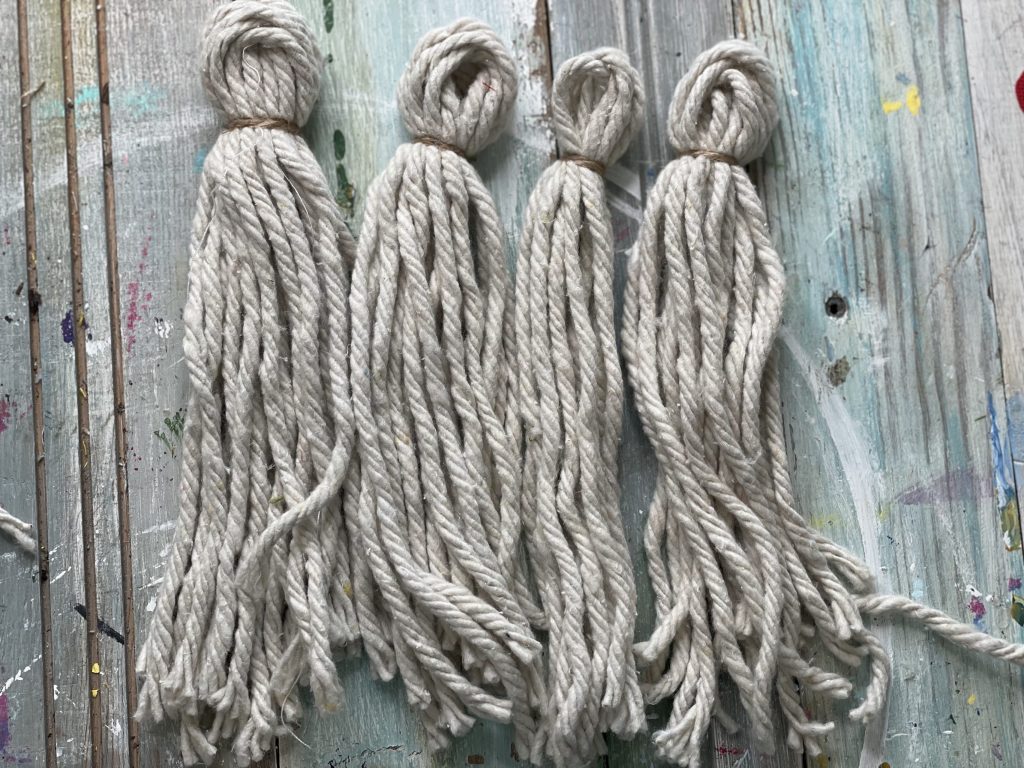
Here’s what you should have so far! They may not look too “ghostly” just yet… but stay with me!!
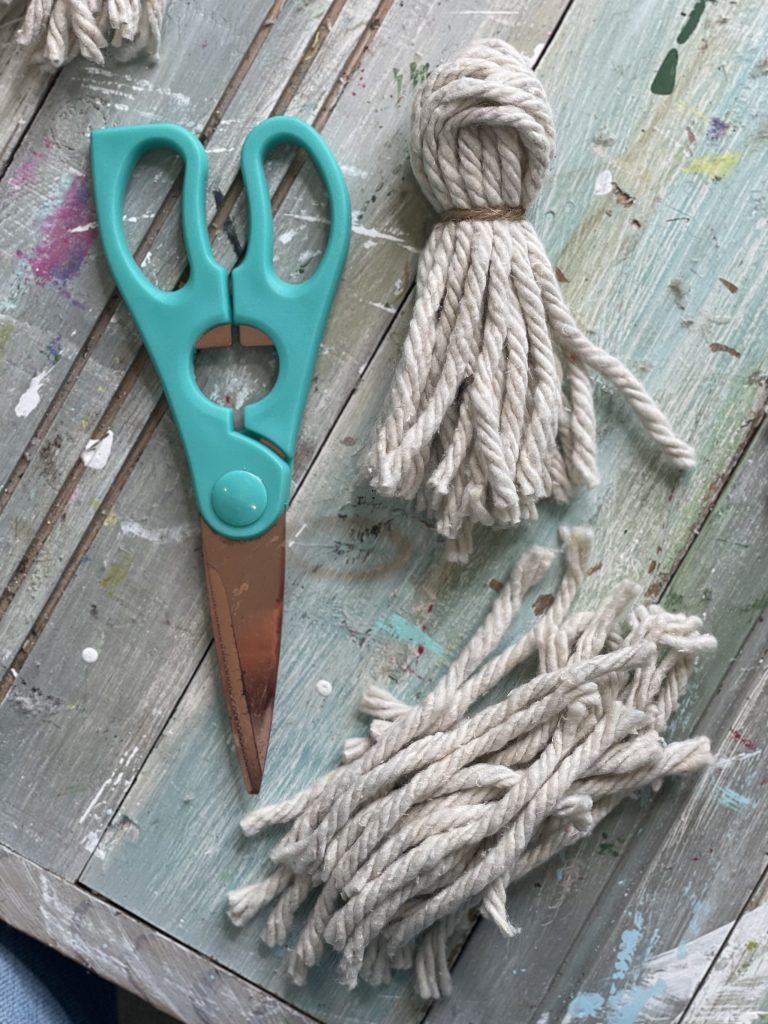
Cut off your excess mop strands from each ghost.
And yes. Those are kitchen scissors… don’t judge me.
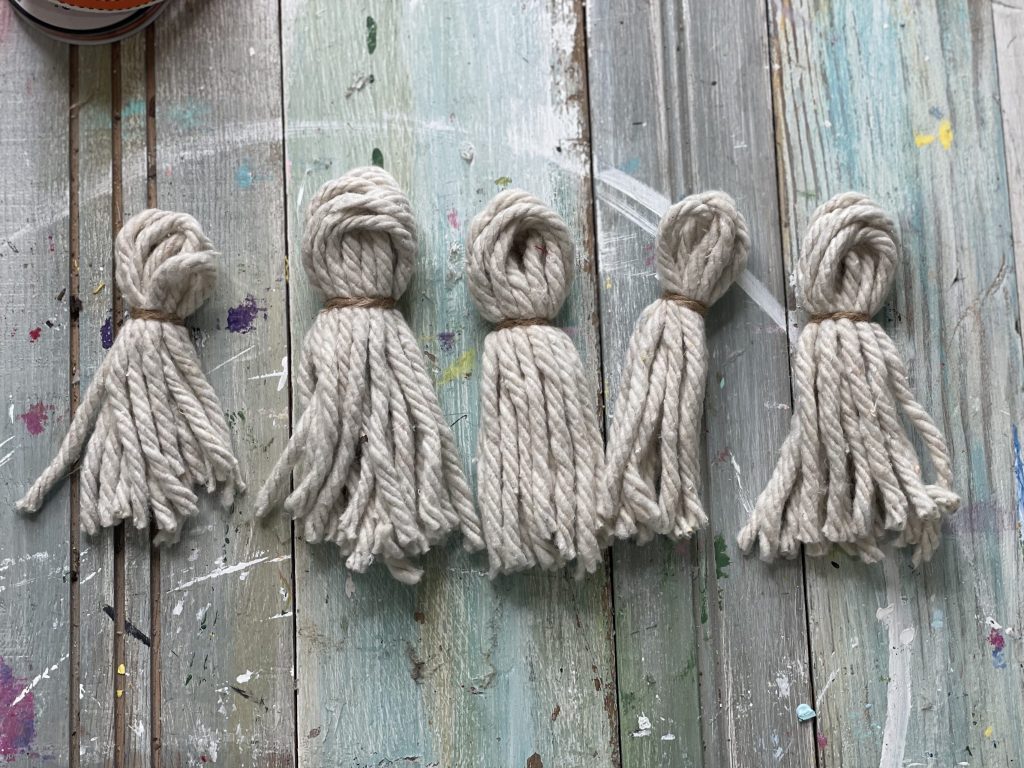
Here’s what they all look like trimmed down! Now it’s time to make their little faces, and give them some cute little BOWS!
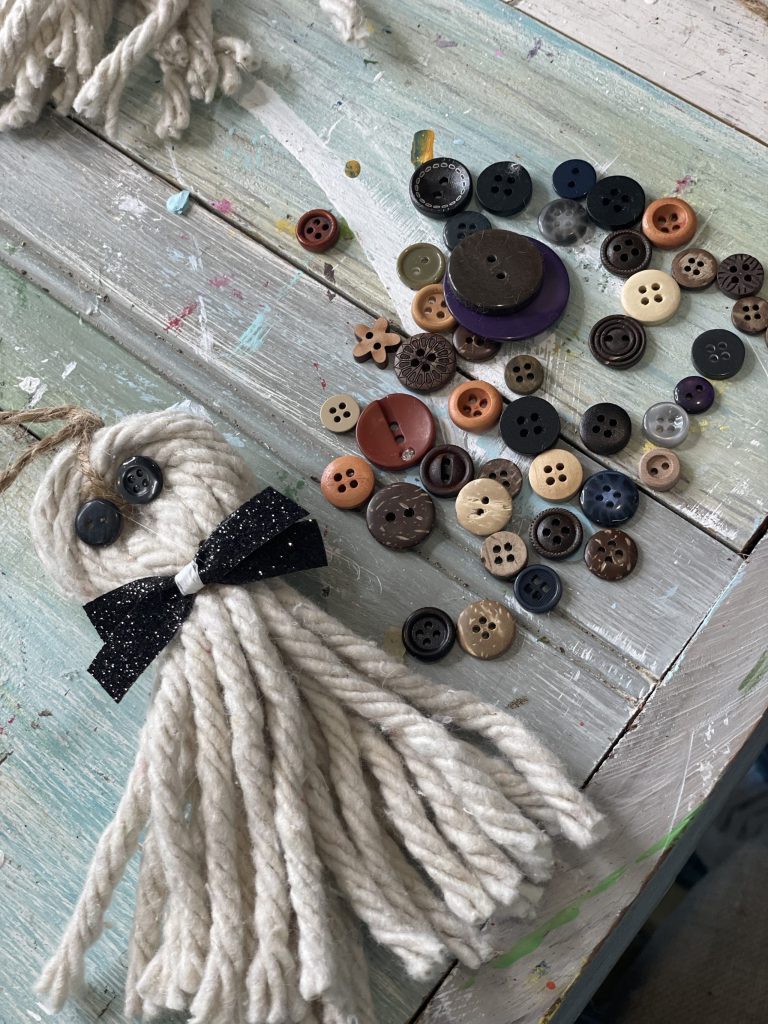
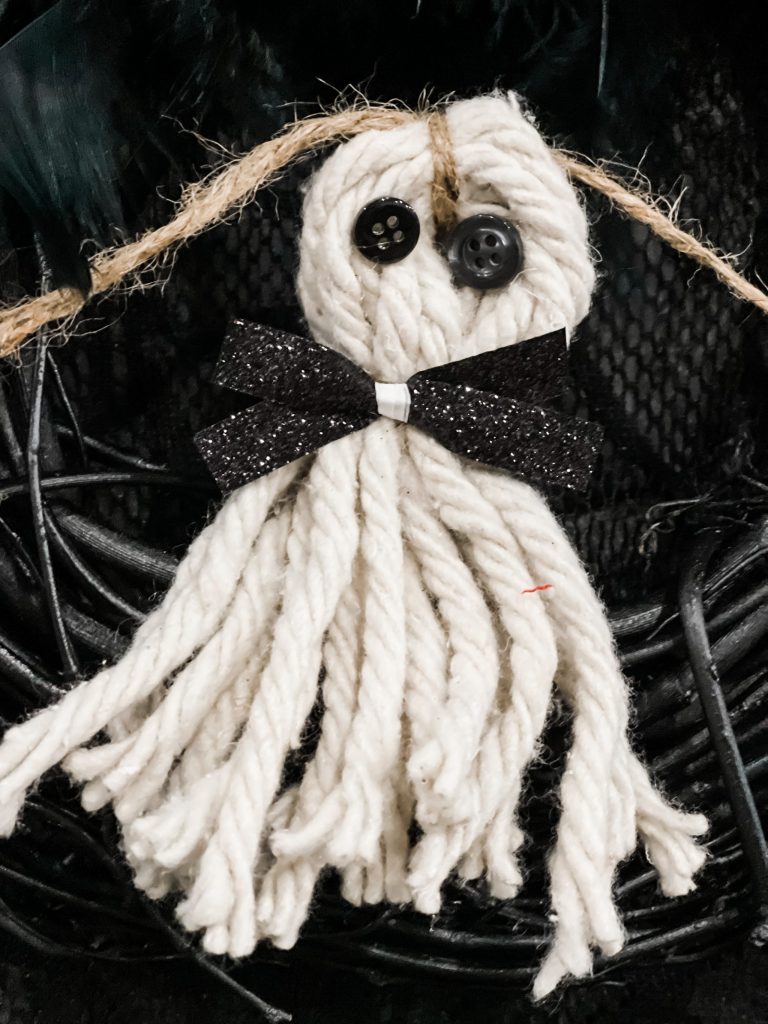
For each ghost, I used two little black buttons as the eyes. I also gave each ghost a nice little bow!
At this point, you may be wondering… HOW do I turn it into a GARLAND?!?! Well- it’s actually super easy!
Simple cut one suuuuper long piece of twine. Run your twine through each ghost, and tie it securely on the top!
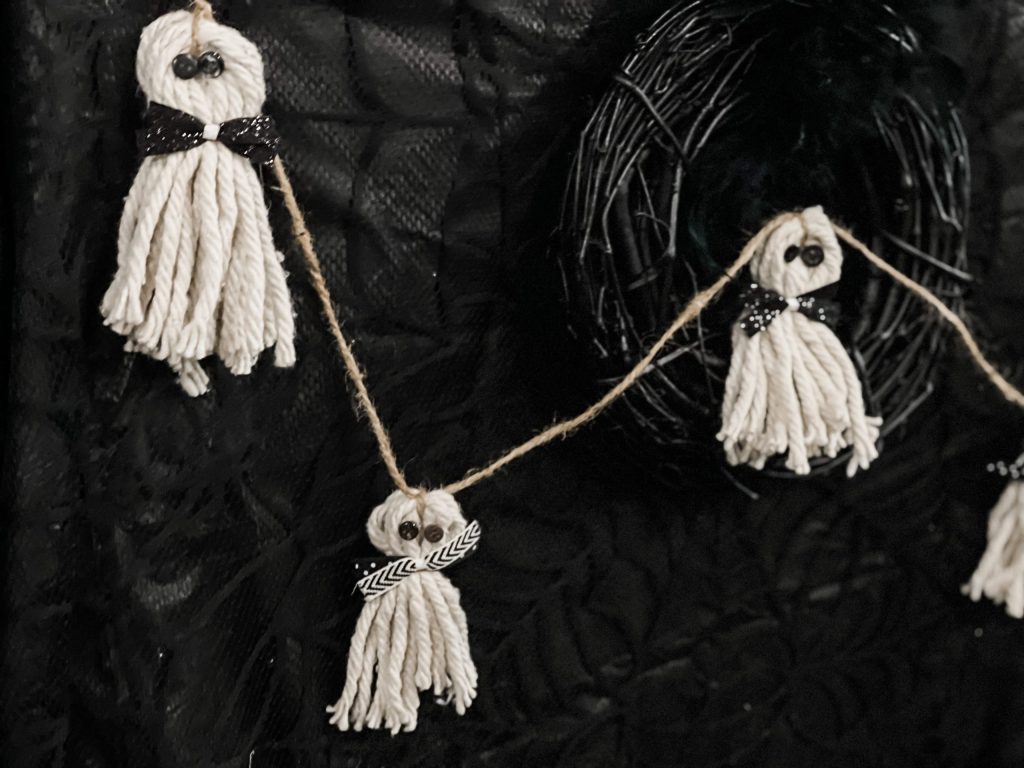
And now, you have yourself a little ghost garland!!
I can’t wait to use it on my Halloween mantel this year!!! I LOVED how mine turned out last year… and this would have looked perfect on it! If you want to see how it looked, GO HERE!
Be sure to check out some of my other Halloween DIY’s as well! Below are a few of my faves from the blog!
BE SURE TO PIN!!!


Last Updated on July 27, 2021

Super cute & so simple. I love it!