Tight budgets bring out creative minds. Being in this mobile home has truly made me so much more creative with how I spend money and how I organize {which I desperately needed}. In all honesty, most of the money that goes into this home will not be money that we will get back- unless we get really lucky. When you know that, you seriously start thinking outside of the box. I mean, let’s get real- you know I am not going to leave this home the way it was, temporary or not. I still want to be happy and feel at home, so making it as pretty as possible on a dime was/is a major priority to me. **If you follow this blog, you know that my husband and I have sold our foreclosure home and have moved to our 20 acre farm, where we are living in a single wide mobile home until we build our dream home {in a nutshell}. To get up to speed on this, go HERE.**
So, anyway our kitchen was in need of some updating big time. It was just so bland, and it was not my style. NOTE: The appliances that are here worked fine, so even though they are not pretty, there was nothing wrong with them, so we did not see the need to change them. In this entire makeover, I am showing you what you CAN change on a tight budget to make a big impact. This is not the typical renovation that we do, so please be mindful when looking at my posts for this mobile home. I do feel like you will see that changing a few things can make a huge difference in any home!
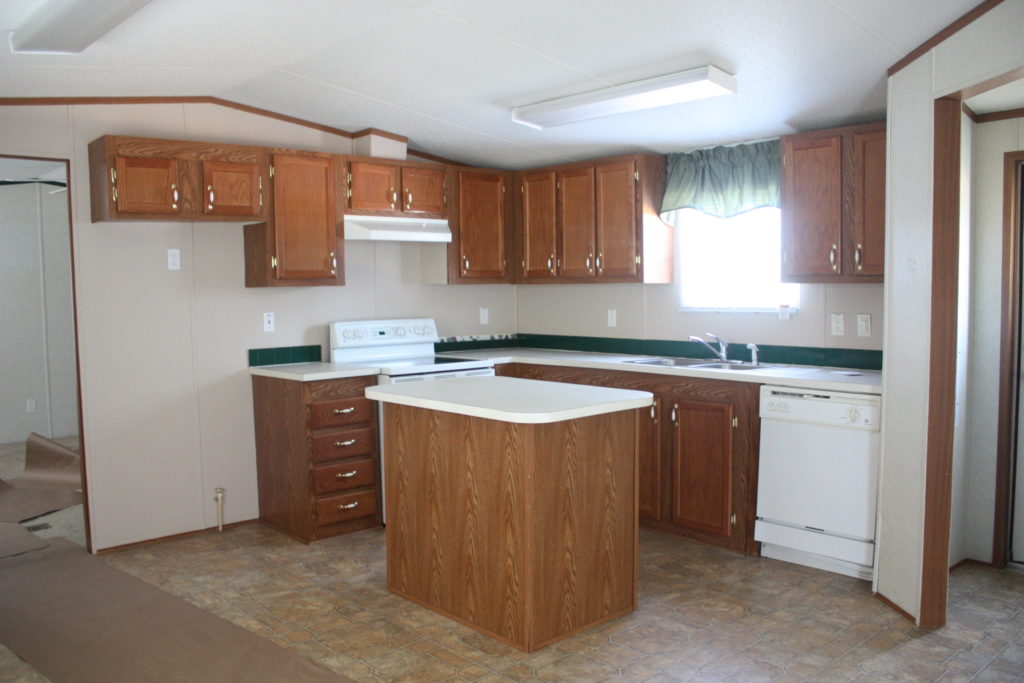
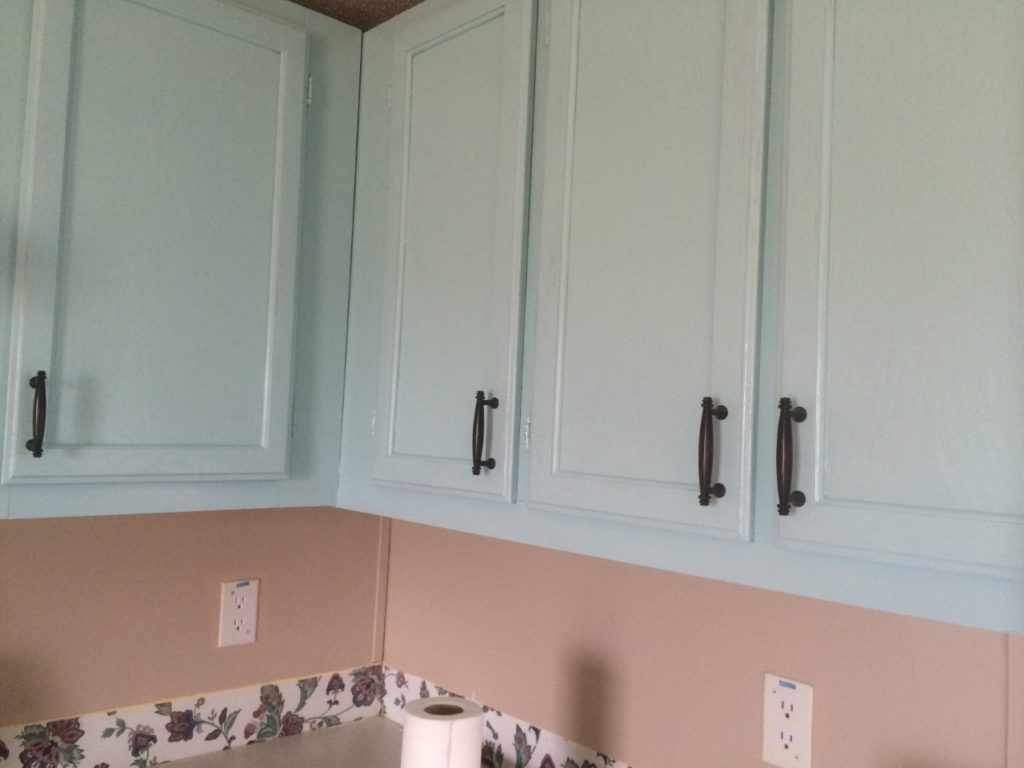
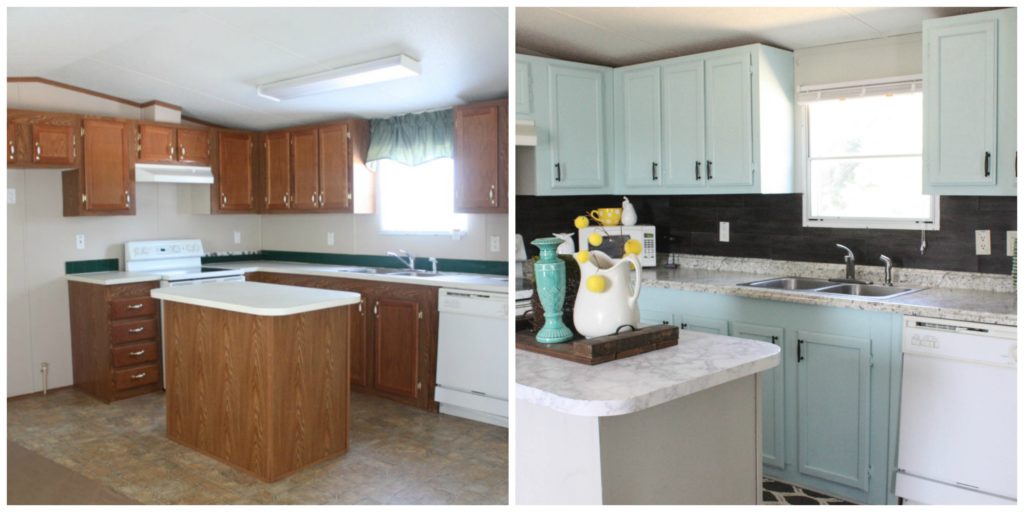
As you can see, the cabinets looked so cheap and just plain outdated…but the post for today is not about the cabinets or the kitchen in general. The post today is about the BACKSPLASH that we decided to use! Yall, this current backsplash {or lack thereof} was not going to cut it. It was a cheap green looking plastic “tile” that had floral wallpaper behind it. But…We just couldn’t decide what to do, and the cabinets were the top priority at the moment, so I got to work on them while we contemplated the backsplash and the rest of the details.
I had already painted the cabinets before I got a good picture of what was it looked like before…oops! {these are all iphone pictures taken at night while working late on this- so I apologize for the poor quality}:
I really wanted to do something besides just take the green fake tile down and cover the wallpaper. I wanted something that would give character to the space, but as I mentioned, I had a very tiny budget. This is a decent sized area, so a lot of options just added up to be more than we wanted to spend on this.
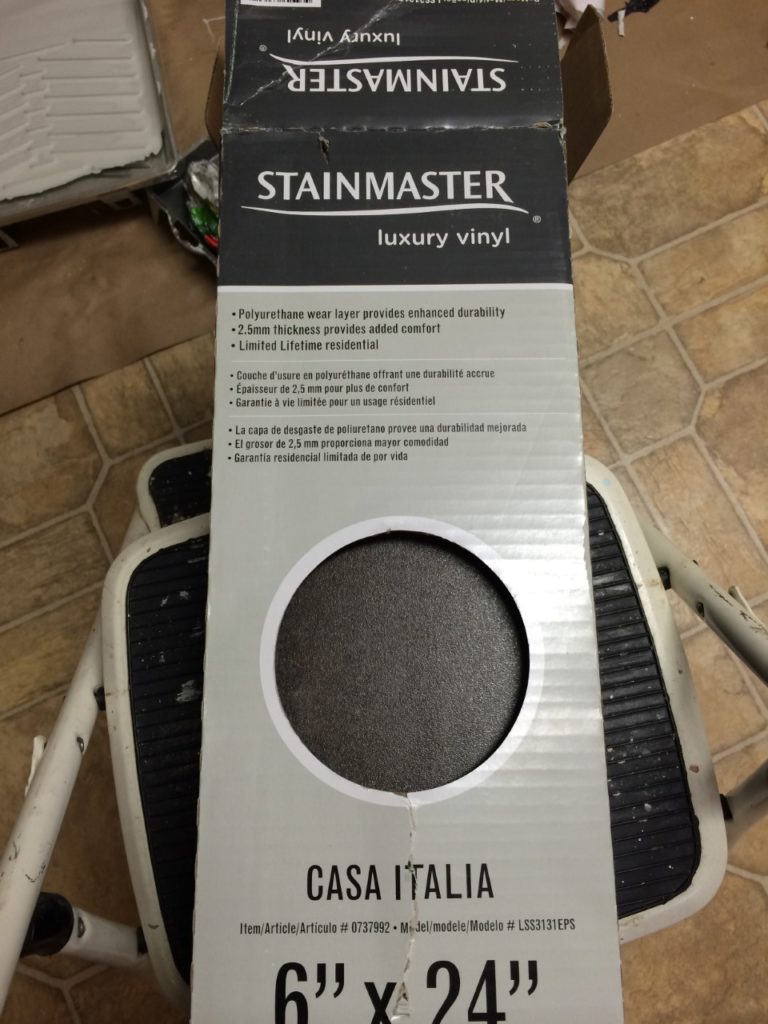
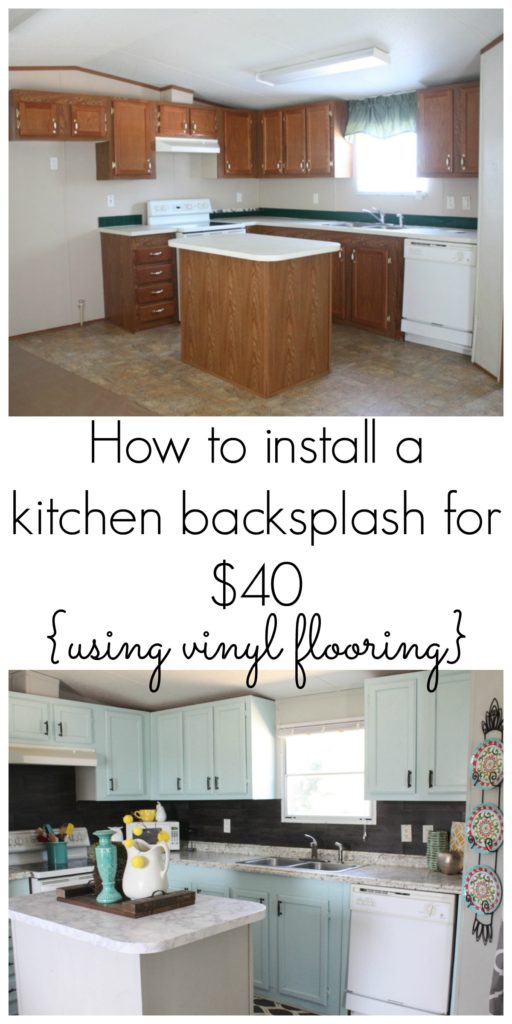
One day, my husband came home with an awesome idea. THIS is why I love him so {well, one reason}! He had bought a box of vinyl flooring from Lowe’s, and he mentioned using it as a backsplash. Never have I heard of doing this, but I couldn’t see why it wouldn’t work! I thought his idea was brilliant. A box of the flooring was only $40.00, and it was peel’n stick, so it would be super easy to work with.
Here is what we used, and it was $40.00:
Mr. Re-Fabbed got to work on this while I finished up boxing and cleaning over at the other house, so I don’t have but 1 picture of the actual process, but it was very easy!
Here are the materials used for this project: {some affiliates are used for your convenience}
Vinyl Peel ‘N Stick Flooring (exact one we used is HERE)
Level {for straight lines}
Tape Measure
So, here we go!
How to Install the Backsplash:
Step 1:
Start at one side of the area you are covering and measure the size of the piece you need for the very bottom.
Step 2:
Score the flooring where you need to cut it and bend to break.
Step 3:
Take your Adhesive (Loctite) and put on the back of the flooring. This adhesive is what makes it stick to the wall. Since we are not using it on the floor, the stickiness on the back does not stay put without a strong adhesive {we did try that}. You can also use liquid nails or something of that nature. They are all very similar.
Step 4:
Put the flooring against the wall and press to hold for a few seconds until it is firmly in place.
Step 5:
Continue this process going upwards until you reach the top of the cabinet, then start around the rest of the area you are covering. We took the switch plates off and cut around that area so that we could put it back on top of the backsplash.
**Tip** We did not put all of the same size boards in a row going up. We cut them in the middle on some of them so that there was a more “staggered” look to them.
See picture below: {You can see that the bottom piece is a full piece, along with a small piece to finish covering the area, and then above it are 2 cut pieces to give a more staggered look, so that all seams do not match perfectly.}
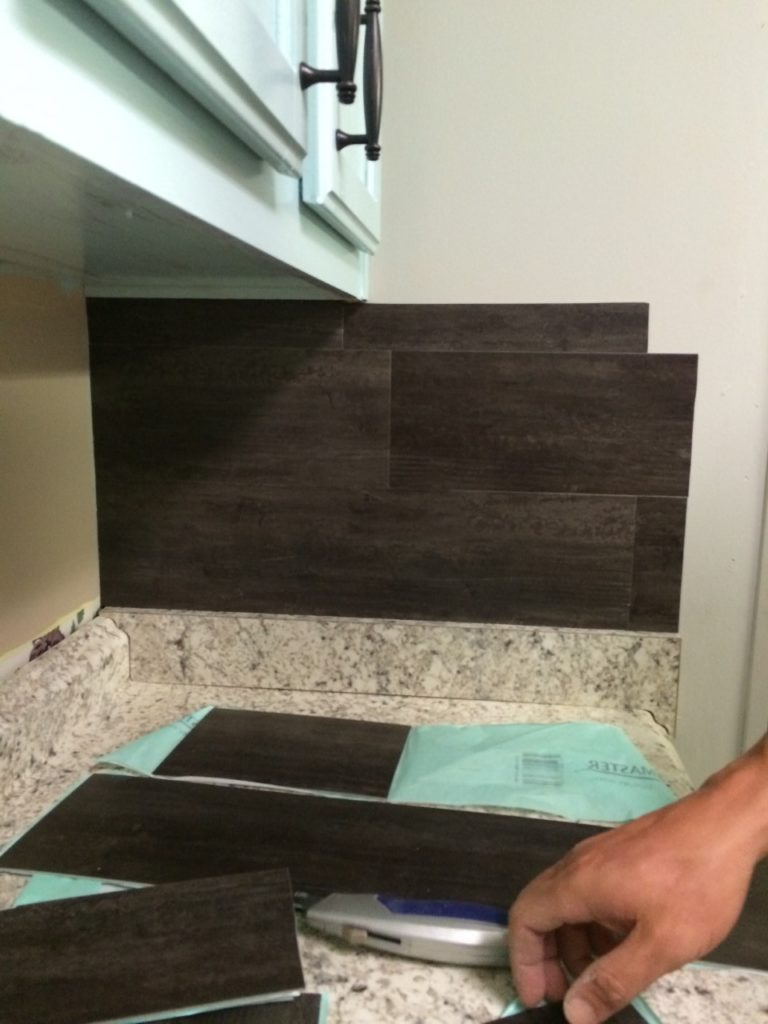
You simply do these steps all around the backsplash area you are covering until you are DONE! It truly is that easy! We only used half the box, so to be honest, this was more of a $20 project since we had so much left. I bet you would NEVER guess that if I didn’t tell you!
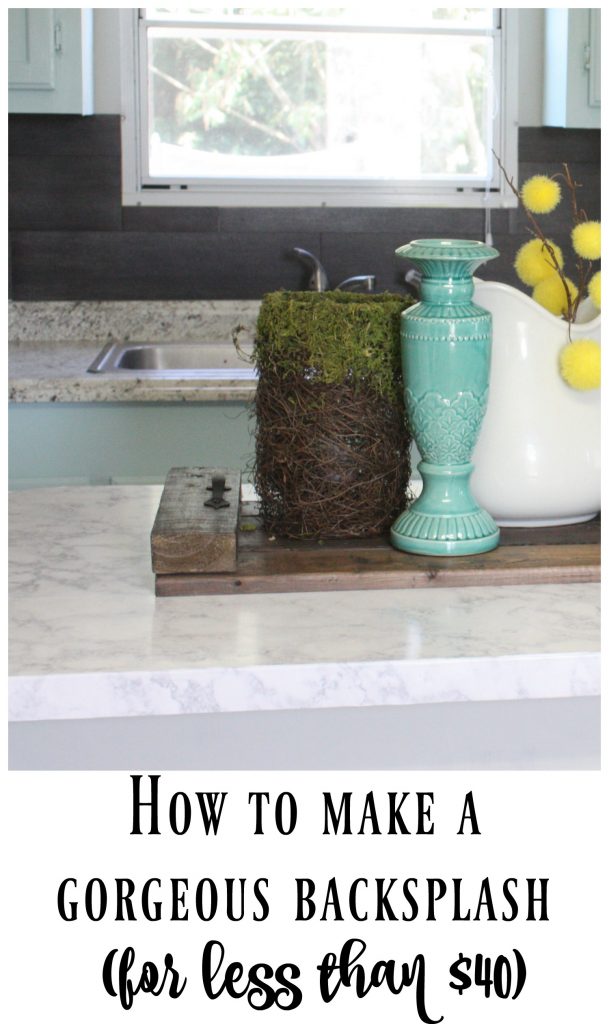
Here are some pictures of the finished product in our kitchen! It is amazing. I seriously love it. {p.s. Please don’t look too closely at the imperfections of the kitchen. We kept everything the same that we could, including some of the switch plates that were a little crooked. This is not a magazine worthy home, but it is our temporary home…and it’s budget living at its finest! haha}
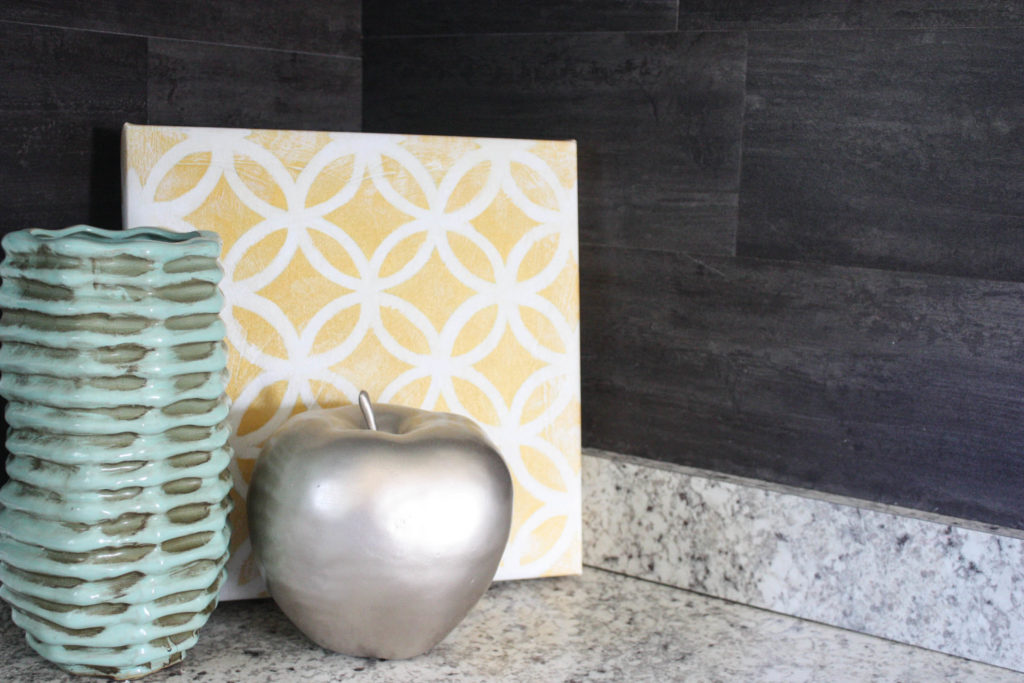
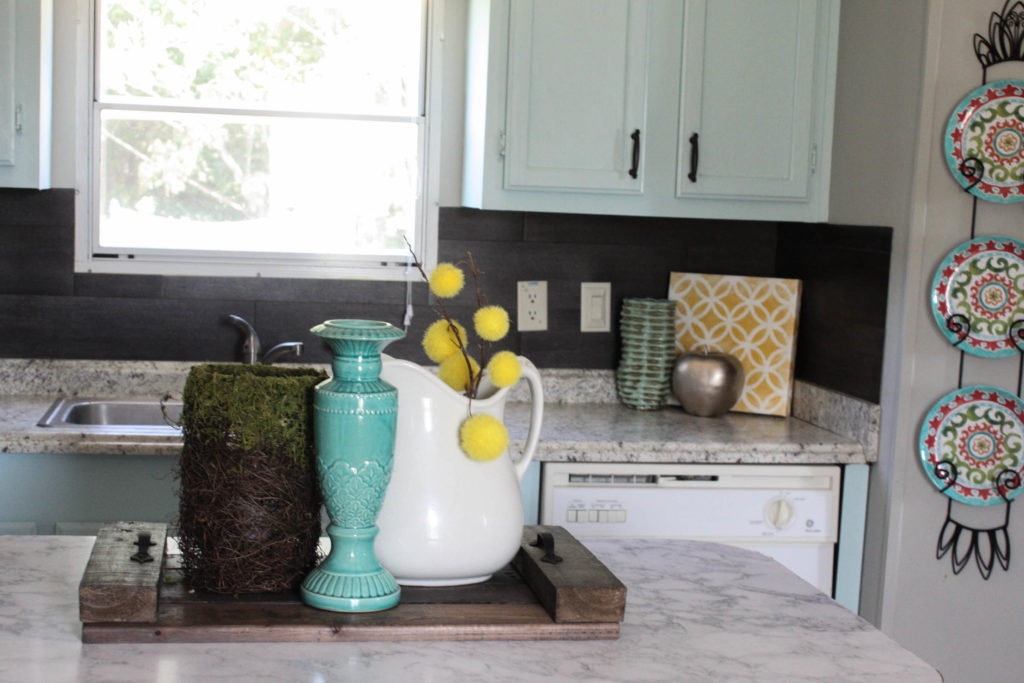
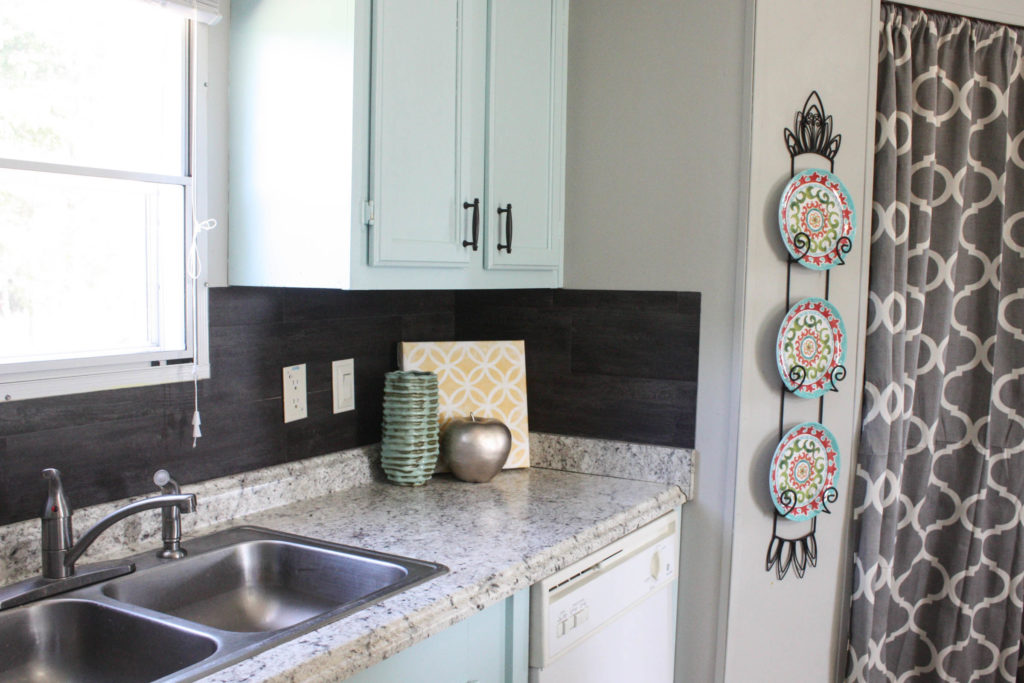
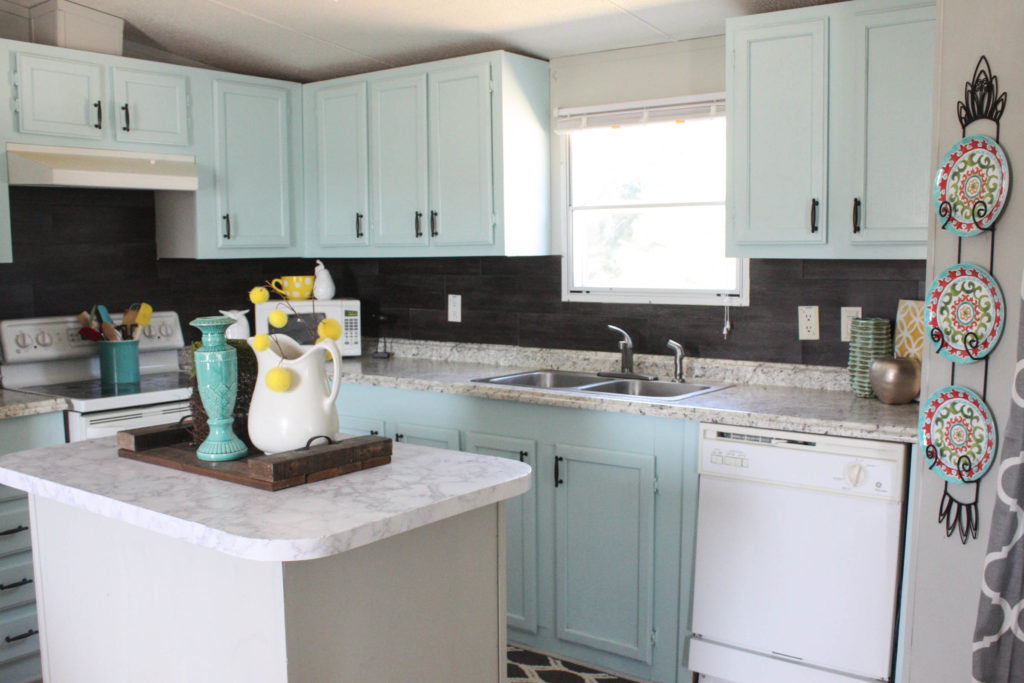
I feel like these pictures do not do this kitchen justice, if I am honest. This backsplash truly looks amazing, and I still can’t believe how inexpensive and easy it was! I LOVE my cabinets. I will be doing a full kitchen reveal pretty soon, but there are still things that are not finished. I will be getting a valance for the sink window- as well as something for over the window. I will also be painting our kitchen table and desk that are all in this kitchen on the other side. The curtain that you see a little part of in some of the pictures is covering a door way that goes into my laundry room. Without it, you can see straight in at all times- and that was NOT going to work. They are too long right now and will be hemmed soon. We also MIGHT get a new dishwasher. It is not working properly, and I think it is beyond fixing. I am still doing all dishes by hand, and I do believe I want another dishwasher! We will see. So, all in all, there are still several things that I am working on, and it just takes time. This kitchen isn’t going to be seen in any home magazine, but I am happy with it- and the difference is truly night and day. I can’t wait to show you the entire finished product in a couple of weeks.
What do you think of the $40 backsplash?? Is it something you would ever try?
One more before and after!
Pin this for Later!
Never miss a post! There is ALOT going on around here, and the fun is just beginning 🙂
Follow Along on Social Media!
Facebook/Pinterest/Instagram/Twitter
Last Updated on January 29, 2018

I so wish I had known this when I had my old house. It looks amazing. Great job!
Thank you, Katie! Gotta give Brandon the credit on this one 🙂
I must disagree, your kitchen is magazine worthy! Love It More Due To your Creativity.
Brooke,
What a neat idea, and it turned out great!
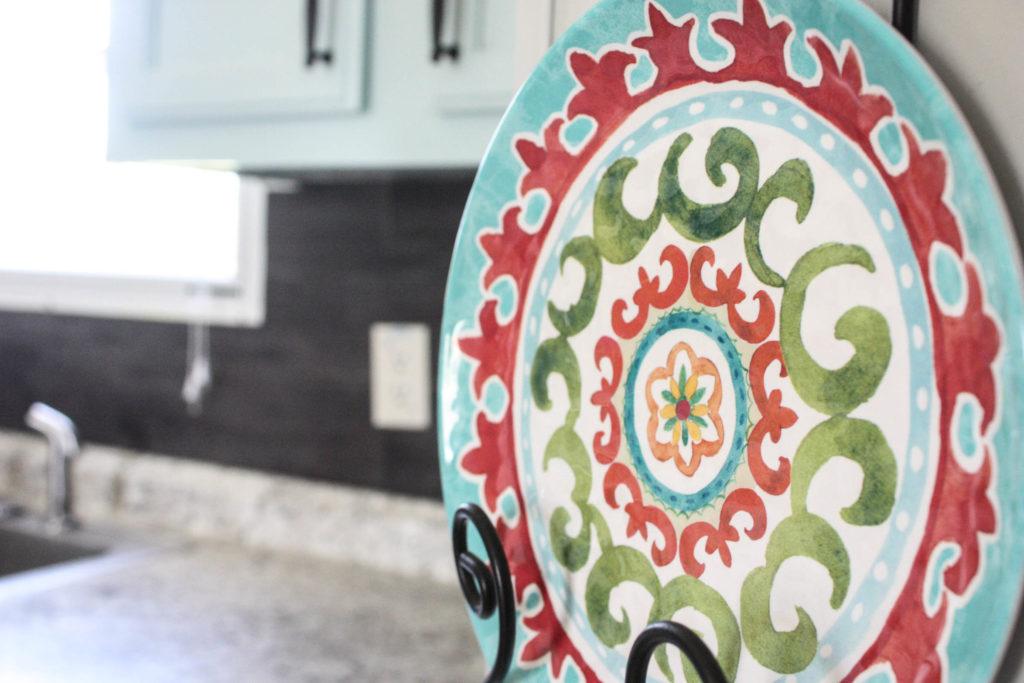
I love the color palette, your kitchen looks so nice and cheery 🙂 Where did you find the beautiful display plates on the plate rack?
Thank you, Jennie! The plates are from Burkes Outlet 🙂
Lol I found the same ones in plastic at Big Lots this summer they were very pretty.
I would be curious to know the kind of paint you used and color on cabinets ?
Check out this post right here!
https://www.re-fabbed.com/mobile-home-cabinet-makeover/
I LOVE thinking outside of the box! Your backsplash is great!
Brooke, you are a doll! Some of us live at this budget level all the time, and you give great ideas where most blogs show homes that are FAR from the financial capabilities of a lot of us! You are real and still inspiring! Your kitchen is beautiful What would you think of taking that backsplash material up around the window?
Aww~thank you, Kerry! I appreciate that! I do think that is a very good idea about going around the window 🙂
I LOVE this idea!! Thank you so much for sharing. I have a question, is it removable? I am not able to do anything permanent where I am right now so it has to be able to be taken back down without causing any damage.
In all honesty, with having to use the liquid nail type of adhesive, I would not take the chance. I don’t know how well it will come off. We don’t have to worry about it in our situation, but it is not necessarily “removable”.
Looks grea and so creative–great teamwork! I can’t wait to see the whole kitchen and exactly what you did with the countertops
Well done! You inspire us…I’m planning on using peel and stick in our pantry…I’m taking out the wire shelves and replacing them with wooden shelves the hubs is making, and I’ll stain those dark. Then line the pantry with the peel and stick that looks like wood and maybe cutting out the top panel of the door and adding lettered glass.
Thanks for your creative ideas! Can hardly wait to see how you’ve “refabbed ” everything!
It’s looks great, would have never thought of doing this.
What is the color of your kitchen cabinets? Love it…
What a change you guys have made! Always impressed with your ability to do some much on a tight budget.
Great idea! I love it. Y’all are such great refabbers! I wish I could think of half of the stuff you do on my own. You give me so much inspiration! Thank you!
I love that you picked these two amazing colors the beautiful blue and the rich cafe. They blend well and its so budget friendly. Suh a great job!
Maria
Great job you both have done. I look forward to seeing more. Thanks for sharing.
This is so creative and it looks AMAZING! I’m also dying to know what you did to the countertops, did you write a post on that yet? I’m getting ready to do a budget makeover in my niece’s kitchen and I’m looking into different countertop ideas. Great job, pinning!!
Hey Roxanne! Thank you so much! Actually the countertops are new from lowes. They are the cheapest grade they have and super budget friendly, but the original ones we had were in bad enough shape hat we couldn’t use them. They were cracked and separated, so we had t rip out. I haven’t shared the whole kitchen yet, so I haven’t posted anything yet on the blog 🙂
Get out of town Brooke!! It looks amazing! How smart!!!
Thank you so much, Sara! I couldn’t be happier with the outcome!
The vinyl flooring was a great idea, and I adore that shade of blue in this space 🙂
Always a fan of thrifty creativity!! Good work
Love this idea! It is so smart! It’s durable, easy to install and cleanable, not to mention affordable! I think that covers just about everything on my list! Thank you for sharing! Pinning for later!
Cat
This is so pretty! What a beautiful kitchen makeover! I really like the contrast of all of the light colors with the dark back splash. My kitchen is painted almost the same color as yours, I have had it painted for over 5 years and still adore it!
Wow! Your kitchen transformation is amazing. I love the vinyl tile backsplash too, it’s such an amazing impact. Pinned!
What a difference! This looks amazing!
Suuuuuch a good idea!! Love this! I may be taking the same life journey as you in a couple years so I’ll have to pin and remember this!
I looks great Brooke! The color of the cabinets is so fun! Pinning!
Love this look. What a great idea your husband had…..he’s a keeper. Thanks for sharing.
What a great idea and you can’t beat the price! Your kitchen looks wonderful!! Pinned!
What a fantastic idea. There are so many patterns and color combinations your imagination and decorating talent are opening your own personal door.
Love this 🙂 I actually used the same exact flooring on my wall behind a mudroom bench 🙂
Looks great with your cabinets 🙂
It looks amazing and just down right gorgeous!
I would also be interested in knowing the color and brand of the paint you used for the cabinets.
Thanks for the inspiration!
Jeannie T.
Your kitchen looks great! My father just gutted his bathroom and used vinyl flooring as the wainscoting on the wall. It looks AMAZING. Will definitely be doing this either as a backsplash or as wainscoting when we finally redo our kitchen. Thanks for sharing your results.
Beautifully done! May I make a suggestion? We rent our home so I understand the frustration of living with less than quality finishes… Perhaps you could paint (spray paint would be ideal) the outlets along your backsplash. It would hide their being crooked and your eye would focus only on the beautiful backsplash! Just a thought to consider…
Brooke! This is amazing! Such a great idea for the backsplash! Thanks for sharing. You are the Star feature at the Before & After Wednesday party at The Dedicated House. Here is the link to this week’s bash. http://www.thededicatedhouse.com/2016/10/wednesday-week-80.html Happy day to you! Toodles, Kathryn @TheDedicatedHouse
I just recently completed a backsplash in my kitchen that was not expensive at all. I simply watched for postings of tile that people were selling off what they didn’t use up for their project. In total I spent about $85 for my whole tile backsplash. I still have lots of tile left for other projects too.
At the same time I also refinished my countertops using a Beauti-Tone Countertop Refinishing Kit.
I wish I could post a picture to show you the before and after.
I am new here and have subscribed, I love what you have done with your kitchen! I grew up in a double wide trailer and wanted to clean it up and do some inexpensive updates after my mother passed to help it sell but my brother preferred to just sell it as it was. It is rewarding to make such wonderful improvements without spending tons of money. Thank you so much for sharing.
I am so glad you are here! I love the challenge of being able to have a pretty home without spending lots of money. So glad you appreciate my efforts 🙂
I just found your blog when doing a Pinterest search. We are literally in the exact same situation as y’all. We bought a home and renovated it then decided we really wanted to be at our farm. We have recently sold our home and bought a single wide to live in while we build. We will be going from 3300 sq ft to 1100. It will be a drastic change for my three little boys who will have to start sharing a room. I’m so excited about living on the farm and decorating our trailer. Even though it’s temporary I’ve got to make it mine so we can enjoy our time together (real close together) Your kitchen and living room gives me so much inspiration for our home. I can’t wait to see other photos. Like you we will be on an extremely tight budget for fixing up the trailer so I love your ideas!!
Love it!!! I ha ha haha 90’s double wide, I want to do this! What did you paint the cabinets with and what process? (Forgot to check notify. ..
Love this! What color and brand paint did you use for the cabinets?!
Wud love to find out the color of your beautiful and cheerful cabinets! And this project is going to help tremendously in my kitchen.
What is the name of cabinet paint color? Searching for perfect robins egg blue…
It is called Mint to Be!
What brand is that? It’s so gorgeous!
It is Sherwood Williams! Thank you!
Who cares if it’s a mobile home, a mansion, or a cardboard box? This looks AMAZING! I can only imagine how beautiful your forever home will be with this kind of creativity! I love that pale green + black/white faux granite. Such a great combo. Thank you for sharing this!
Could you please tell me what color was used for the cupboards?? I LOVE IT!
What a creative idea! It looks great. The kitchen turned out beautiful! Love those colors too?
It’s been a year. How did the tile back splash hold up? Have any of them fallen off?
No ma’am! Perfect!! We love it!
We recently moved into double wide, we aren’t sure how long we will be here but I can not stand the kitchen cabinets, walls, well basically everything. ? I am wanting to redo some things but not spend a lot of money. This is a perfect idea!
This is absolutely beautiful and you did a fantastic job! Love the colors and the backsplash idea….
Thank you so much, Regina!
thank you for your inspiration! i was looking at your counters in the final pictures…did you also retouch them? if so, how? they look good. thanks for teaching us so well.
Stunning!! What did you do in the corners? And how did you finish the ends? Did you do anything where the backsplash meets the counter … quarter round, caulk…? Thanks!
Thank you!!
We put it behind the countertop and we just butted the pieces together on the corners and squared off the ends ?
I was searching for an idea for a rental unit. My question/concern is about the portion above the range. Have you had any problem from the heat?
No sir! Not one bit!
LOVE this idea but I am wondering how easy it is to clean. Does grim get stuck in the cracks between each piece of laminate?
No- never have had an issue cleaning so far and have had 1.5 years! ❤️
Hi Brooke, do you have to waterproof it since it’s behind the sink? This is wonderful and is an easy fix for what I need. Thanks for sharing this.
What did you do to the counter tops? We have a modular like this as well and are wanting to sell soon but like you said don’t want to put a lot of money into because we know it won’t be a huge payoff.
I’m so glad to find this! I also live in a 1999 mobile home and wanting to do some updating. Did you have to paint the VOG first before starting this project? My walls came from the factory just plain white VOG and didn’t know if you needed to prep the walls in anyway first? I’m so hoping to hear from you even though this is an older blog. You are the only information I have found on this. Thank you
We did no prep work before adding the flooring to the wall!
I would love to know what color your kitchen is painted.
It is called Madeline Steps by Valspar. It is no longer on a paint chip, but if you tell them at the paint counter, they will mix it bc it is still in their computers !
How did you update your counters? My husband and I inherited a home that needs a kitchen overhaul (that will come in a couple years) but until then we have to get rid of the “golden rod and avocado”!
Our countertops are just the cheapest in stock that they had at Lowes 🙂
Brooke. I came across your blog when searching for using vinyl plank flooring as a backsplash. Looking at the comment dates you did that project around 2016. Here are my questions. Did you use the plank flooring behind a stove? That’s my biggest concern. We have a gas stove and wondered if the heat from the oven was ever an issue. Secondly how has it held up
Thank you
Carol
This backsplash turned out so cute. This was such a smart way to do it! I love it. I might have to try this after we finish our kitchen cabinet painting.
This turned out so good! I really like the look of the backsplash. I am going to attempt this after we do some kitchen cabinet painting. Thanks for sharing!!!
This is such a creative idea and turned out so beautiful! I’m remodeling my 1960s home, and it has become a much bigger project than I originally thought. I even had to hire a dumpster rental company near me to haul away all the debris I’ve made in the process haha. I am definitely going to consider doing this in my kitchen! Thank you so much for sharing!