As Spring was {and still is} inching closer and closer, I kept trying to think of a cute idea for a Spring wreath. I wanted something to stand out from the road and fit the feel that I wanted for my itty bitty front porch area. I never could come up with anything that I just LOVED, so I decided to do something a little different. I had seen people do fun “wreaths” with picture frames, and with my most recent auction visit, I had more than my fair share of frames, so I thought I would dig one out of the project garage and give my own a whirl! This project is extra exciting for me because I am taking part in a Spring Blog Hop, which is being hosted by Hometalk! This Blog Hop will be featuring lots of bloggers who will be sharing their newest and best Spring projects with us, and you can visit them ALL from this post {at the very bottom}. Is that not amazing?
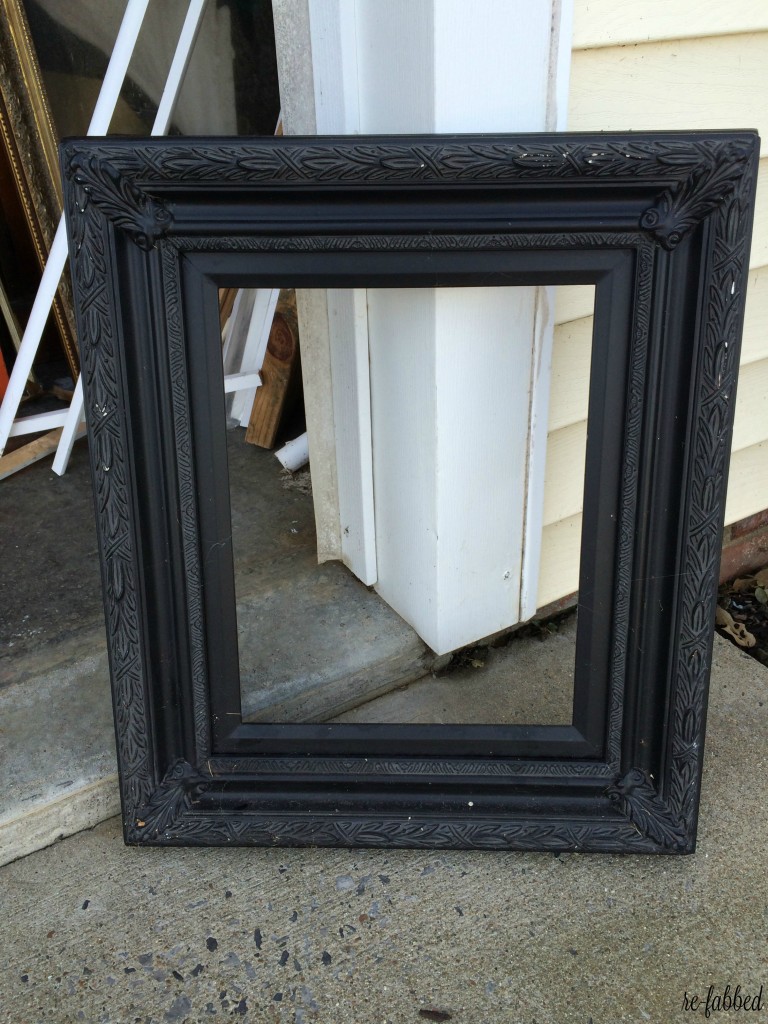
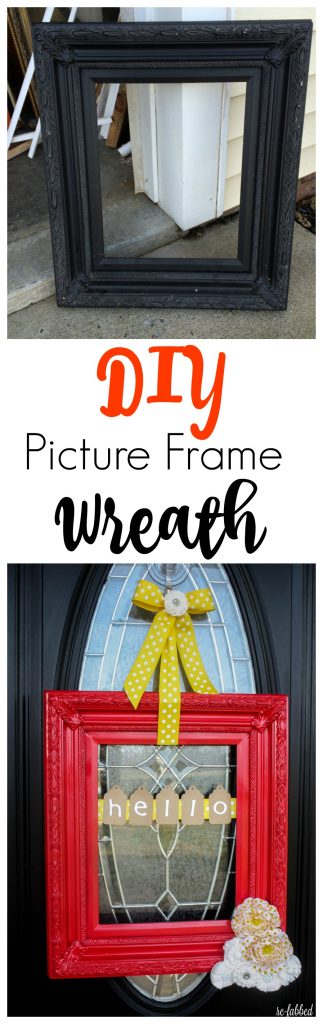
Here was my BEFORE frame: {Just a plain black frame. Nothing bad. Nothing special.}
I decided I wanted to paint it a color that would really POP, so I went with red. {Disclaimer: I should have primed this. I knew better, but I tried to “skip a step” to save time, but spent more time because of it!} I simply used spray paint, and after several coats, it was finally finished!
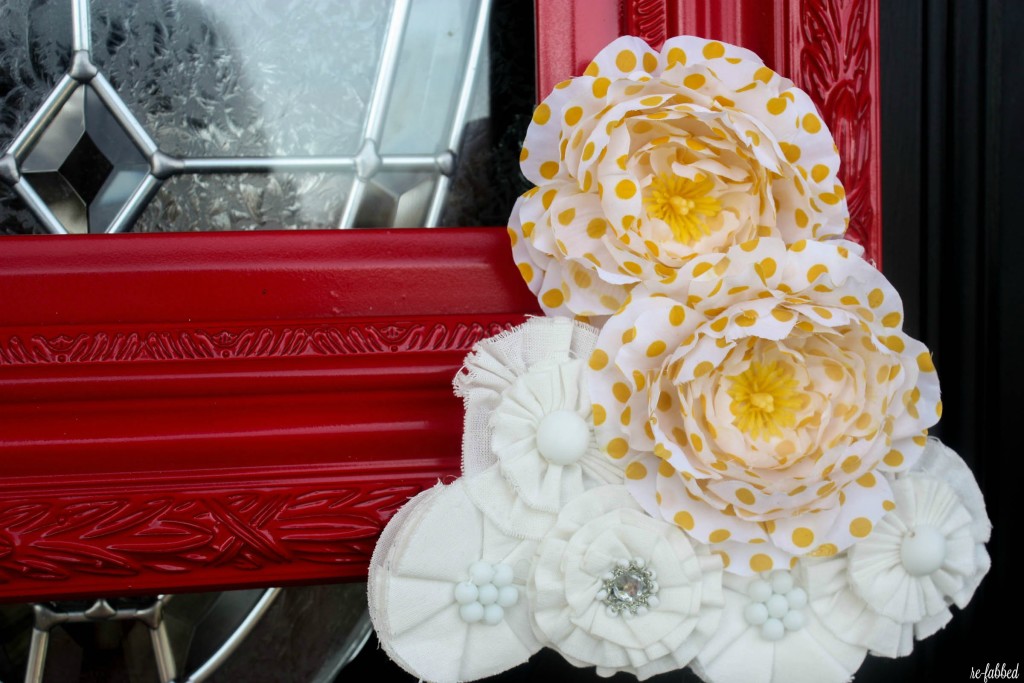
I also wanted to have just a few embellishments on it, but nothing over the top. I truly wanted it to be rather simple. I felt like the frame in and of itself would be plenty to catch people’s eyes. To spruce it up, I simply added a cluster of flowers that I found at Michael’s and Hobby Lobby, as well as cute yellow polka dot ribbon and some card stock name tags with sticky letters! Can’t get much simpler than that!
Forgive this next picture…it was taken at night, because well…you gotta do what you gotta do! This gal works ALOT at night, and unfortunately- that doesn’t lend itself to stellar pictures all the time 🙂 I didn’t end up using the R’s anywhere because I couldn’t find a good fit, but I am sure there will be plenty more projects for them!

So, after about 20 minutes of work…THIS is my result! I love the red and yellow with my black door. And you can’t see it, but my house is yellow, so this is a nice touch!
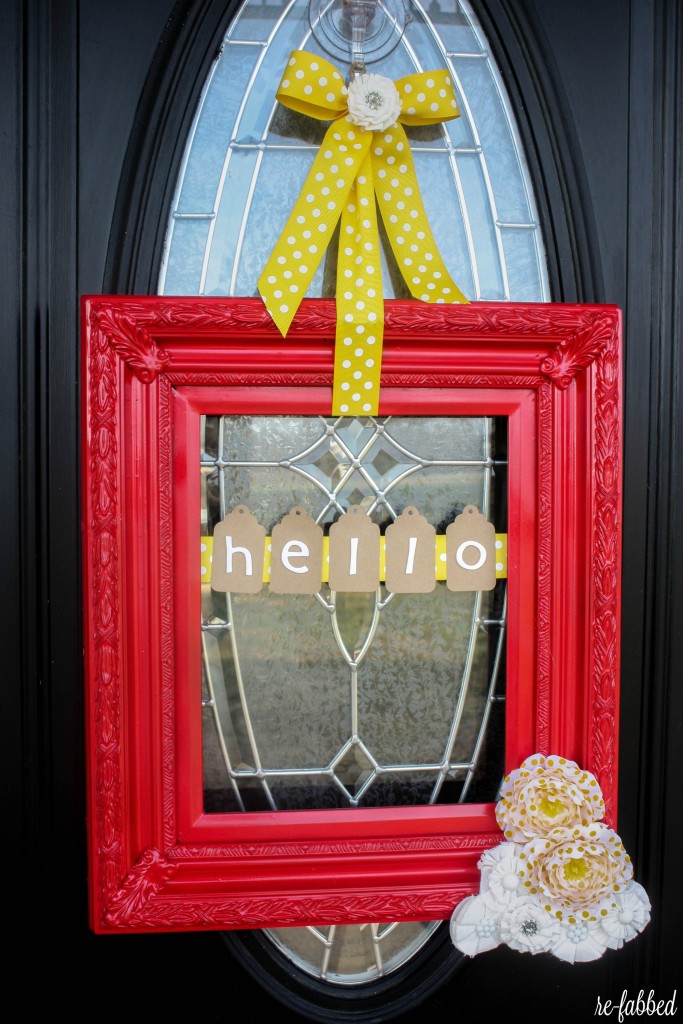
For my little “Hello” sign, I simply took a piece of ribbon and hot glued it on each side…and then placed my little tags across the ribbon and hot glued them on. Then, I put my foam letters on…and done! {My porch is covered, so there are no worries about the “weather” affecting this.}

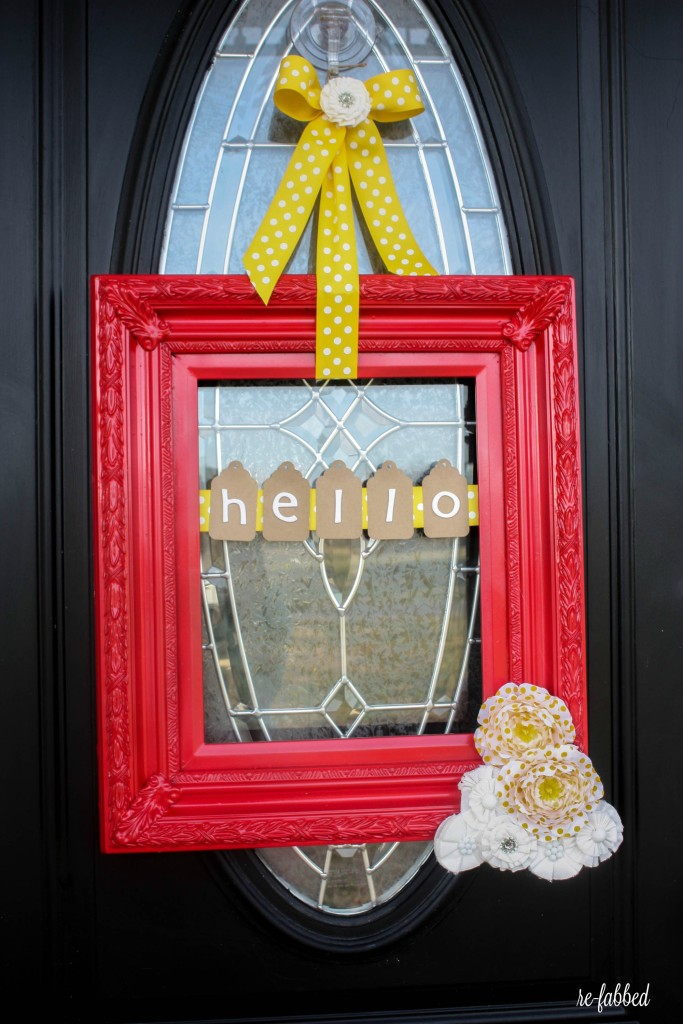
I love my new spring addition! I can’t wait to show you the rest of my little porch in the next week or so! I am loving the colors I used this year!
Doesn’t this make you want to go find an old frame and spruce it up to make your own?! For more Spring inspiration, be sure to check out the other links below, as well as keep an eye out for #DIYMySpring on various social media outlets!
Put a PIN on it!
<!– end InLinkz script →
Last Updated on January 7, 2017

Love the cheerful colors! The red and yellow combined with the white flowers is just so happy! And the hello banner is so cute!
Thank you, Anika! I was really happy with the colors! It feels “springy” to me 🙂 Have a great day!
This is so darn cute!! I would love to make one of my own. Smart idea using a yellow ribbon to match the color of your house. Visiting from the blog hop.
Julie @ Love My Simple Home
Thank you so much, Julie! So glad you stopped by!
Very cute! Love it!
Thank you, Mom!!
Fun and cheerful! I have a really big box full of picture frames. I know what I will be doing with several of them!
Thank you! Show me a picture!
Hi Brooke – I love your spring project! Such happiness at the front door! Visiting as a fellow contributor to #DIYMySpring. Hope your week is full of sunshine! Hugs, Holly
Thank you so much! I am really enjoying it 🙂 So glad you stopped by!
How beautiful! I”ve been wanting to make a picture frame wreath…thanks for the inspiration. Yours is so lovely!!
Thanks so much, Michele!!
Very cute! I’m not a big wreath fan but love this as a substitute!
Thank you Carrie! 🙂
Love this! What a creative use for a picture frame – and so fun on the front door!
Putting this on my must do list! Visiting from the blog hop
Cheers
Thanks so much, Christina! Glad you stopped by 🙂
How darling!!! And perfect for spring, which is just around the corner. Thanks for the suggestion.
Thank you so much, Lynn!
Such a bright ann welcoming wreath!!! Such a gorgeous idea!!