You won’t see me buying expensive Halloween decor over here… I’m all about that DOLLAR TREE life!!!
In fact… some of the items used for this diy witches broom sign were FREE… because I collected them from my yard! LOL!
This is a super simple one, yet super CUTE… and I BET you won’t see anything like this on the shelves at home decor stores!
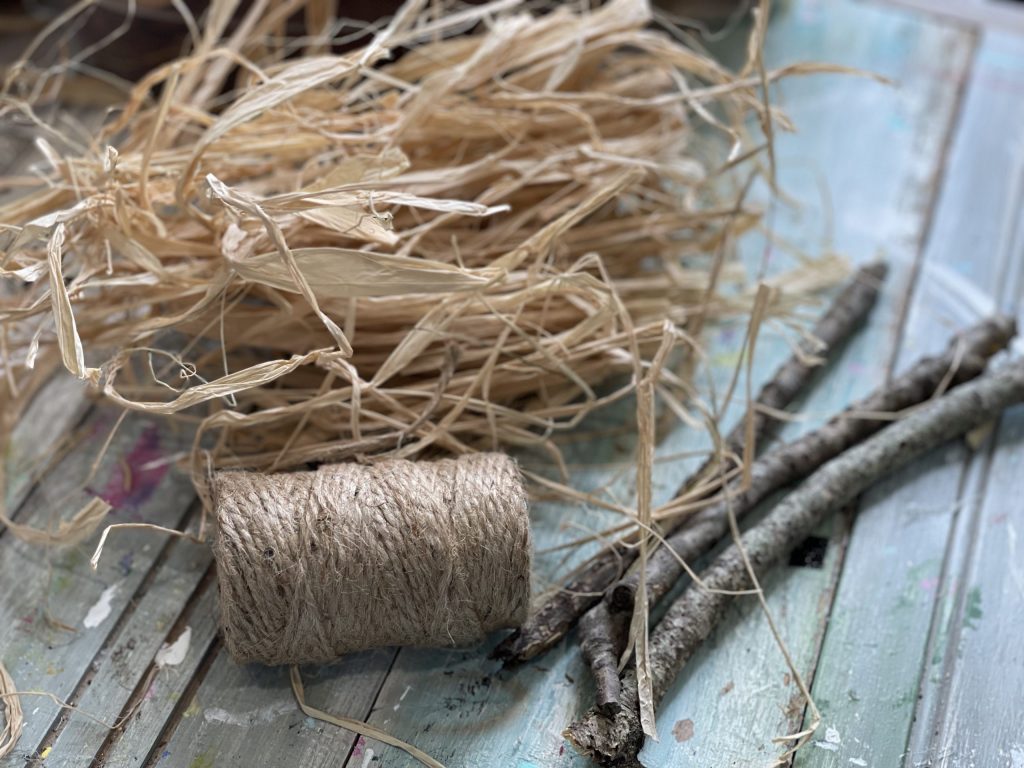
What you’ll need…
*some of these items are affiliate links. Tap on the bolded item to shop my affiliate link!*
- 3 sticks
- raffia
- twine
- hot glue
- Dollar Tree tray
- ribbon
- black paint (I used Apple Barrel acrylic paint)
- sanding block
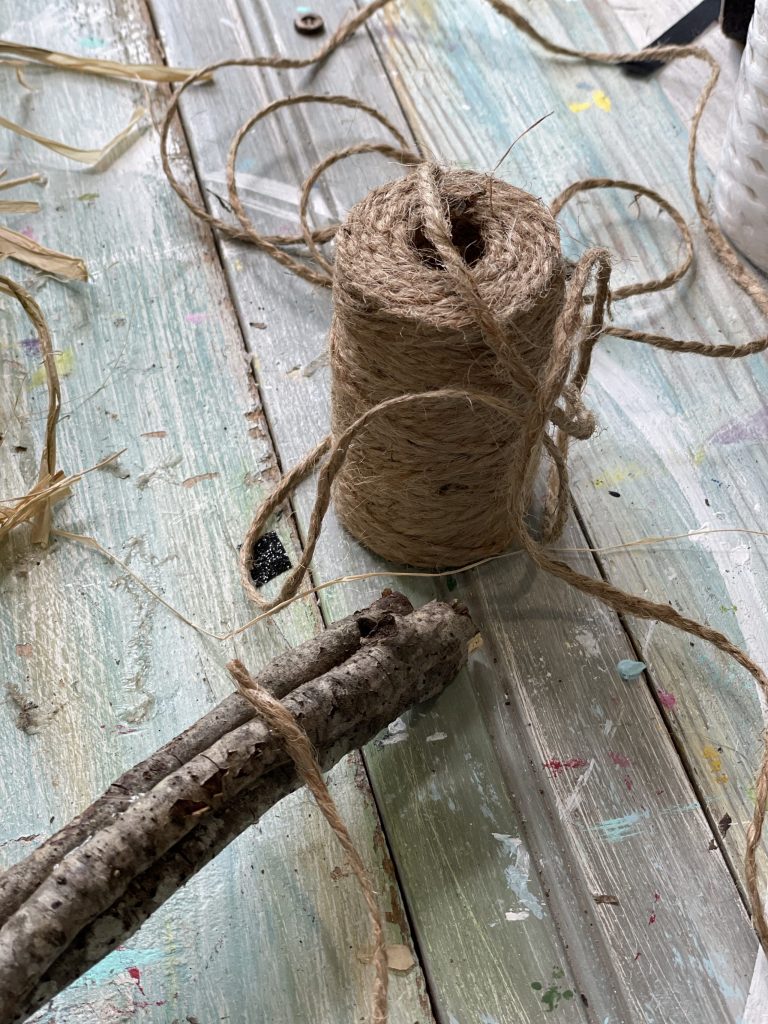
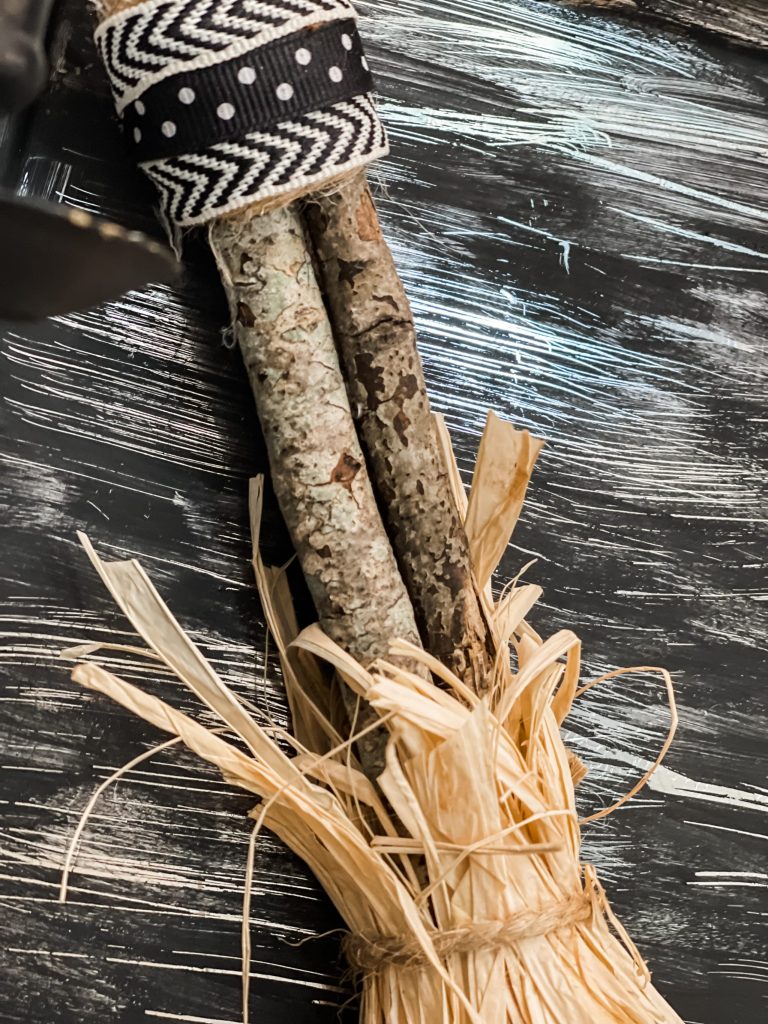
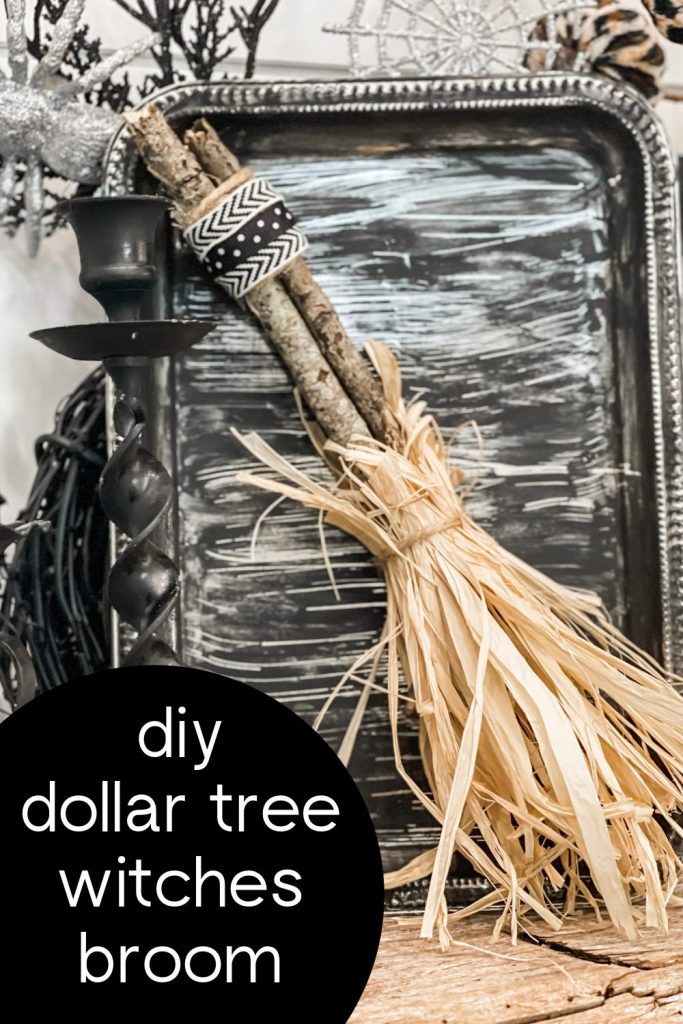
After you’ve went on your hunt for the perfect sticks, wrap the top of them together with some twine. I simply hot glued one side of the twine, then began wrapping!

Here’s what it should be looking like after it’s all wrapped together! Just hot glue the other edge down to secure.
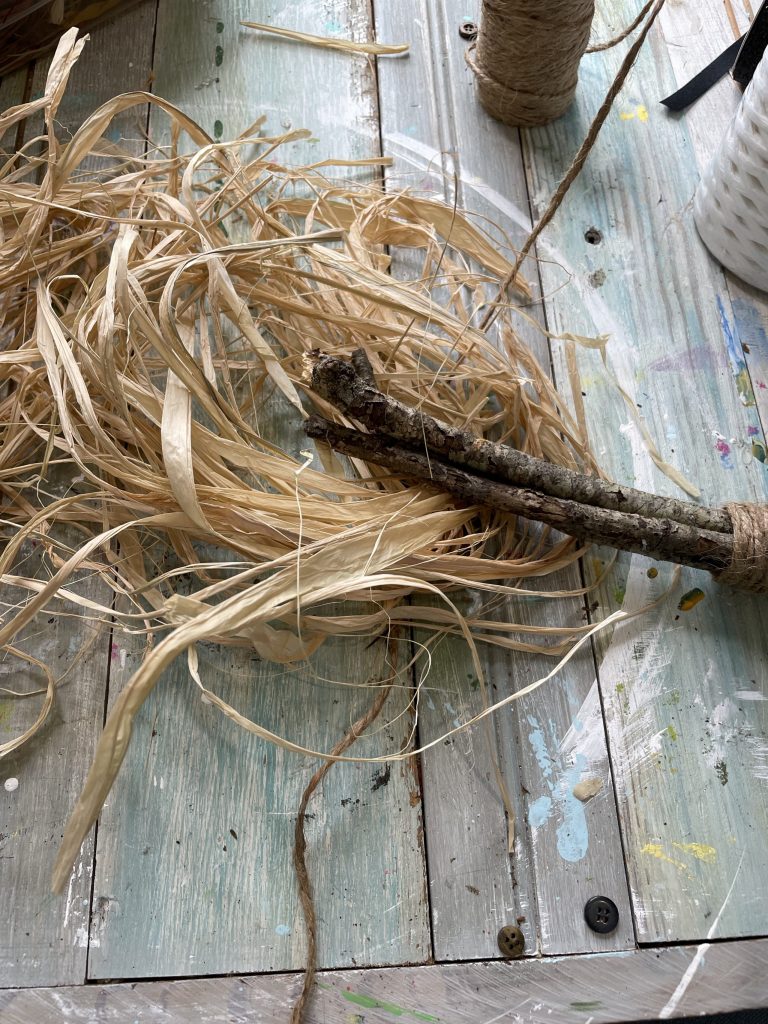
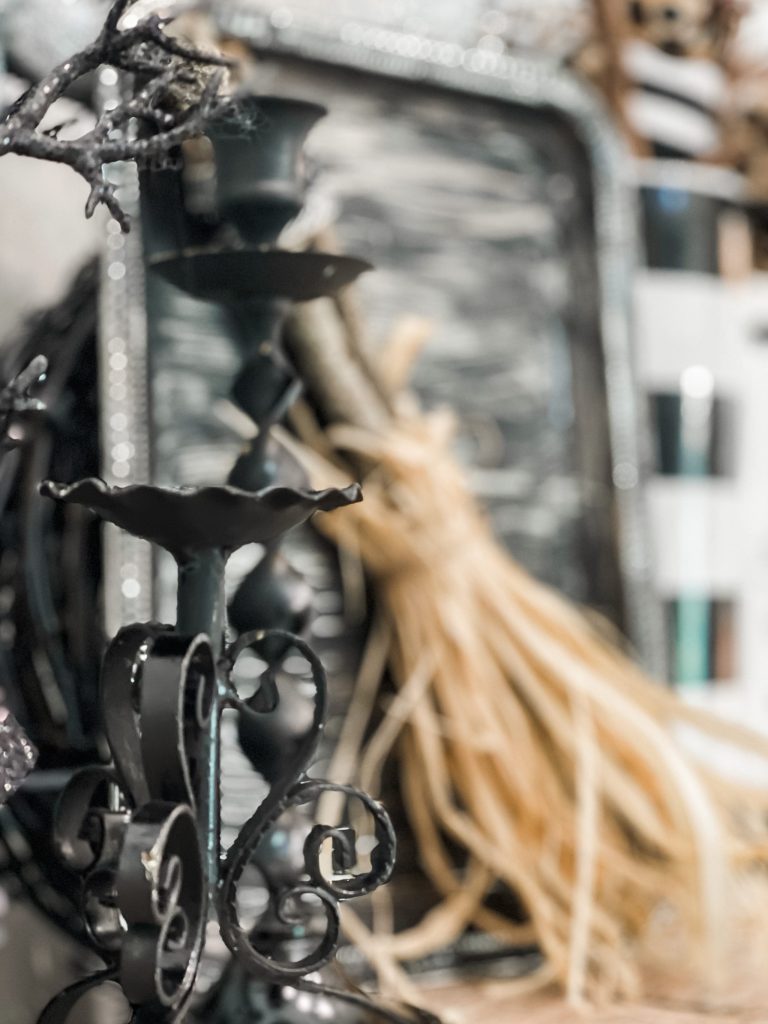
Now, let’s make the broom! I’m just using a bunch of raffia (which you can also buy from the Dollar Tree!) and wrapping it around the bottom of our sticks.
I simply just laid my stick right on top of the raffia, then wrapped the raffia around to cover.
I took a scrap piece of twine, and wrapped it around the raffia to secure it. Now we have the base of our broom!
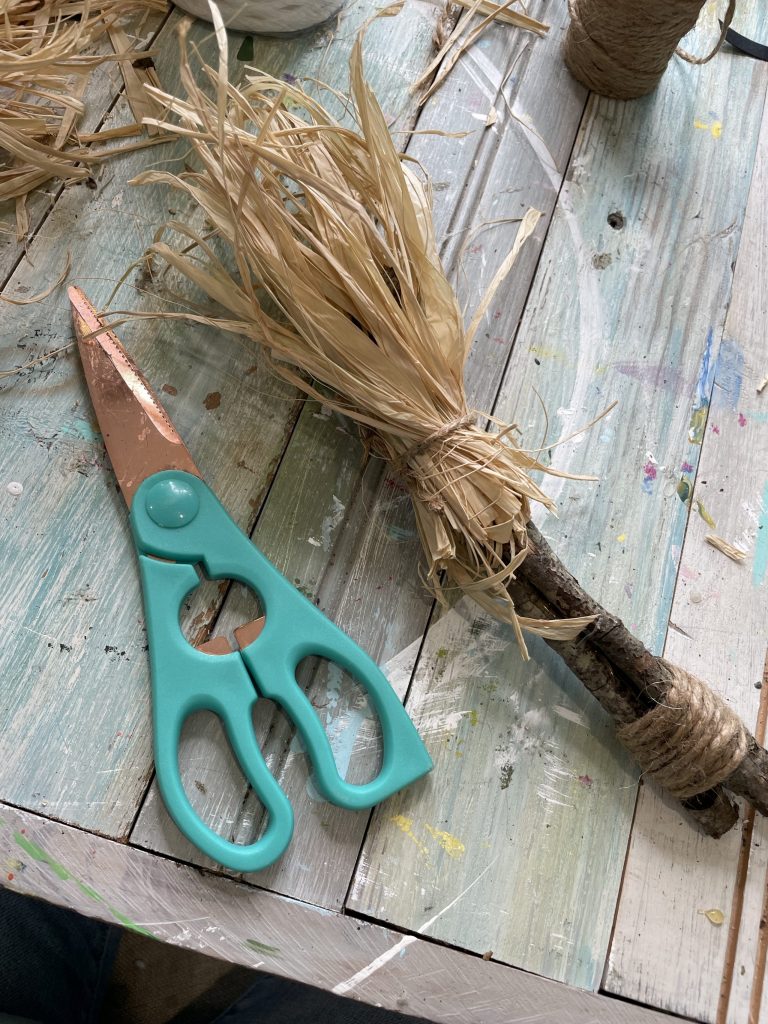
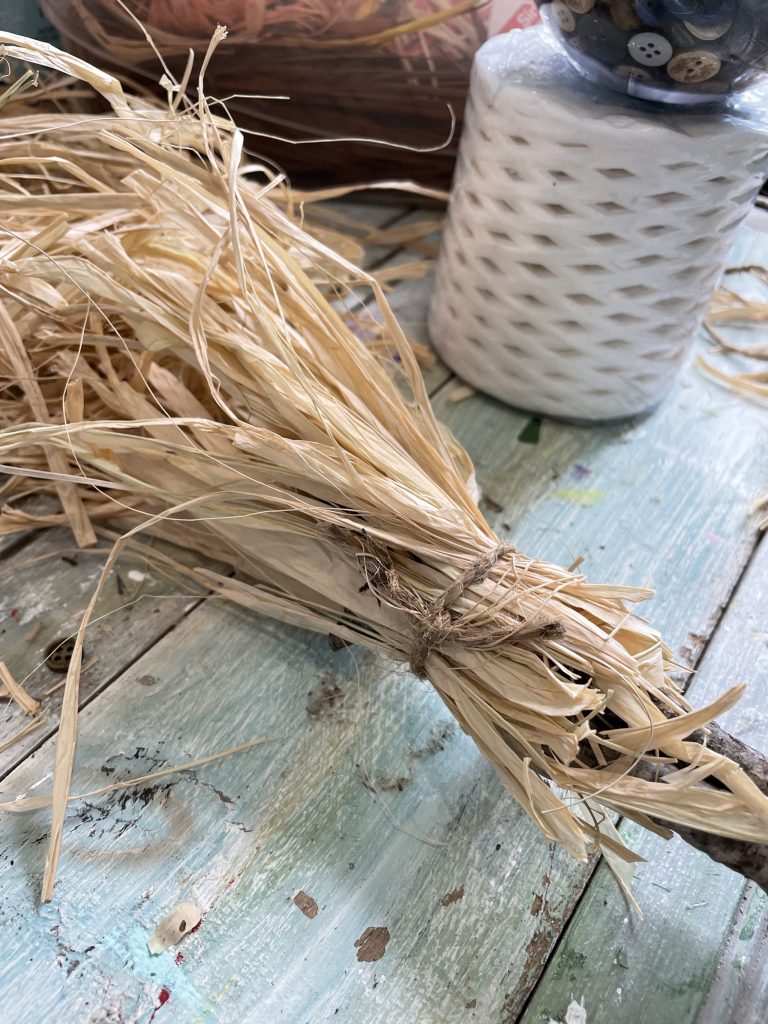
I took some scissors (don’t recommend using kitchen scissors… but that’s all I had at the moment) and just trimmed up my raffia to clean it up a bit.
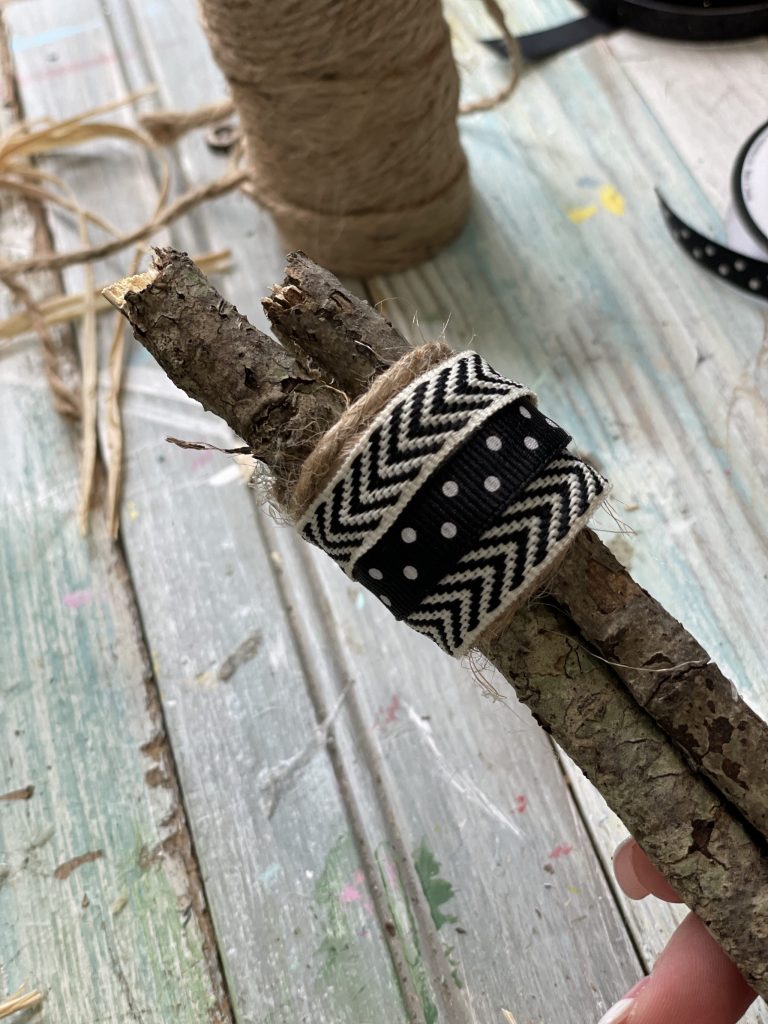
Just for a little extra “p’zaaz,” I added some black and white ribbons around the top to cover up the twine!
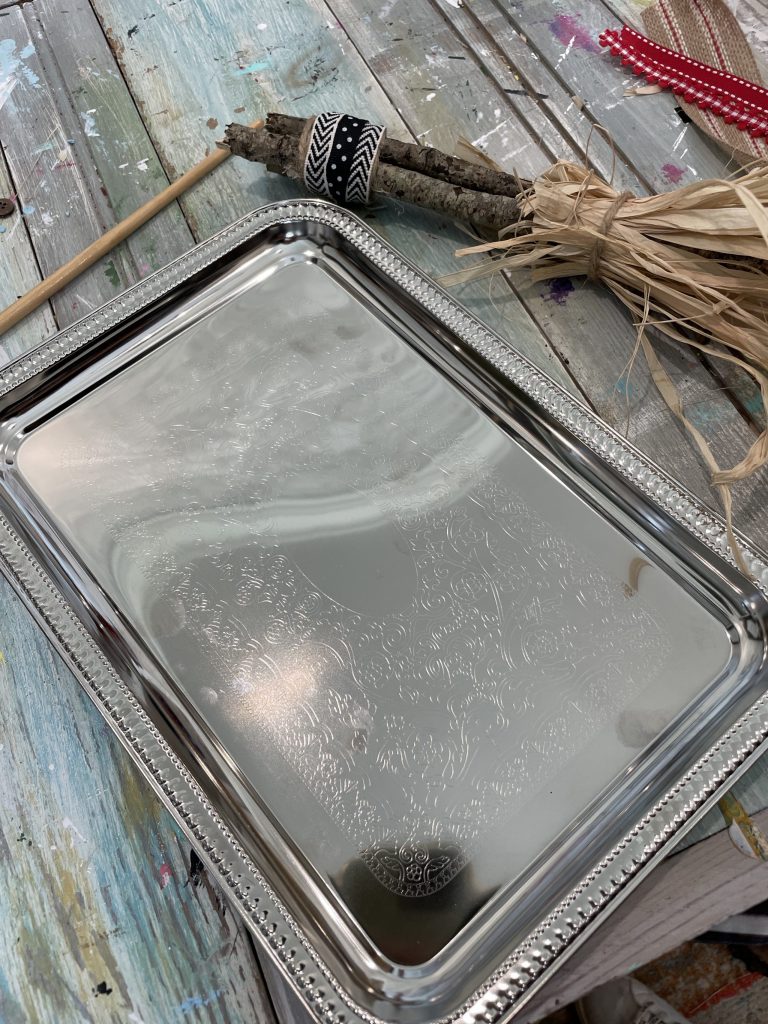
Now to make our sign! I used this plastic tray that I found from Dollar Tree, and painted it black.

As you can see, I ROUGHLY painted it. I didn’t want it to be perfect… because I knew I would be distressing it anyway!
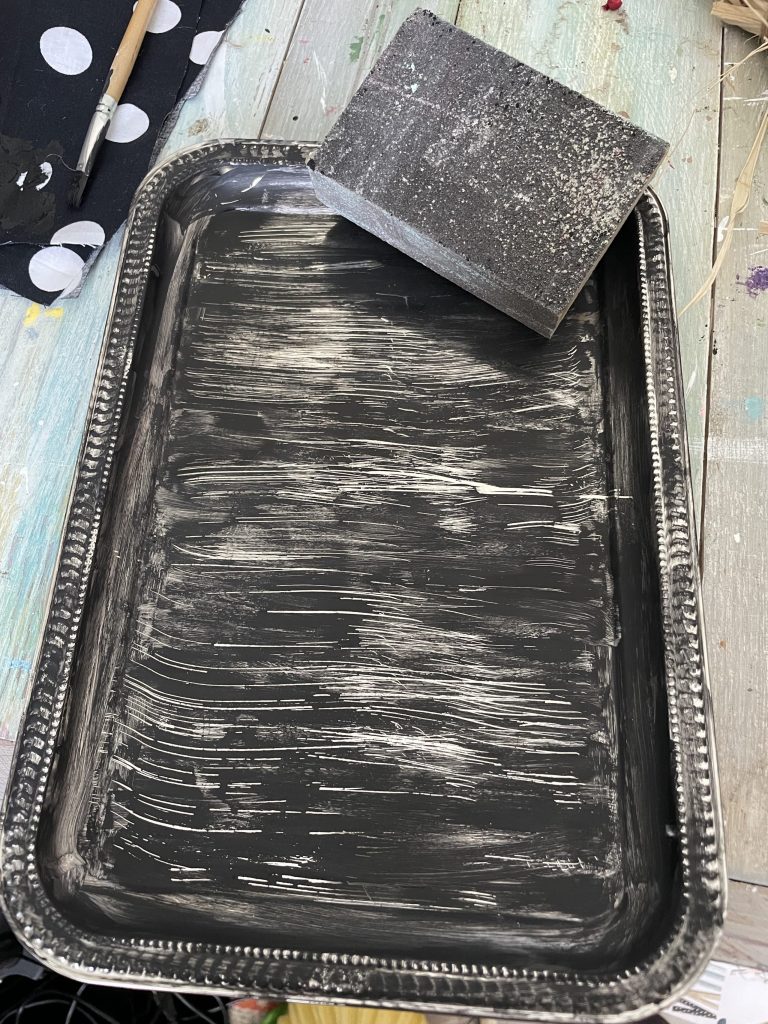
This will take BARELY any effort- just LIGHTLY glaze your sanding block over the paint, and you will get this gorgeous distressing on your sign!
Now, hot glue your broom onto the sign… and you’re DONE!!!!
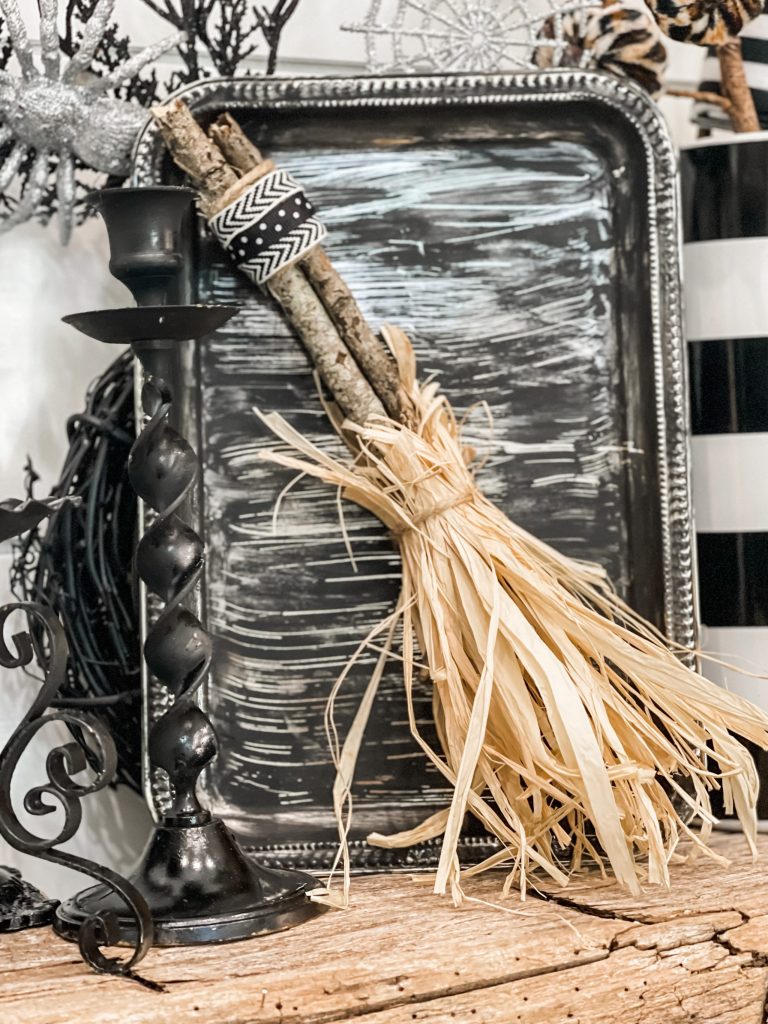
How CUUUUUTE did this little broom turn out?!?! Especially sense it’s all made with items $1 or less… SCORE!
Want to see some other Halloween things I have up on the blog!? Check them out by clicking the images down below!

MAKE SURE TO PIN THIS FOR LATER!


Last Updated on July 27, 2021

A great source of raffia for cheap is the hula skirts at Dollar Tree. You can still find them as the summer stuff winds down.
I just love your ideas! Keep it up!
Very cute and creative!
Thank you! ❤️
Love it!