It’s no secret that I am obsessed with Dollar Tree… especially around the holidays. It truly is a crafters dream store- because you can walk through each aisle, and figure out a way to turn something ordinary into something BEAUTIFUL!
On today’s episode of Dollar Tree DIY’s, we’re making a SUPER EASY ornament wreath… but before we get into it, I have to say one thing. THIS WREATH IS GORGEOUS. Like… you would NEVER guess this bad boy was made from only Dollar Tree items. Now that I got that off my chest… we can get started!
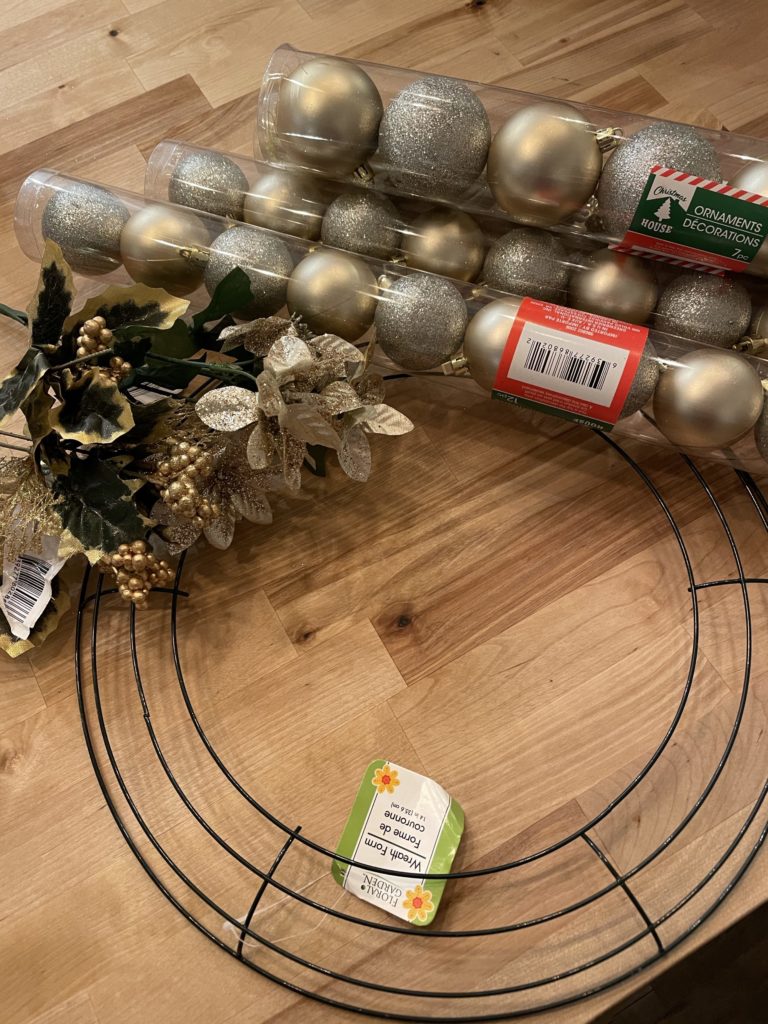
What you need:
- 14 inch wreath form
- 6 tubes of ornaments (whatever colors you choose)
- embellishments
- hot glue gun
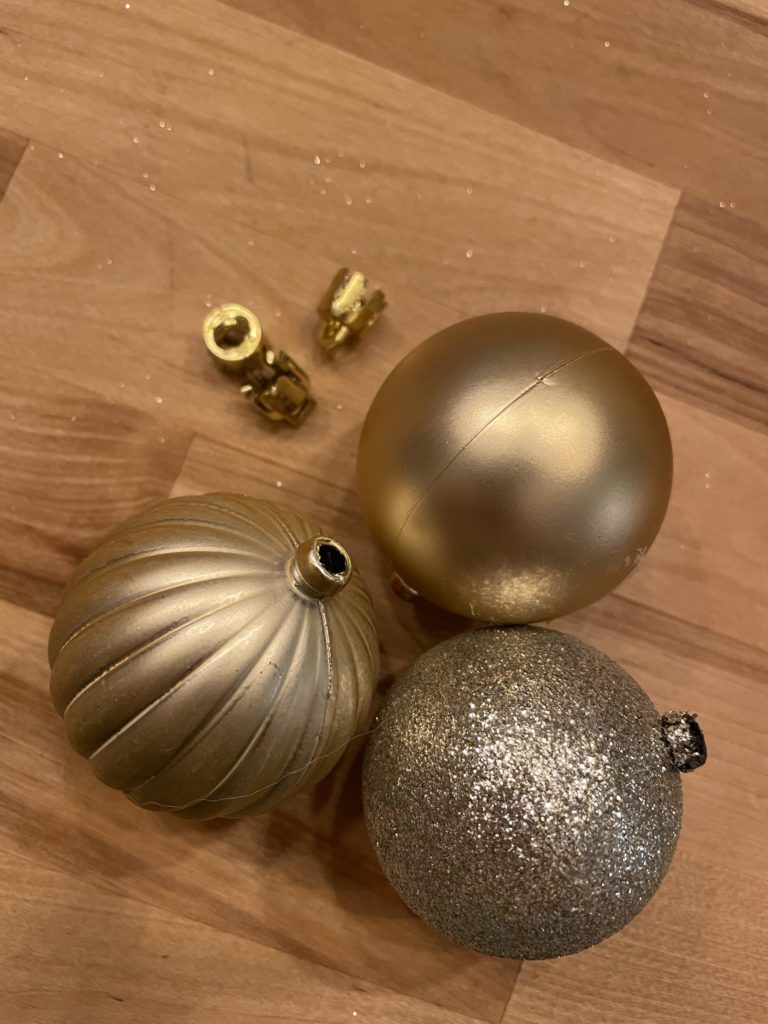
First, take your ornaments out of the packaging, and pop off the little tops.
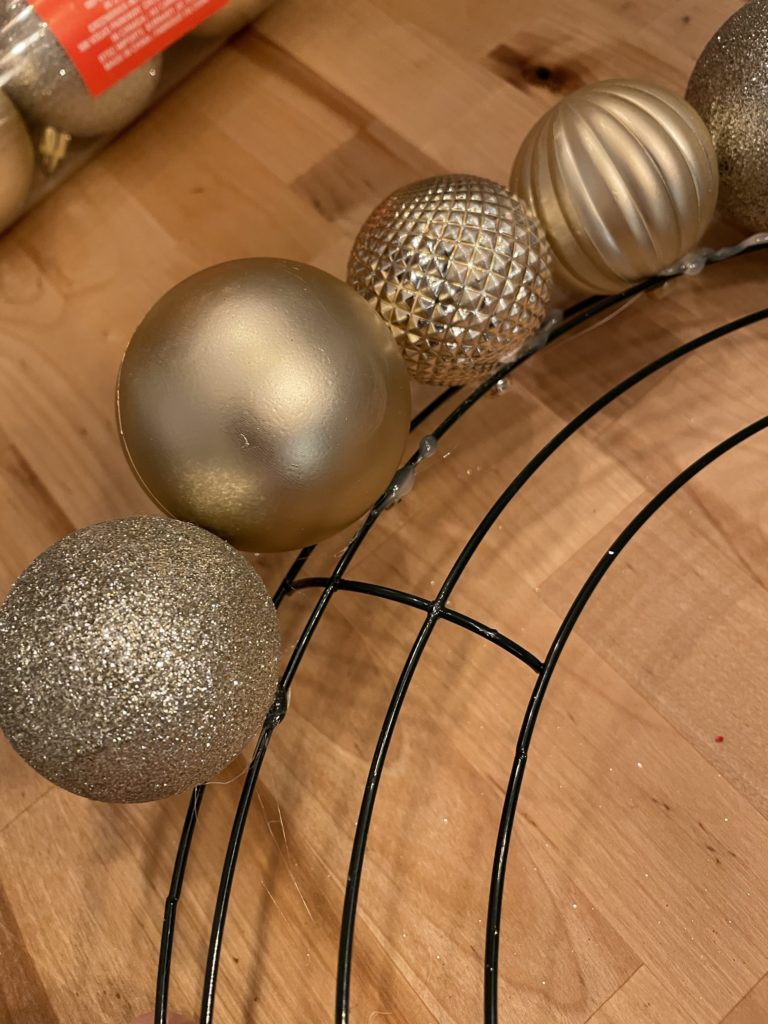
Next, start gluing them on the outermost part of the wreath form. Make sure the tops are pointing down! Continue to do this to the whole outside fo the wreath. It’s okay if it’s a little messy right now, we’ll cover that up!

This is what you should have so far!
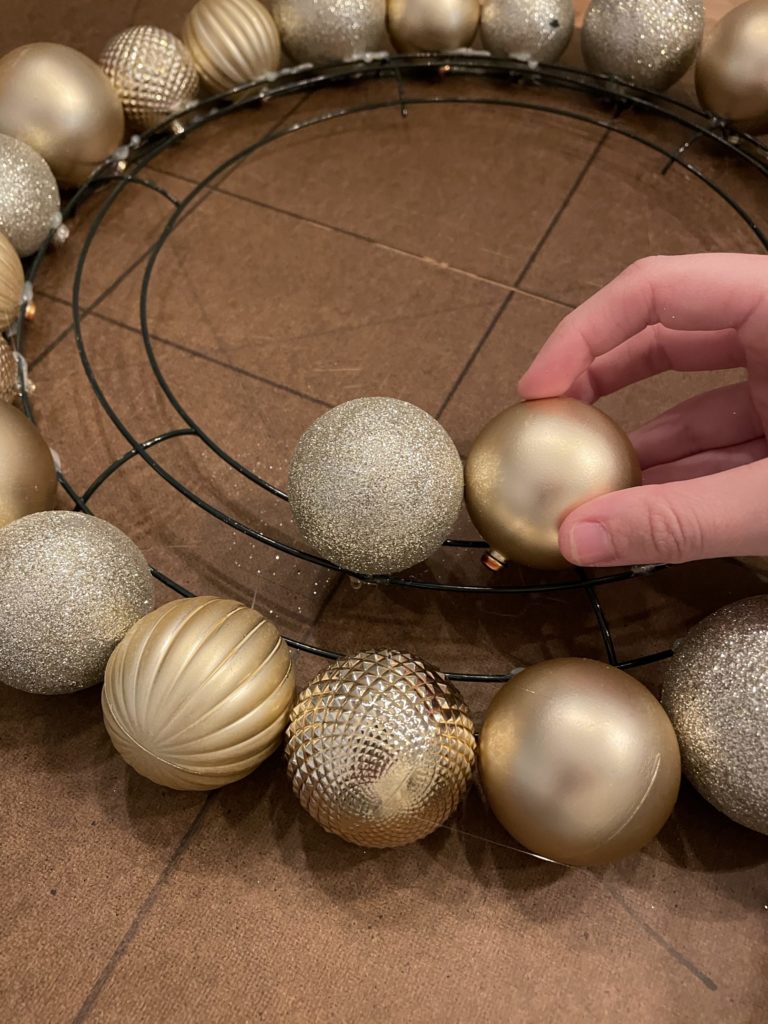
Now, do the exact same thing, except to the innermost part of the wreath form.
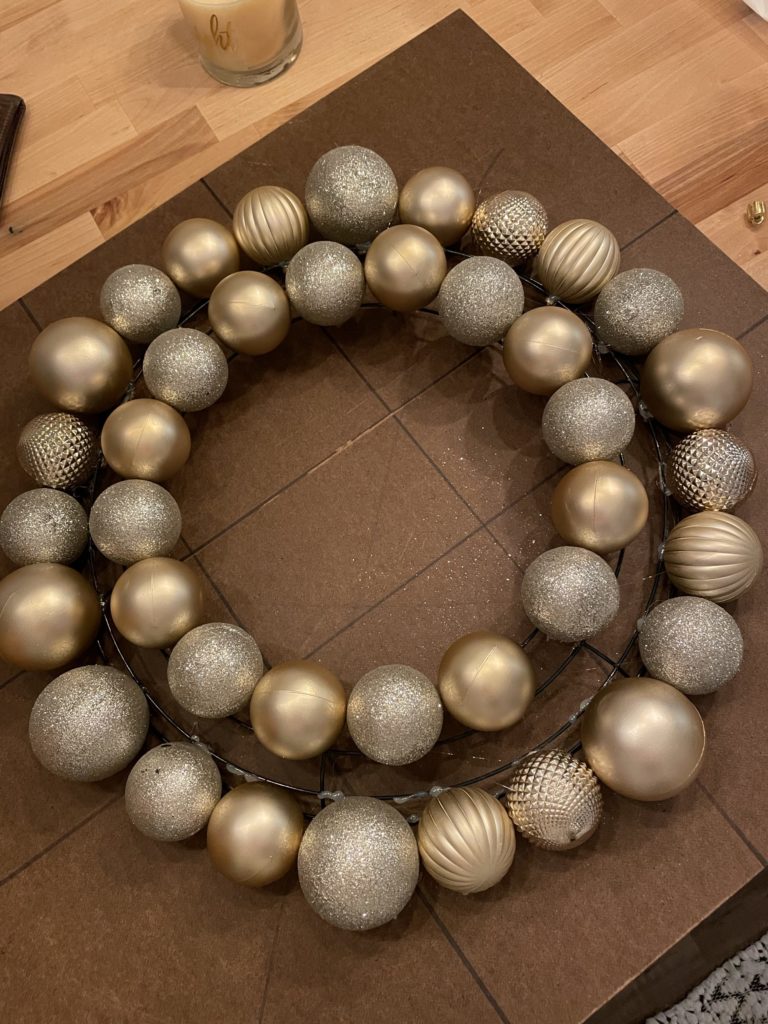
Here’s what it’s looking like so far! If you have a little gap between the beginning ornament and the end ornament- that’s okay… we’ll be covering that up too!
I don’t have any pictures of this part, but it’s pretty self explanatory… do the exact same thing as you have been doing, but now- do it to the middle section of the wreath!
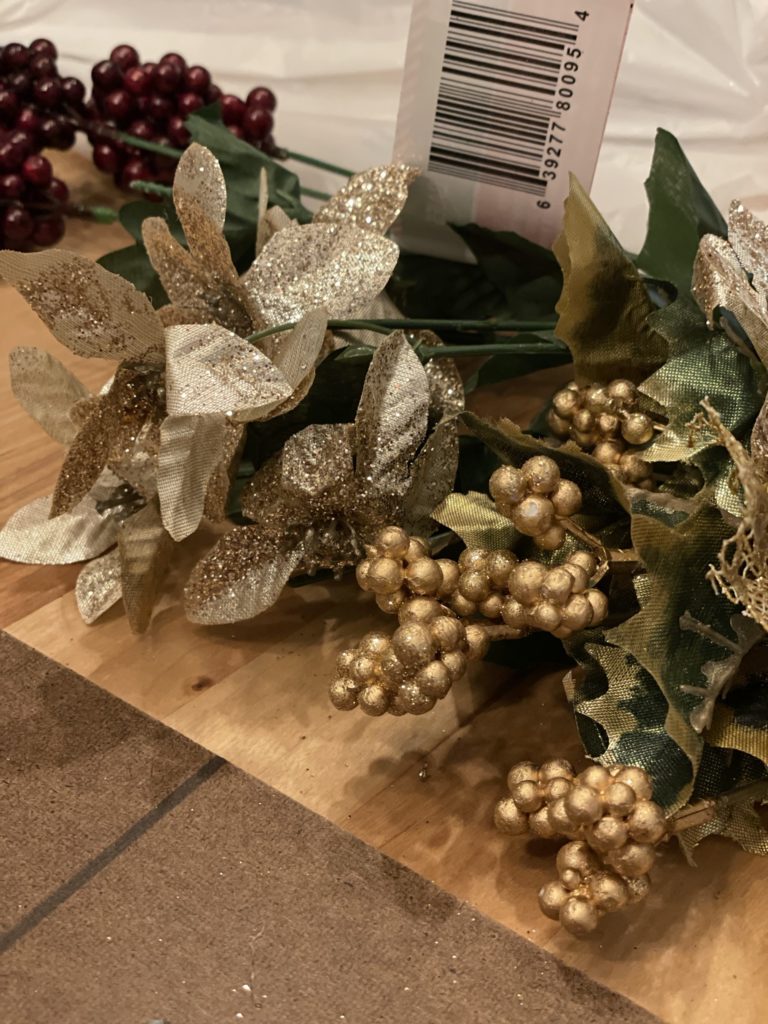
Here is where the embellishments come in! I found these golden berry picks (of course from Dollar Tree) as well as some golden flowers… all I did was pop them off their stems, and hot glued them into the wreath to fill in some gaps!

…just like this!
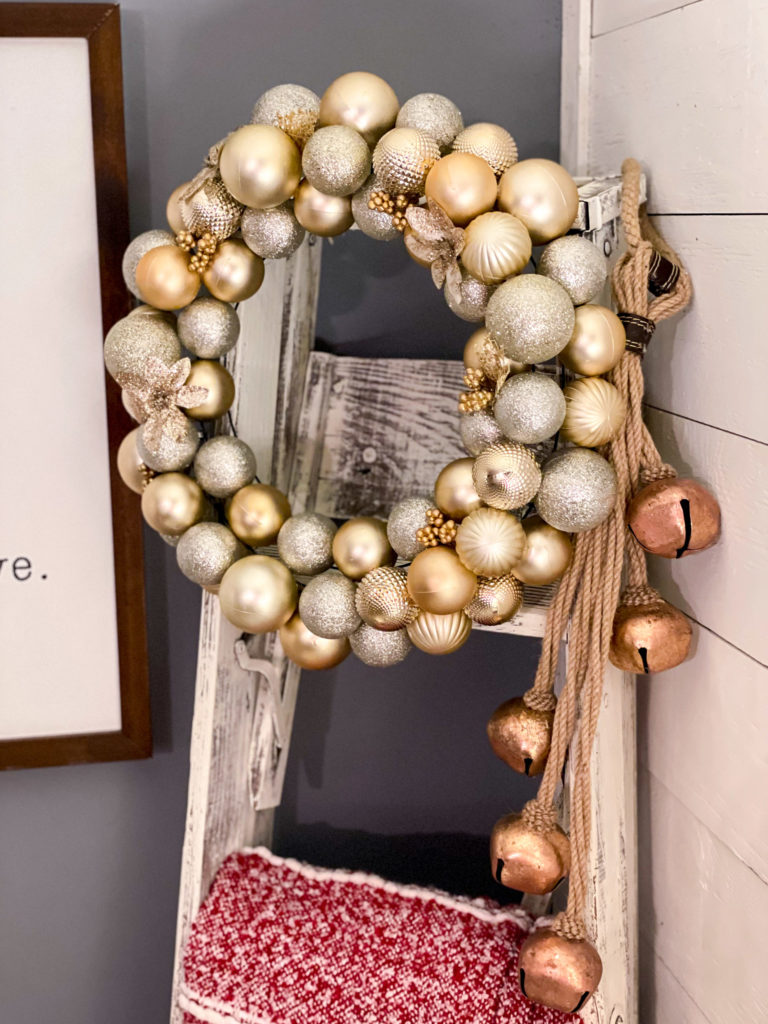
After all your gluing and embellishing, you can take a look at all your hard work!!! This is how mine turned out… isn’t she a beaut???


Tell me your opinion… to me, this looks FAR more expensive than the $8 we spent on it!!! Use it on your front door, on a gallery wall, or even on a blanket ladder like this!
I hope you enjoyed this extremely easy Dollar Tree wreath project!!!!
PIN THIS FOR LATER!!!!

Text me!! 270-200-5848
Last Updated on November 22, 2020

Beautiful❣️ Thank you for sharing!
Love it and looks easy to make!
It’s beautiful that looks like something that I would do as I could sell to some of my Christmas client great idea thanks
I love the colors you chose!
It’s beautiful and can’t tell made from DT items.
Every time I make one of these, they fall apart! The balls will not stay on after the glue cools????
I made this wreath and LOVE the results.
I made three of them and now I want to keep them.
I wish I could have posted a pic of how nice they turned out.
Lovely!
I think that the Wreath is gorgeous. Great idea. Love it
It’s beautiful
Thank you! ❤️
Love that!!! I want to try a whimsical grinch themed one!!