It’s July 1st… which means… IT’S OFFICIALLY CHRISTMAS IN JULY!!! And what’s better to celebrate that than with a brand new CHRISTMAS craft?!?!
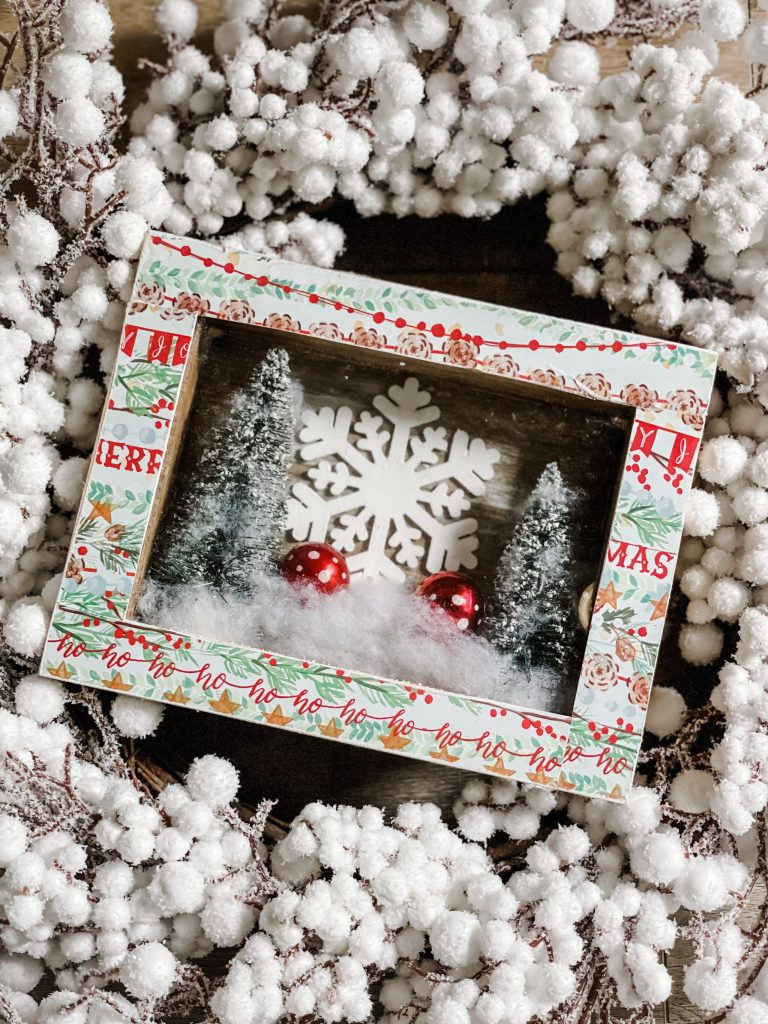
I decided to throw together a diy Christmas scene using a cheap shadow box frame from Hobby Lobby… so let’s get into it!
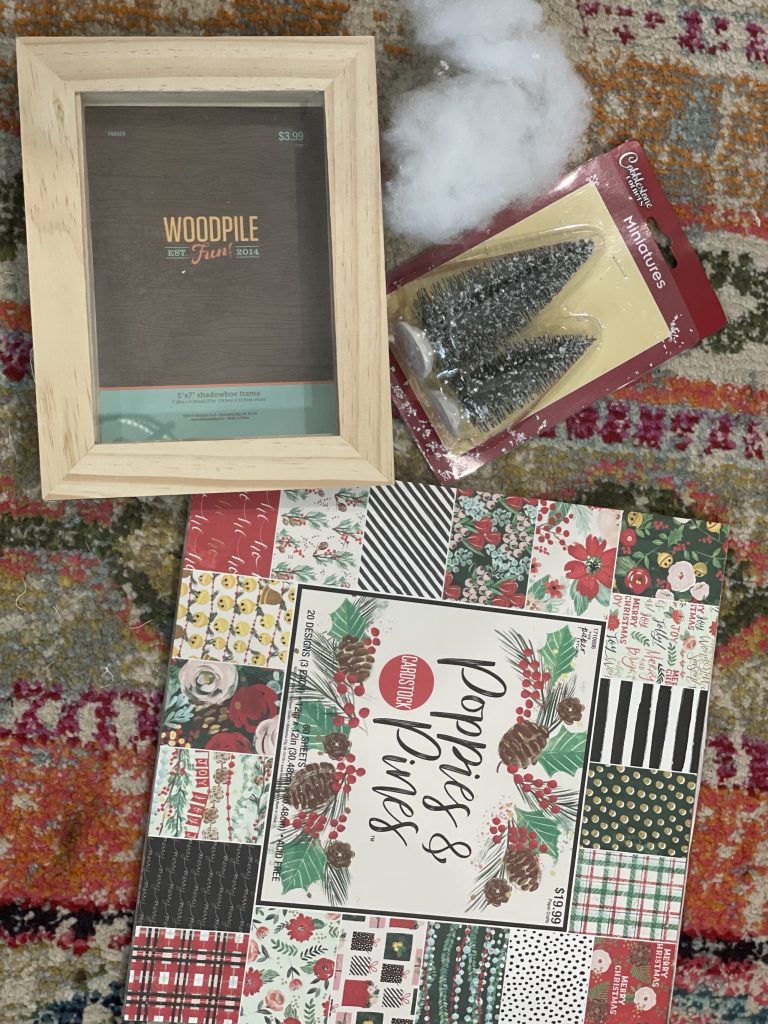
Here’s what you’ll need…
*click on the bolded item to shop my affiliate link!
- shadow box frame (mine is from Hobby Lobby)
- scrapbook paper
- mini bottle brushes
- stain (I used Kilz Dark Wax)
- fake snow
- snowflake ornament (mine is from Dollar Tree)
- mod podge
- white paint
- sanding block
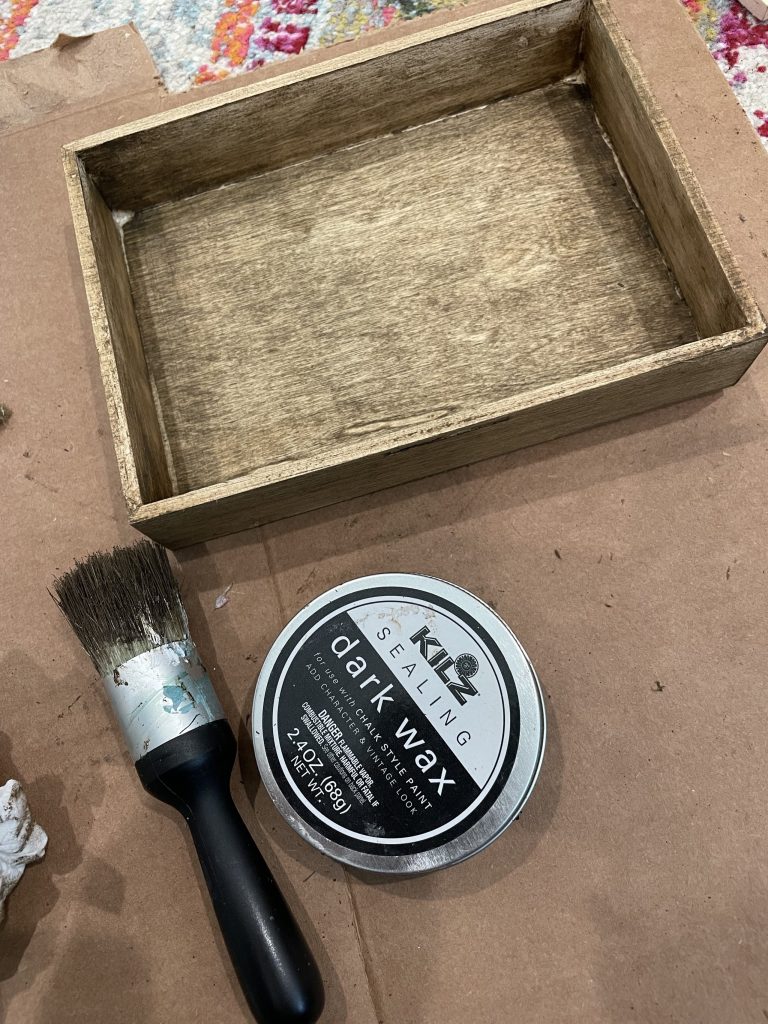
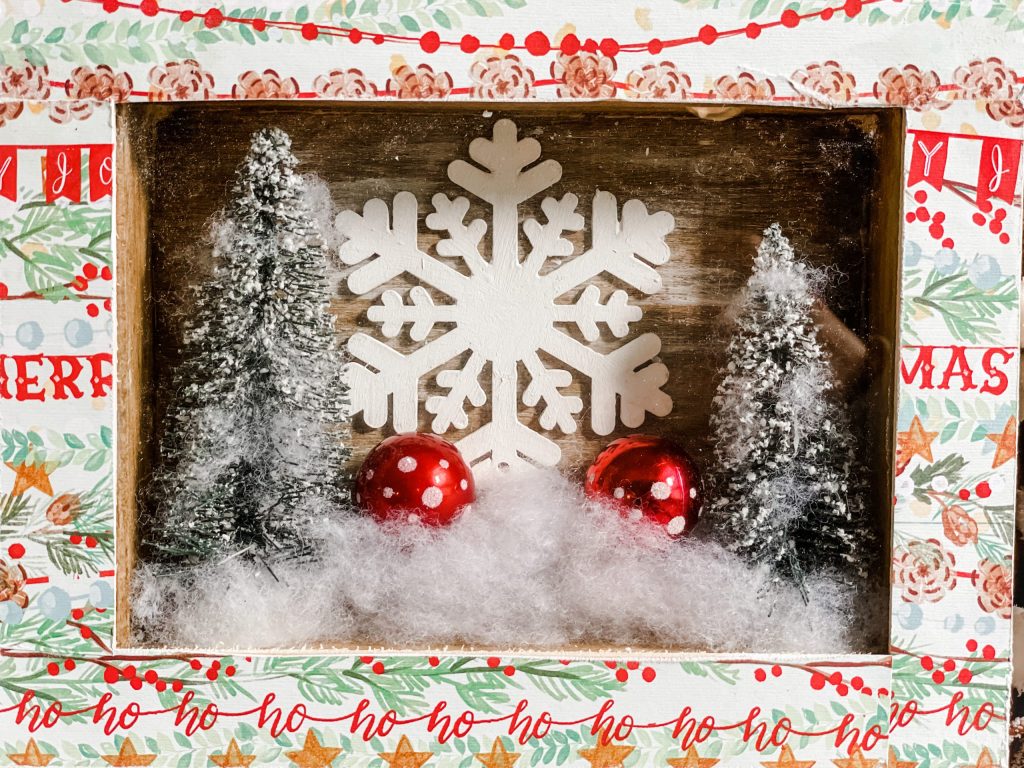
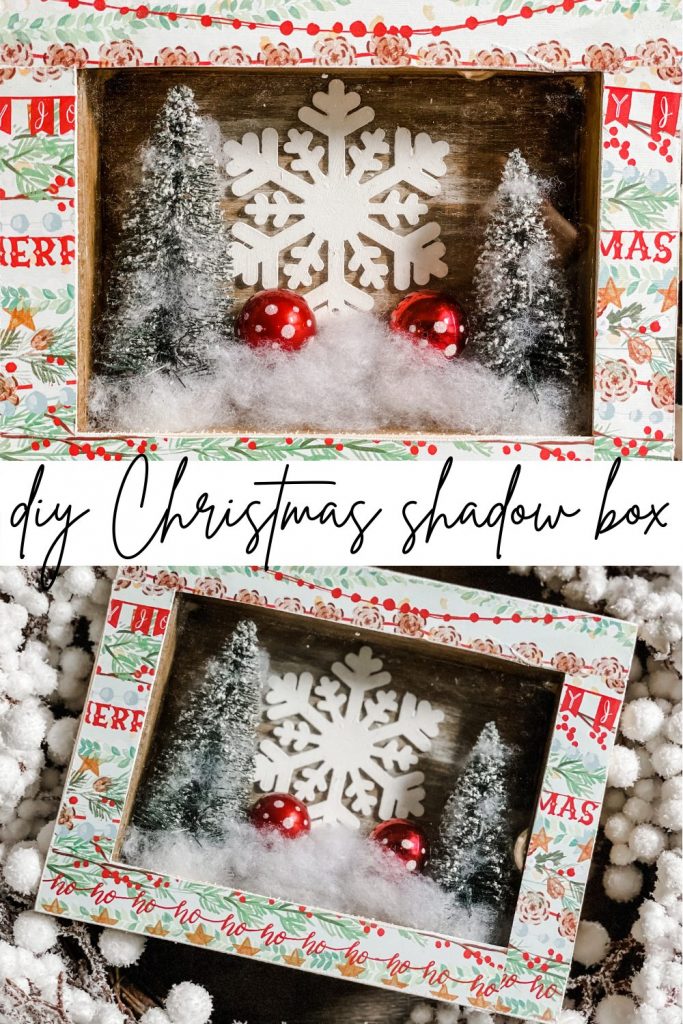
This seems like the first step to most of my projects… stain your frame!! Just the bottom half though- we’ll be covering the top part of the frame with scrapbook paper later!
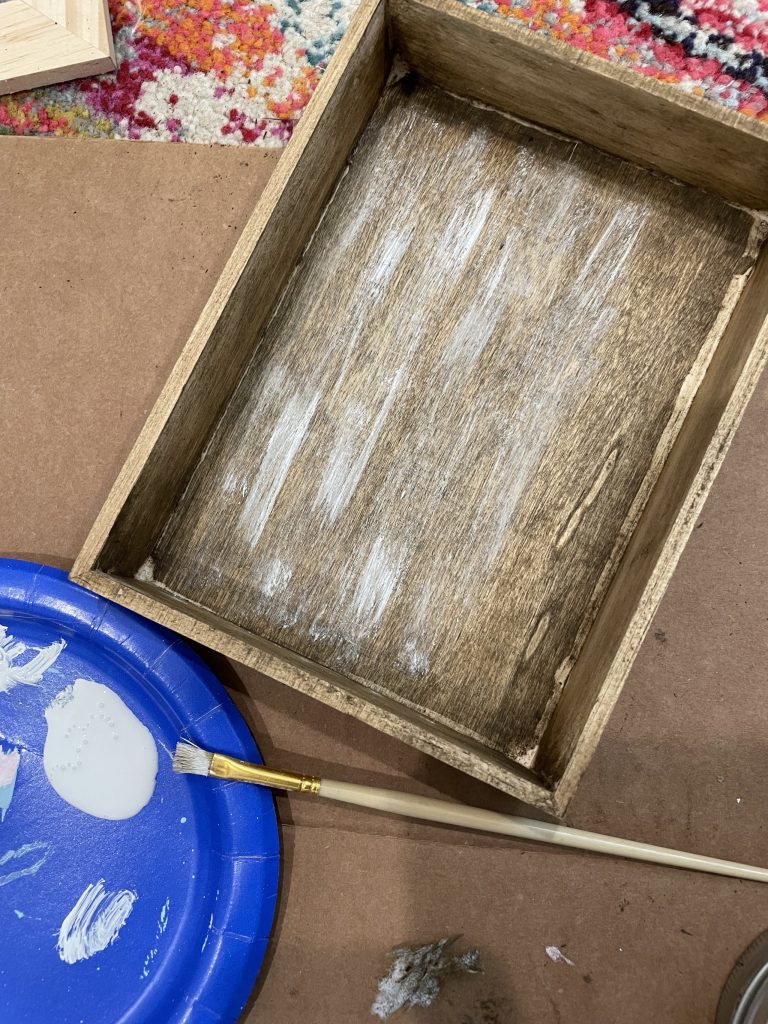
Since this is technically a Christmas background… I wanted to add some “flurries” in here! I basically just barely white-washed right over the stain.
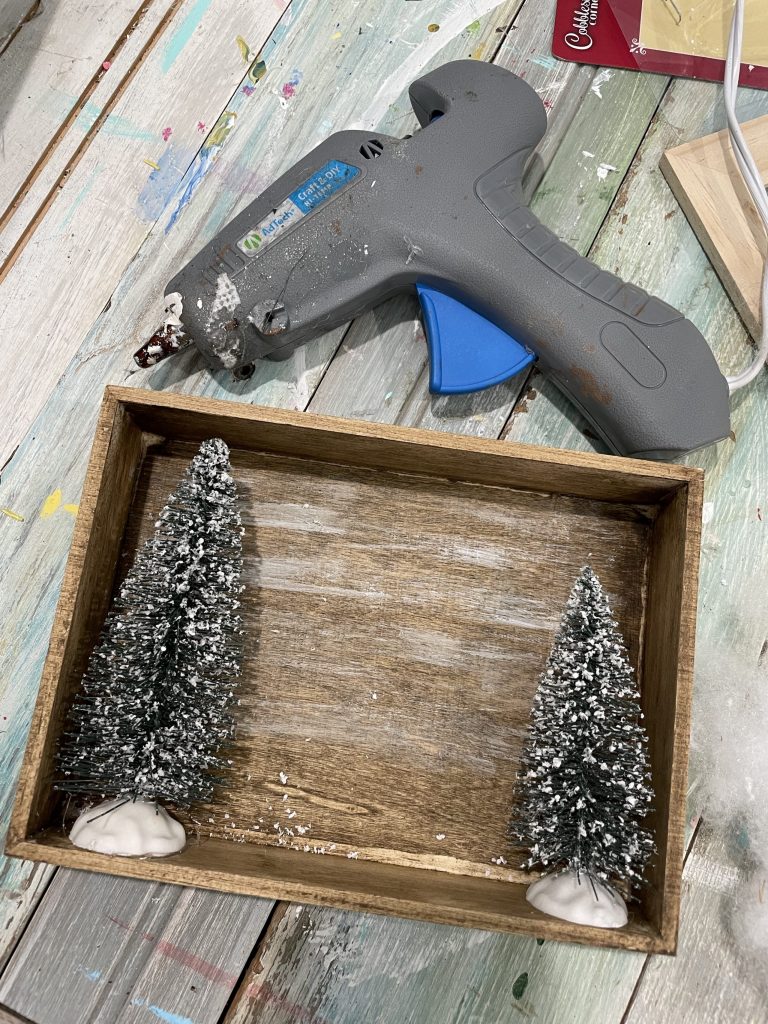
The next thing I did was hot glue my bottle brush trees down! These came in a 2-pack from Dollar Tree.
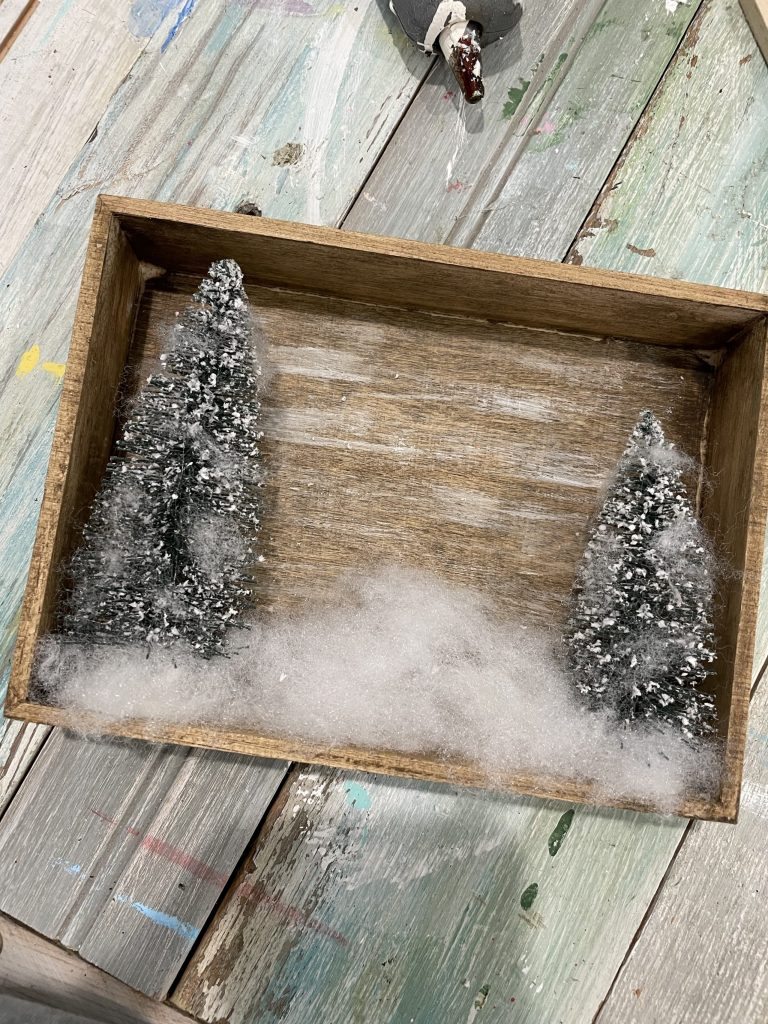
Add some fake snow right in the center between the trees! I kept some fake snow on hand from last year, but you could totally use cotton balls, pillow stuffing… anything that is white and fluffy!
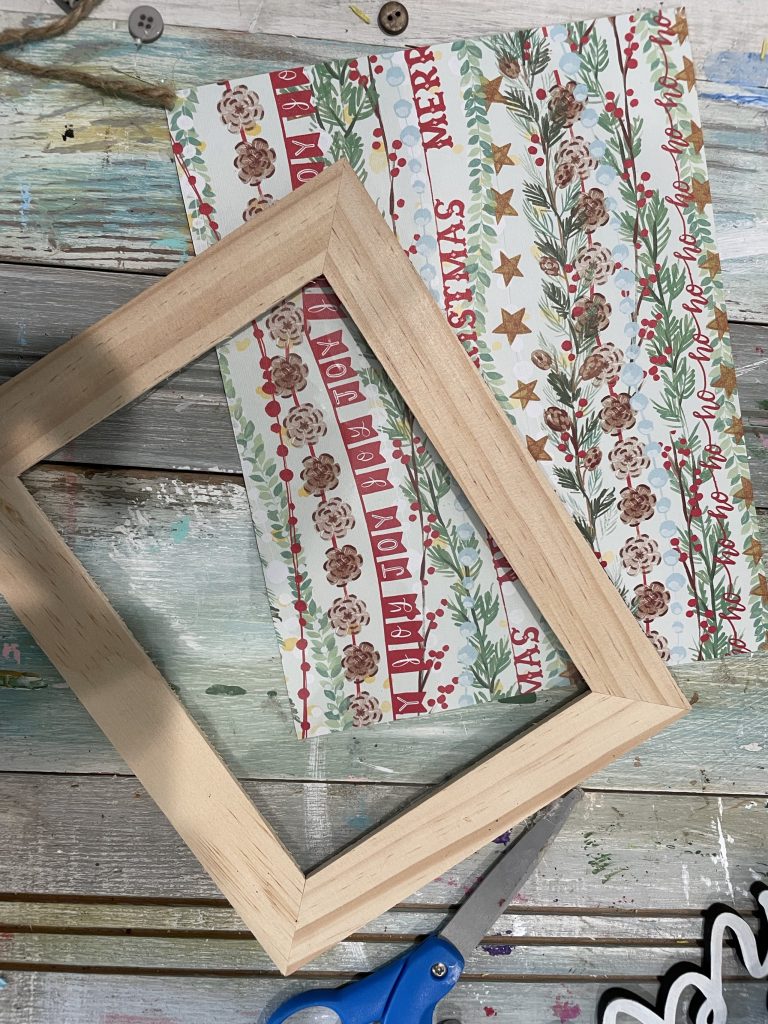
Let’s work on the top part of the frame! I picked out this fun Christmas scrapbook paper from Hobby Lobby, and cut it down to fit my frame.
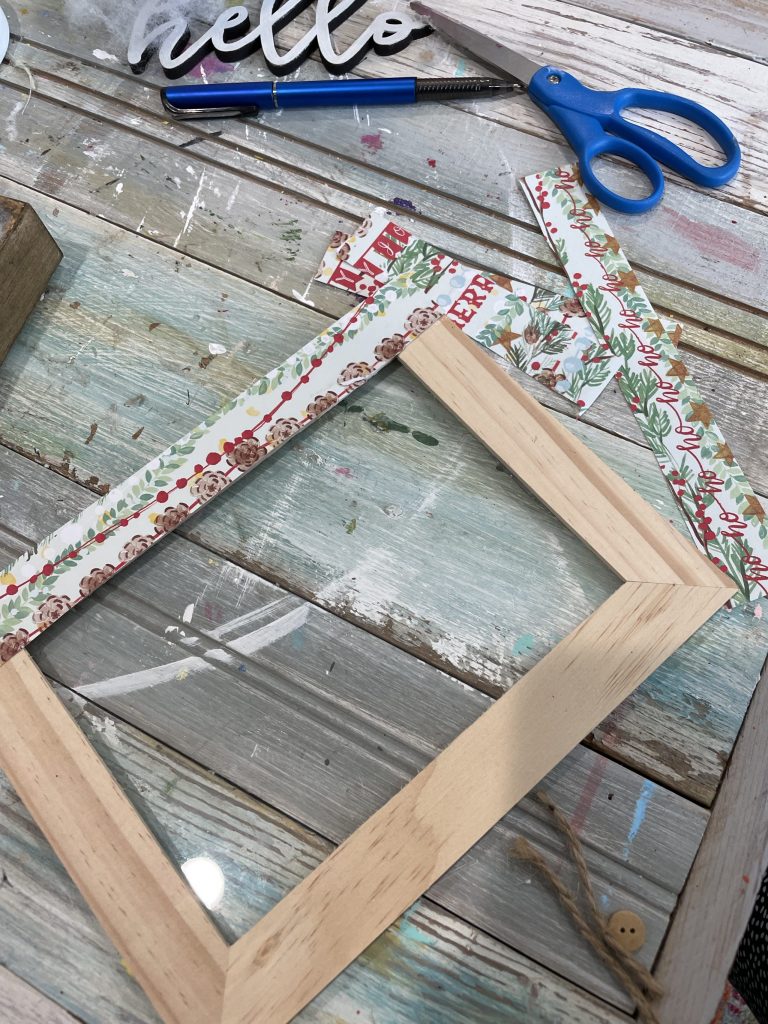
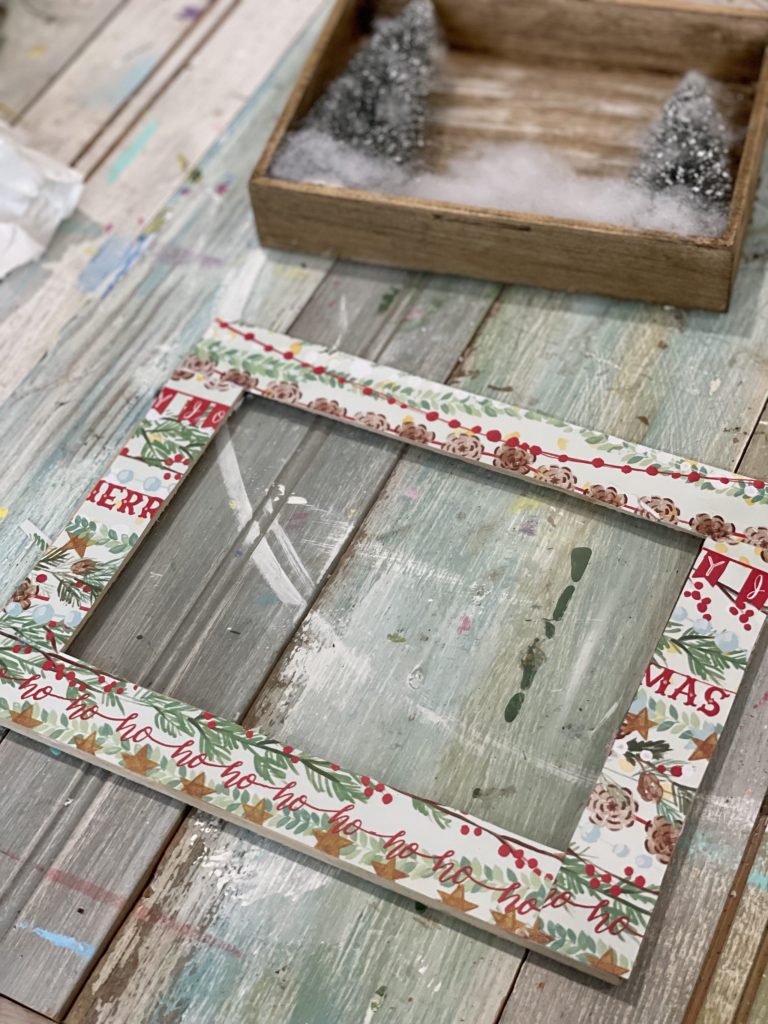
Mod podge your pieces on!
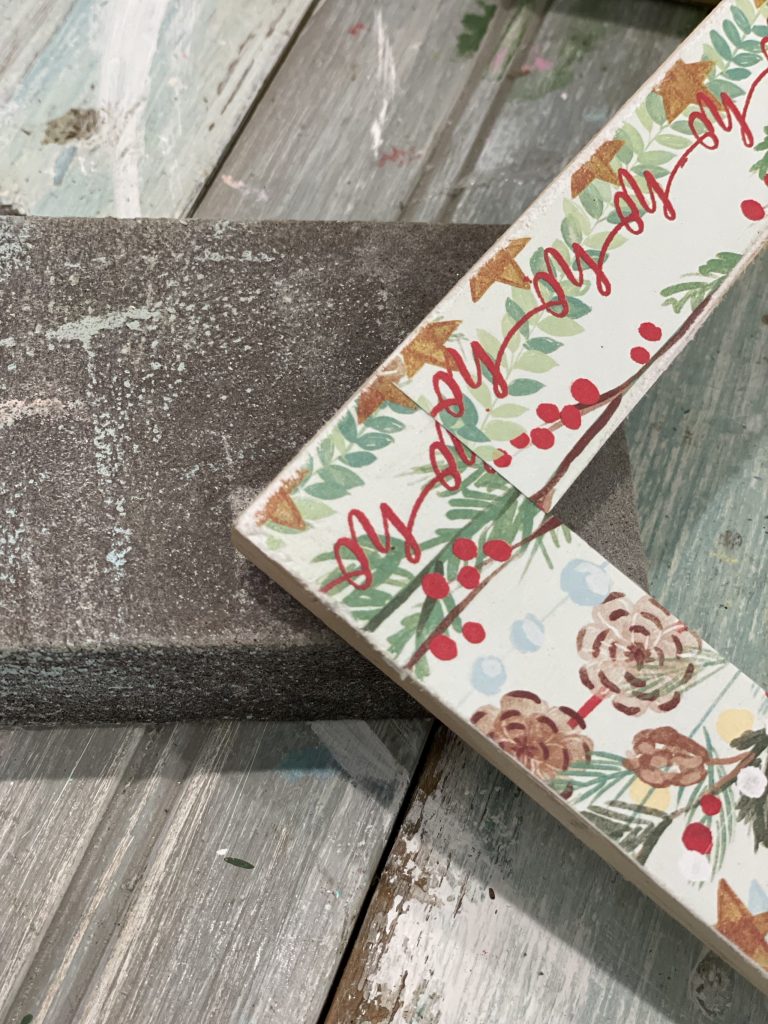
I think this step is super important! Sand down the edges of your paper to help make it look more “finished”.
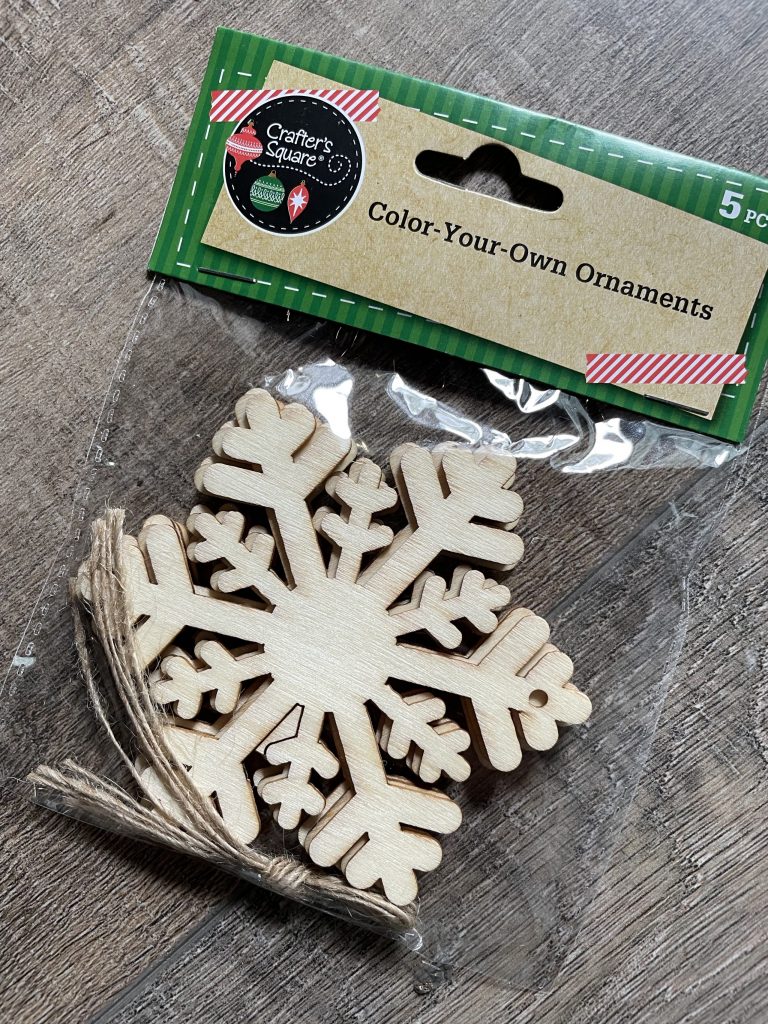
I found this pack of 5 wooden snowflakes from Dollar Tree last year- and thought it would be the perfect addition to inside this shadow box!
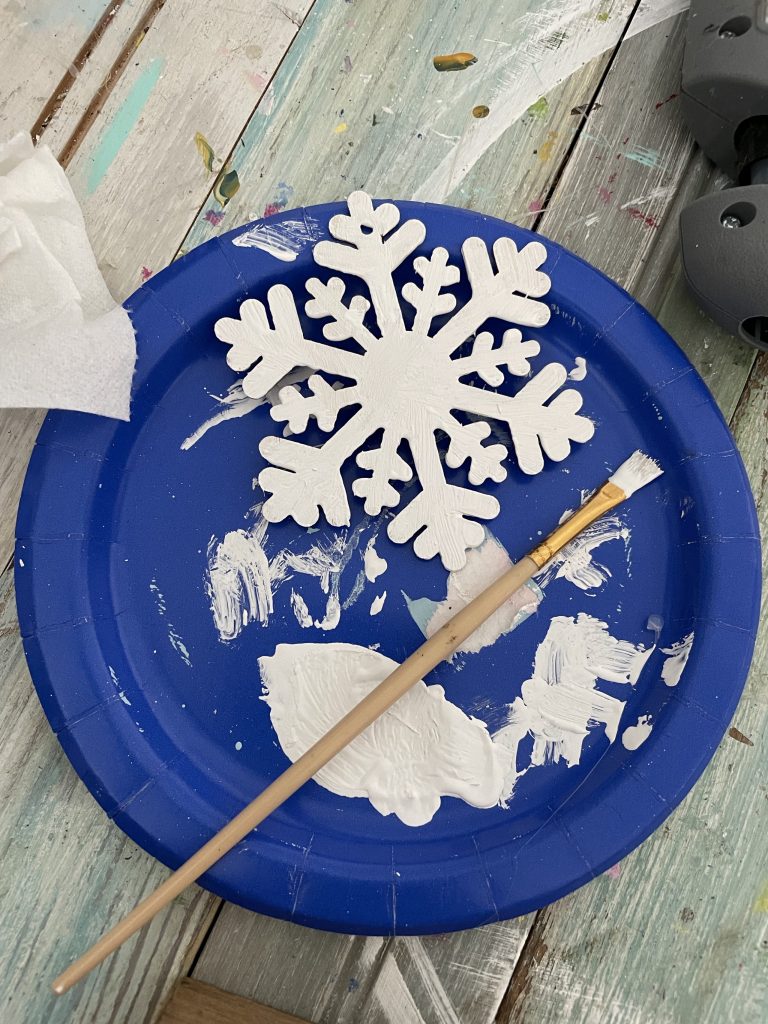
I painted it white, and hot glued it to the inside of my shadow box!
I also stuck two tiny red ornaments in there as well, to give a pop of color!
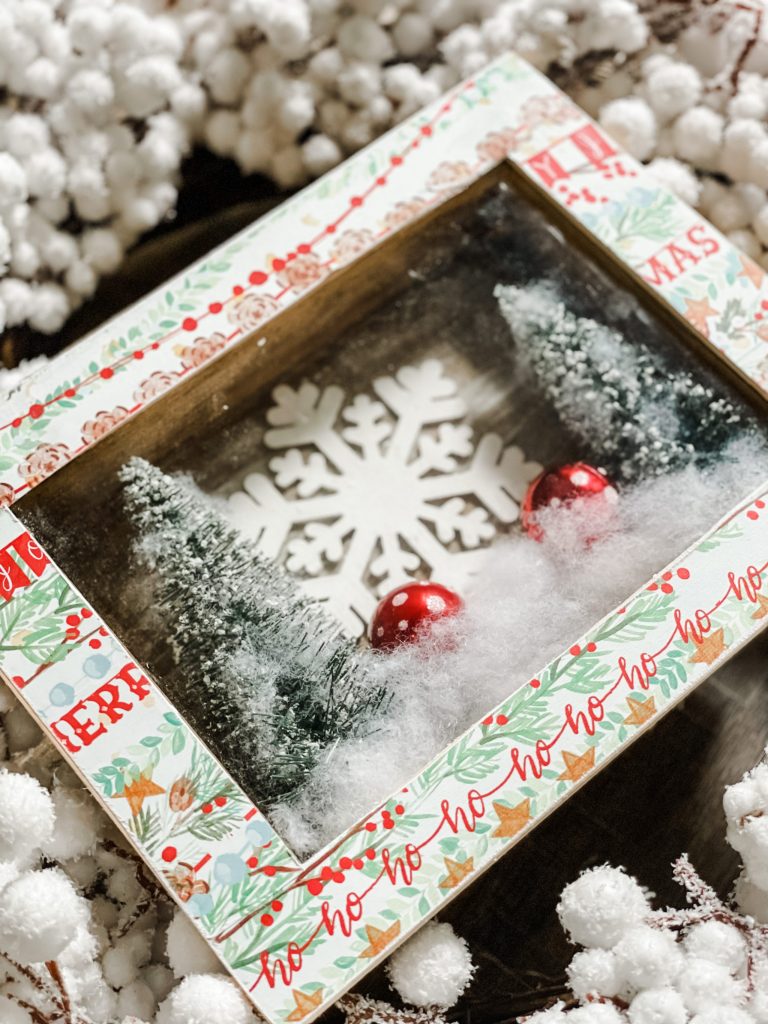
I think it turned out just perfect… and not to mention all the many ways you can make this your own!!!!
I am a HUGE fan of using bottle brush trees during Christmas!! Check out some of my other bottle brush tree projects down below! *click on the image to go straight to the tutorial!*
BE SURE TO PIN!


Last Updated on July 1, 2021

Am new to this. Love your shadow boxes. Wish I had seen them earlier. Oh well, there is always next year! Thanks so much for all the info you give.