There is nothing more fun than a quick and easy upholstery project! Well, maybe I should change my wording on that. I said quick, and this was actually not quick this time. It was totally MY mistake- which I learned from! (Don’t you love learning moments! ugh!!) But typically, a project like this is fast and very easy- and it will be for you if you learn from my mishaps! 🙂
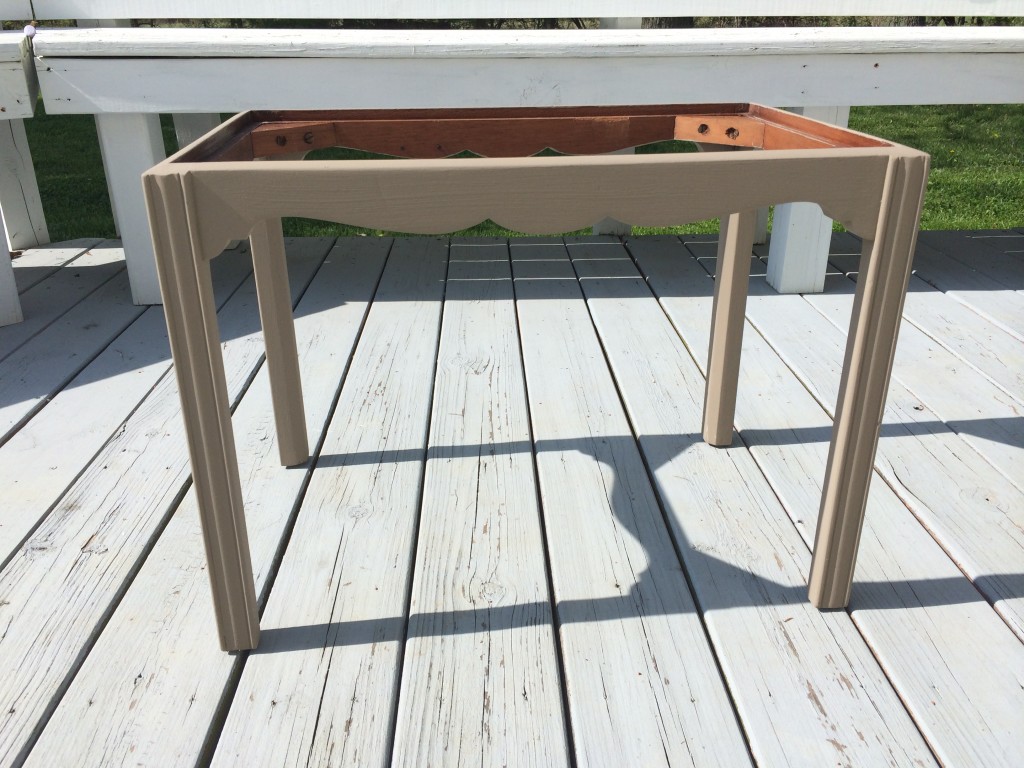
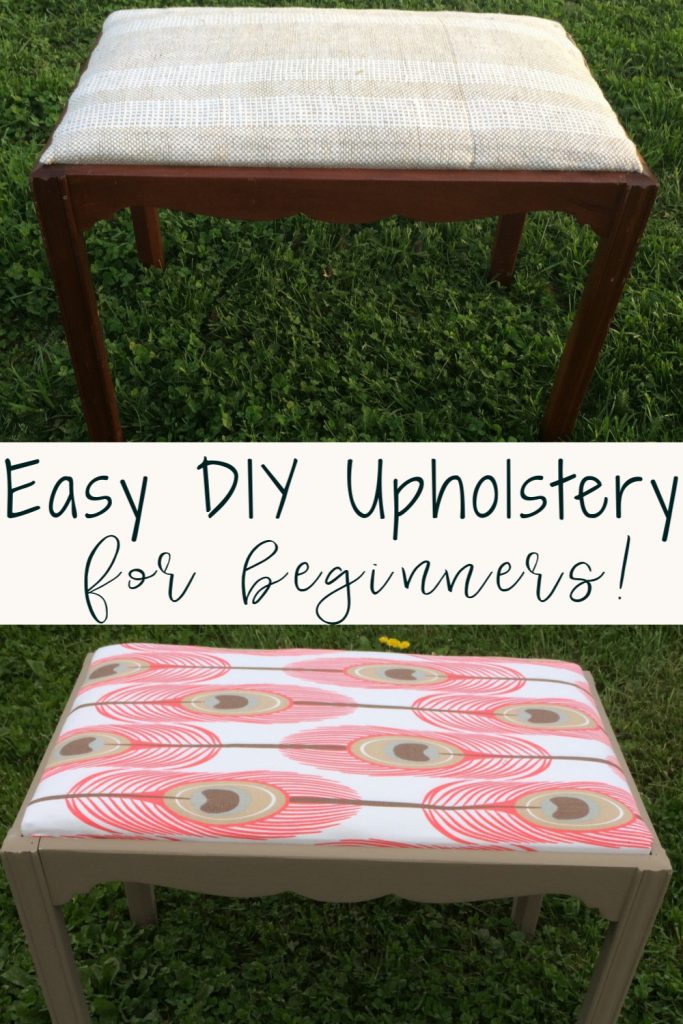
This bench was an eye sore, much like most of the projects I choose to work on. I found it in a flea market for around $15 (I don’t remember exactly)…and it was kind of hidden under a pile of junk. I saw potential immediately, so I grabbed it up and took it home.

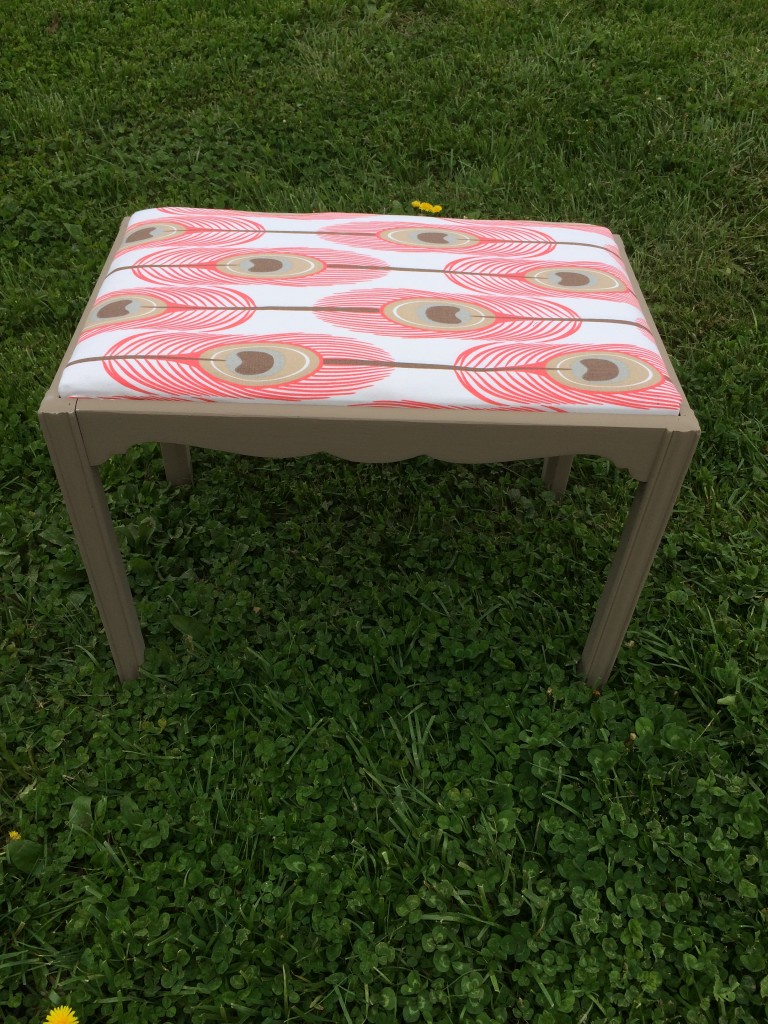
I liked the curvature alot, and I knew that to make this a super cute piece, all I needed was a little paint (would not take much at all) and some unique fabric.
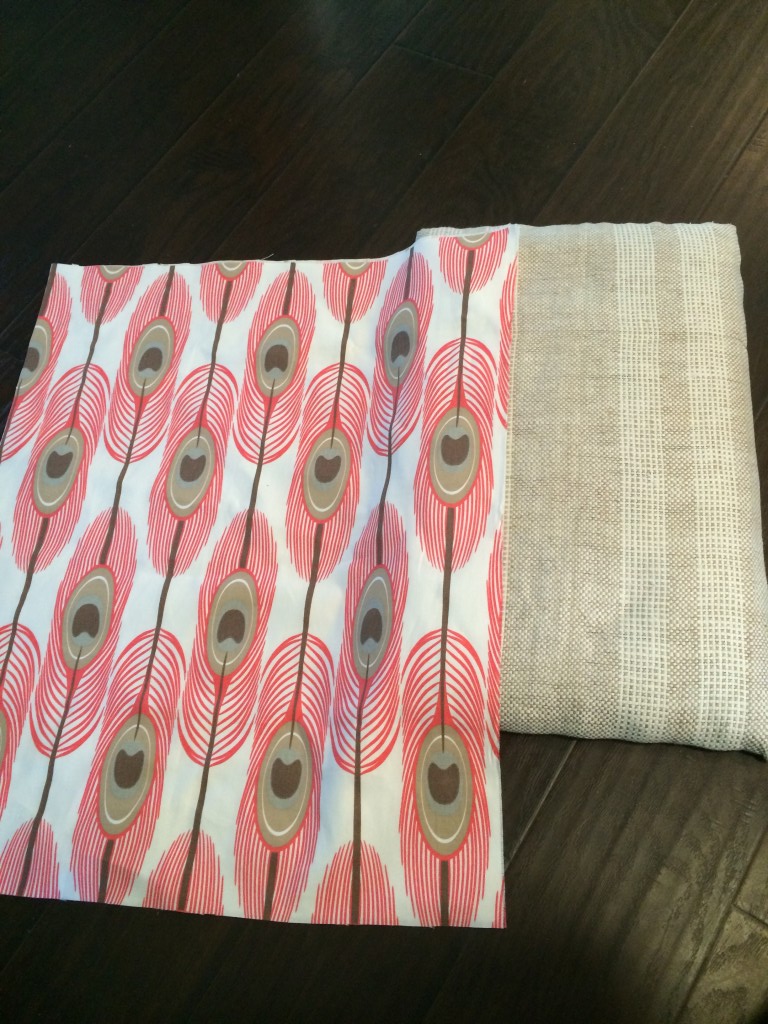
I went to Hobby Lobby and found some awesome fabric! It only cost me about $3.00 for half a yard…and I had some paint at home that would match perfectly~*Vintage Market & Design chalk paint in Taupe! (Jackpot!!)
First, I removed the seat by unscrewing the hundreds (that’s what it seemed like at the time) of screws. I then painted the wooden portion of the bench. This took 2 coats. *Something you should know about chalk paint is that it covers VERY well, and it dries REALLY fast! Sometimes you can even get by with just 1 coat! That is one of the many reasons it is so popular.
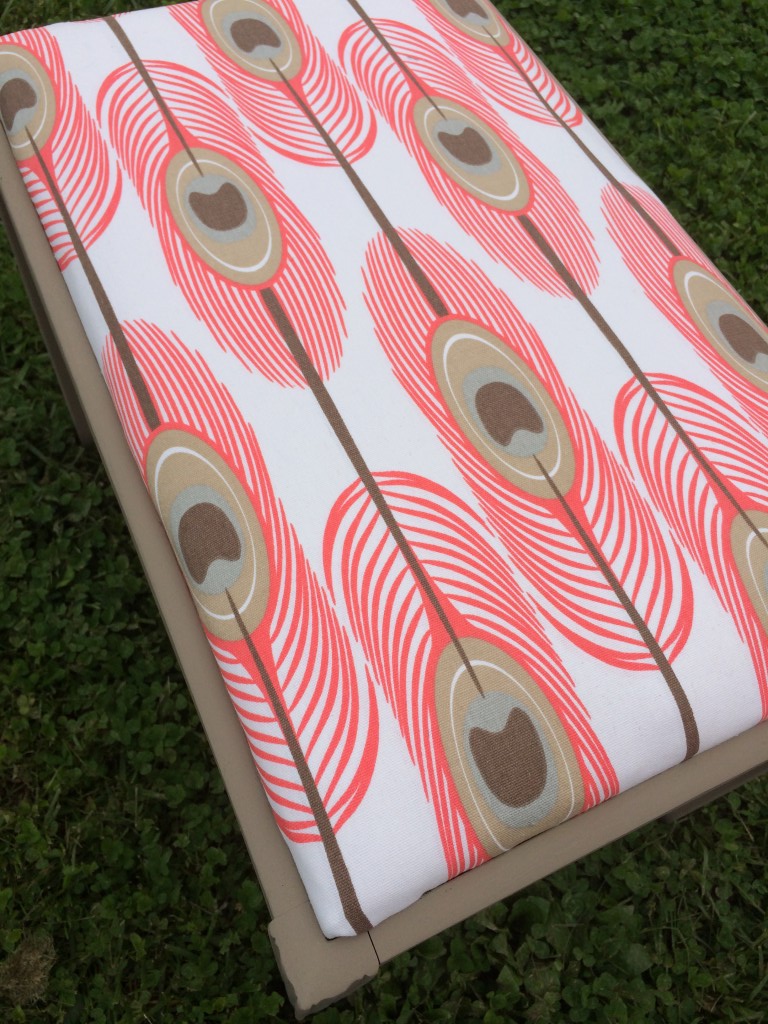
Isn’t this the cutest fabric ever?!
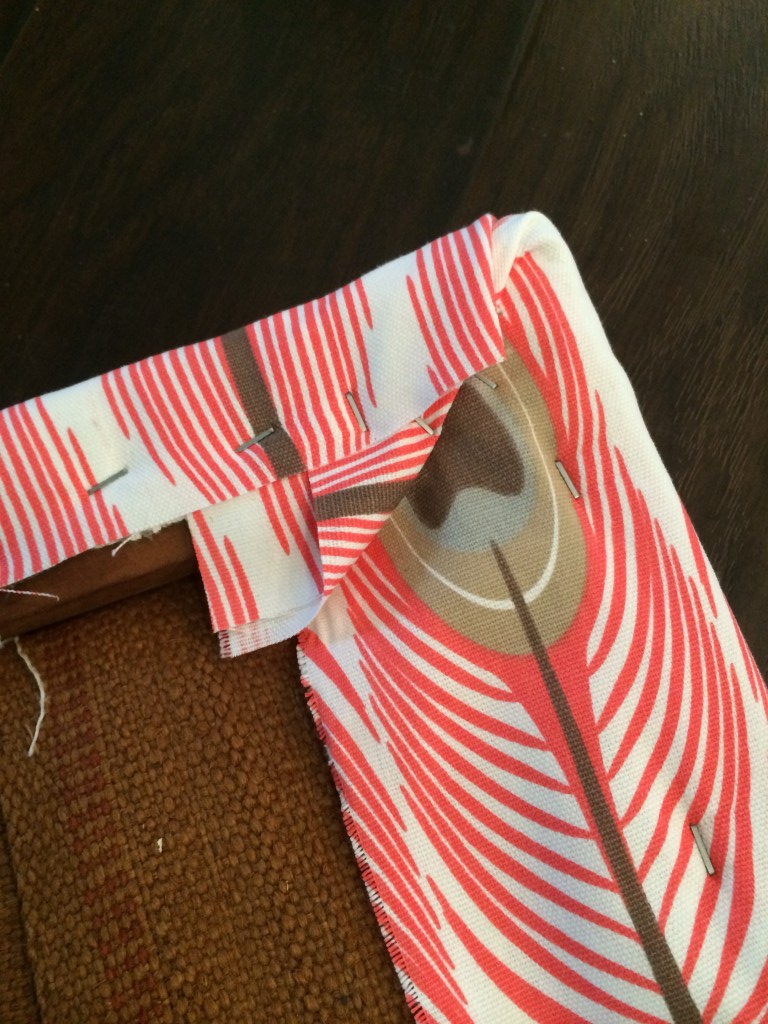
Once I had the seat removed and the wood painted, I started the upholstery portion. THIS is where I boo-boo’d at first. It took me double the time because of it, so LEARN FROM ME!
I thought that since the existing seat was only covered in a “thin” layer of fabric, I would just re-cover it without taking the existing off. Wrong answer! (*There ARE times when I do this, and it is perfectly fine- but not in this case)
When I covered the existing fabric, everything looked just dandy…and I thought- Wow! That was simple and fast! THEN I started trying to get it back into the bench. There is a little lip in the wood where the seat fits INTO- not on TOP OF…and when I tried to get it in there, it would not go. It was too thick with all the fabrics. Soooo….I had to remove all the staples and start over- this time removing the previous fabric- which turned out to be 2 more layers and A LOT MORE STAPLES! Arghhhh!!! (Forgot to take a picture of the layers!)
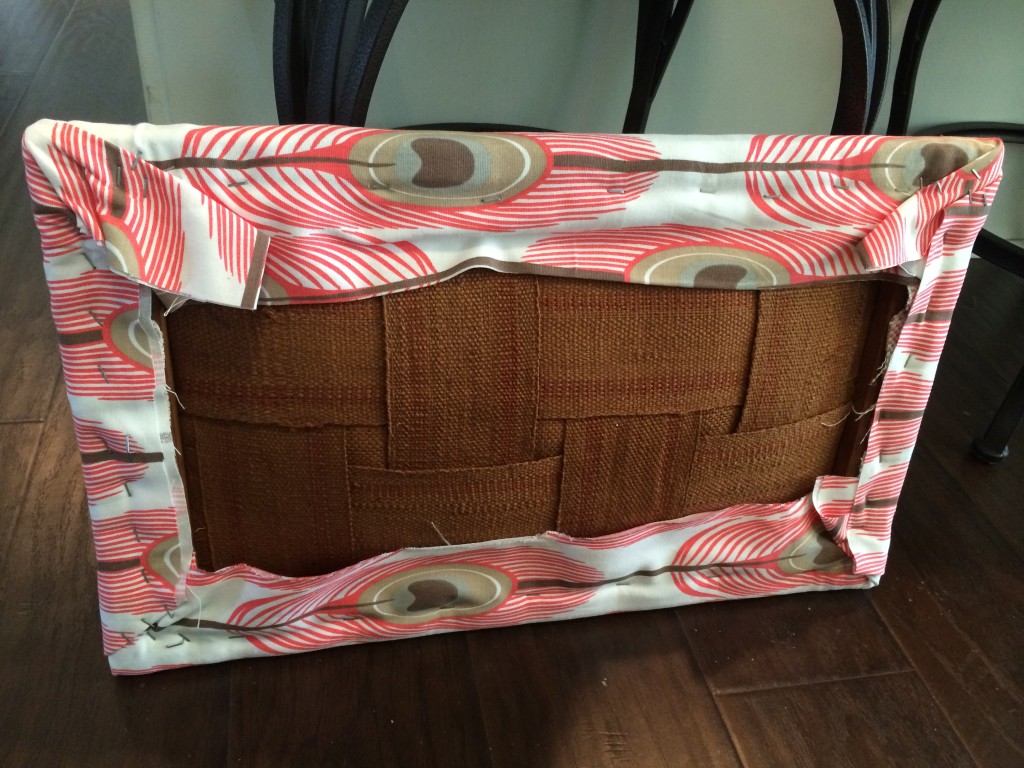
When finished with that, which would not have been as bad if I had done it first…I was ready to recover a second time. For anyone who has never re-covered a seat, you need to make sure to get the material as tight as you can around the edges so that it doesn’t bulk up. Staples are your friend! Go staple crazy. It does not matter at all what the bottom part looks like because you will not see it, of course!
Now came the fun part (again)~ putting the seat on, screwing it back on…and my favorite part~ seeing the finished product!
I was thrilled with how it turned out! Such a cute piece! Even with the extra time involved, it only took me about 2 hours total and approximately $20 (piece and all materials)! Can’t beat that.
PIN FOR LATER!
Be sure you are following along on Social Media and by Email (the ONLY way you will see ALL of my posts!)
Facebook/Instagram/Pinterest/Email
Last Updated on February 17, 2020

beautiful projects. Going to try this on my gold frame. Thank you!
Thank you! Let me know how it turns out!
Your choice in fabric is perfection! What a beautiful transformation!
That fabric had me at first glance! I will definitely be getting some more when it is time to do a project that I will be keeping! Thank you!
Love it! My daughter and I just recovered a bench too. It had 3 layers of fabric with soooo many staples! What a pain! But it sure looked good in the end! If you would like to see it, you can visit us at http://homeonthecorner.com/2015/04/20/the-great-reveal-ugly-april-makeover-challenge/. Thanks for sharing your cute idea!
Thank you! I appreciate your compliment!
Great job on the bench! Looks totally different and great!
Ohh love the fabric choice with the paint nice pairing, What a cute little piece Brooke!
Thank you so much, Brenda! I love that fabric too 🙂
This turned out so cute. The fabric is so fun, and the tutorial is so easy to follow! Congrats on being featured at Totally Terrific Tuesday 🙂
Hope you have a great week!
Jess
Thank you so much! I sure appreciate the feature 🙂 You have a great week as well.
Love the fabric you selected. Total transformation! Visiting from The DIY Collective.
Thank you so much! I loved that fabric too! So glad you came to join us!
I had a piano set I covered first I used hot glue to get where I wanted then I stapled it maybe it stay on good
It turned pretty I think I use it as vanity stool
Blk white check I have a white comforter
I just love it
Looks great!
Thank you!!!
Love the makeover.
Thank you!!! ❤️
I love your fabric choice!
Thank you!