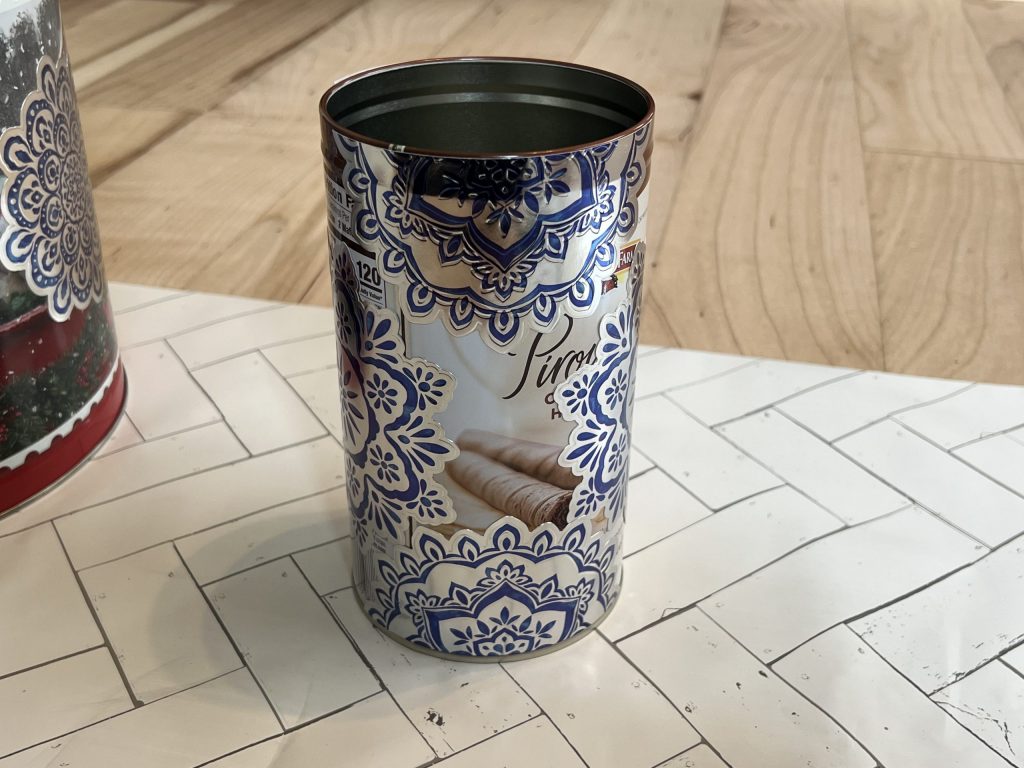
We all either have them or have seen them at Christmastime in stores…popcorn and candy tins! They are cute and serve a purpose, but what in the world do you do with them after the popcorn is gone?!
I hate to throw them away, but I really don’t need a Christmas themed tin canister hanging out around my house. I finally decided it was time to get creative and repurpose some tins I had. You won’t believe the transformation!
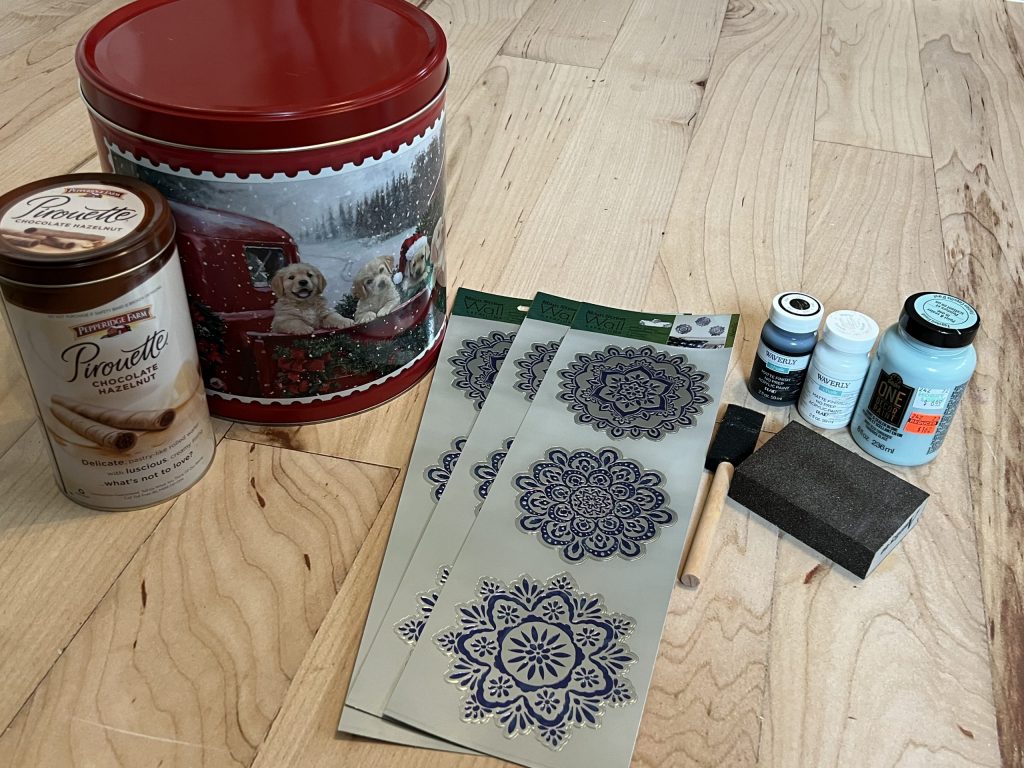
For this project, I started with the following supplies:
- Large popcorn tin
- Small tin
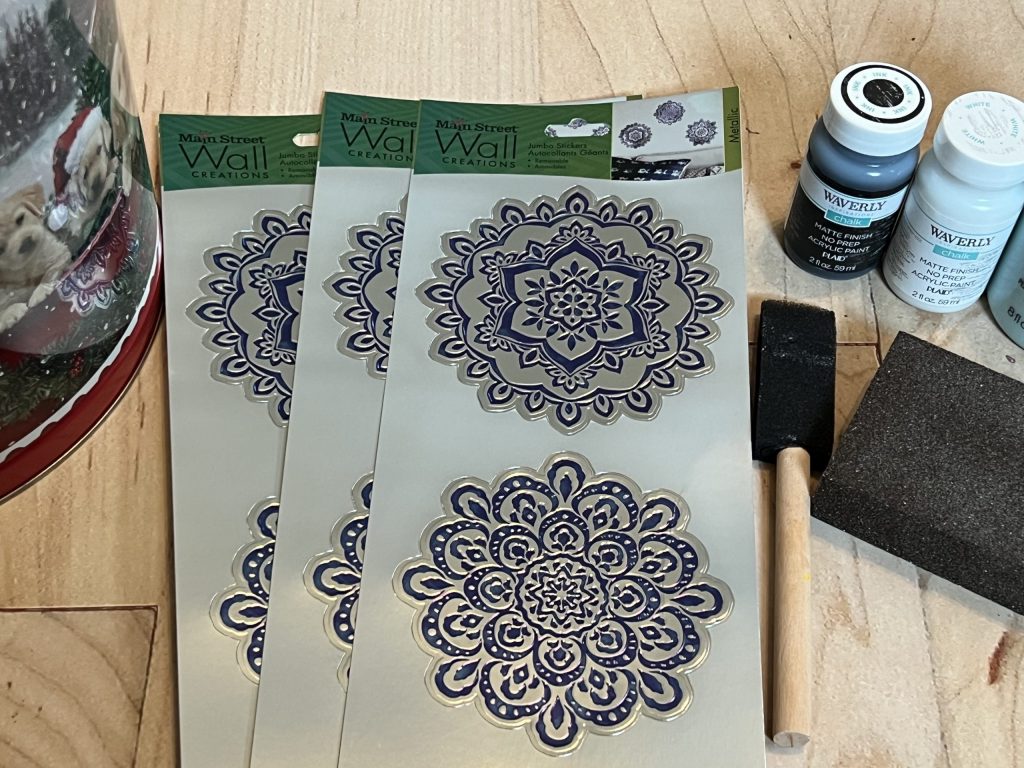
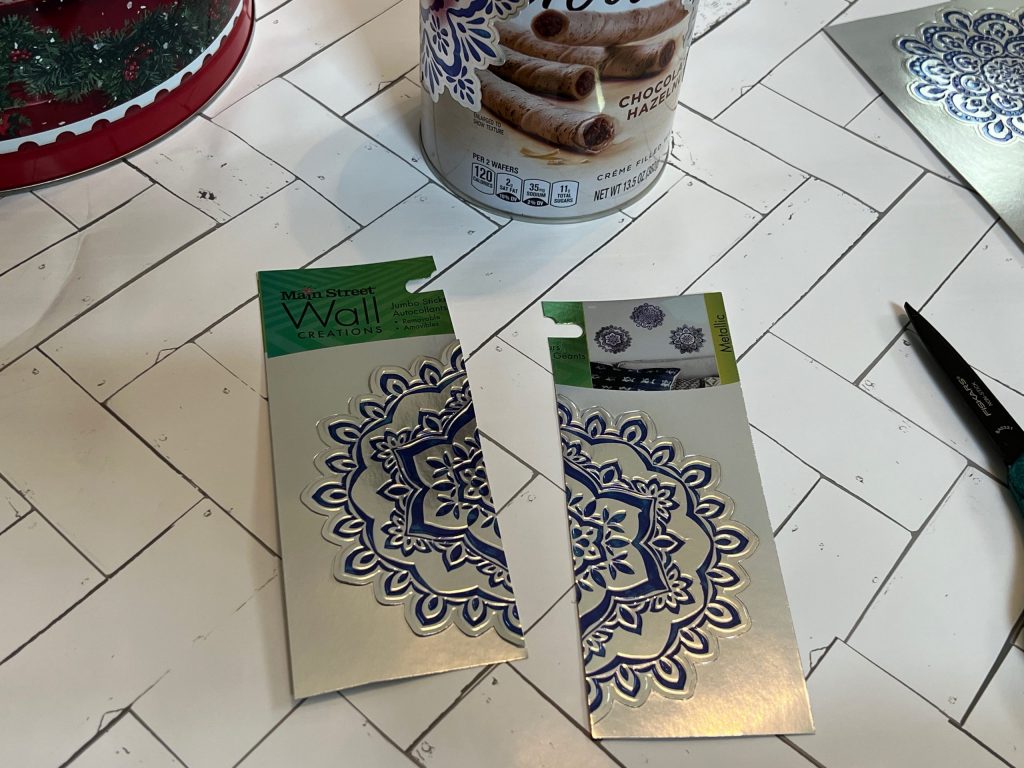
- Wall stickers – floral medallions (purchased from the Dollar Tree)
- Waverly chalk paint – Ink
- Waverly chalk paint – white
- FolkArt One Décor Paint – Iced Turquoise (purchased from Hobby Lobby)
- Sponge paintbrush
- Sanding block
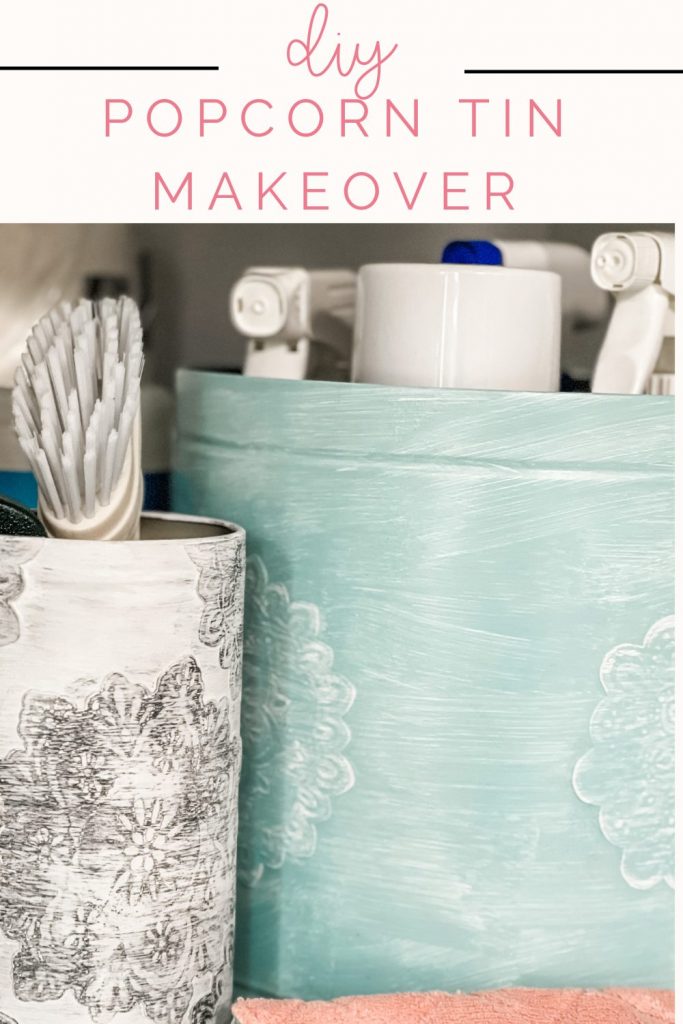
I purchased these wall stickers from the Dollar Tree, because they had a raised texture to them.
First, I cleaned the surface of the tins and then applied the wall stickers to the outside of the tins.
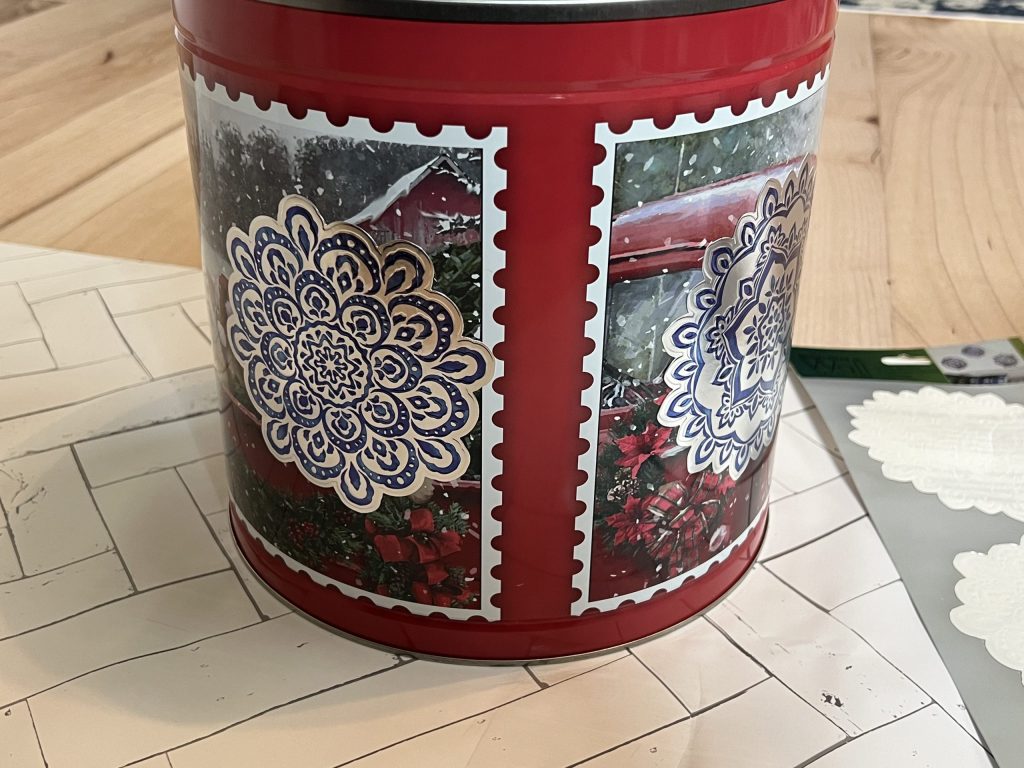
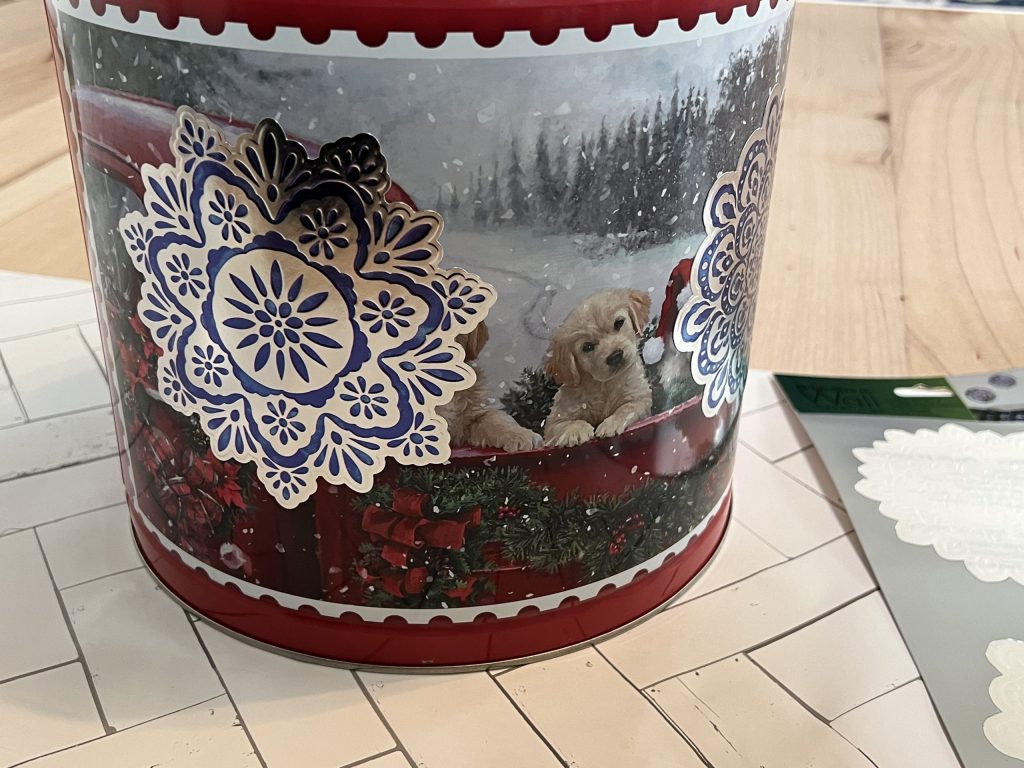
For the smaller tin, I actually cut the stickers in half and applied some of them to the top and bottom rims.
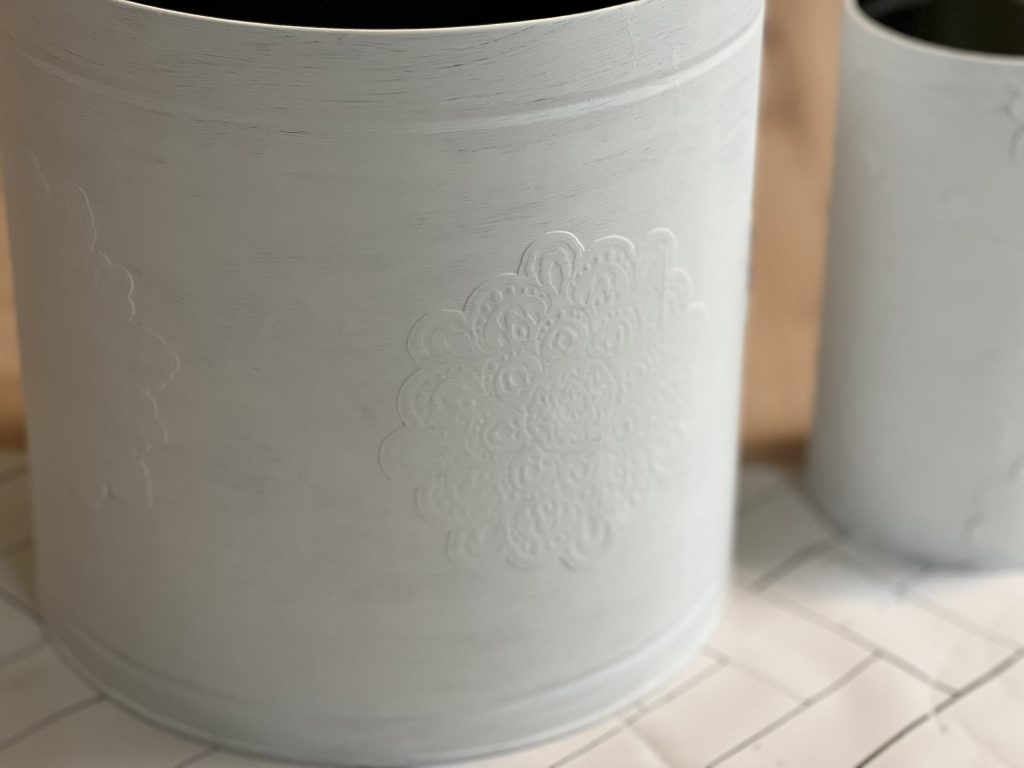
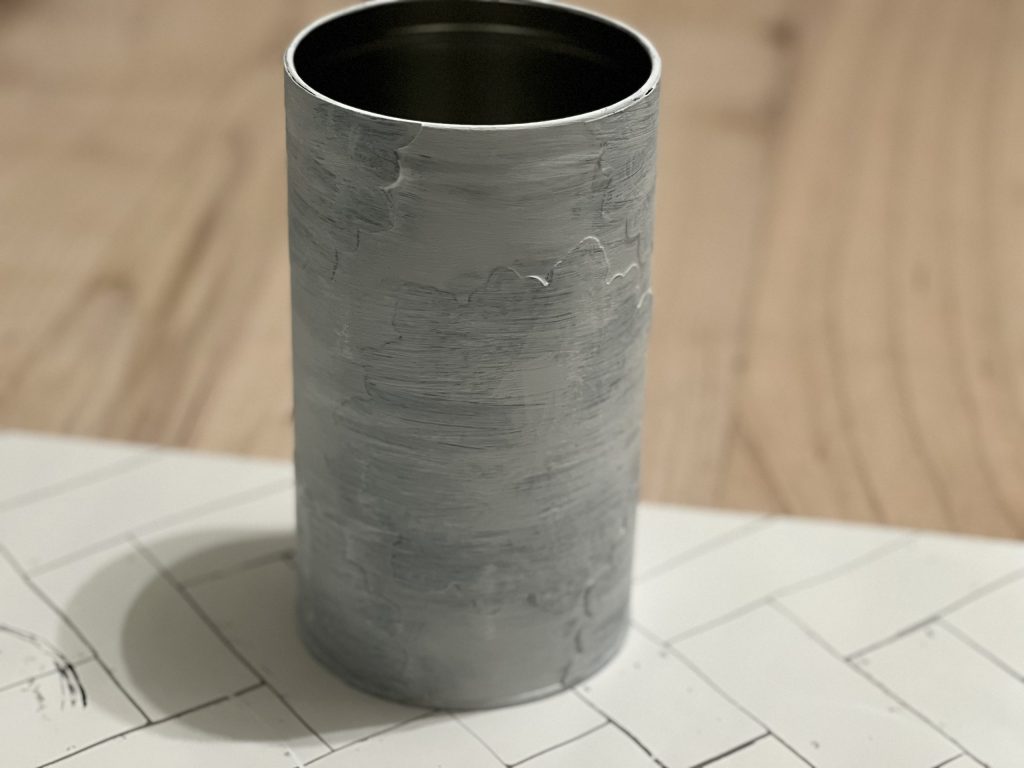
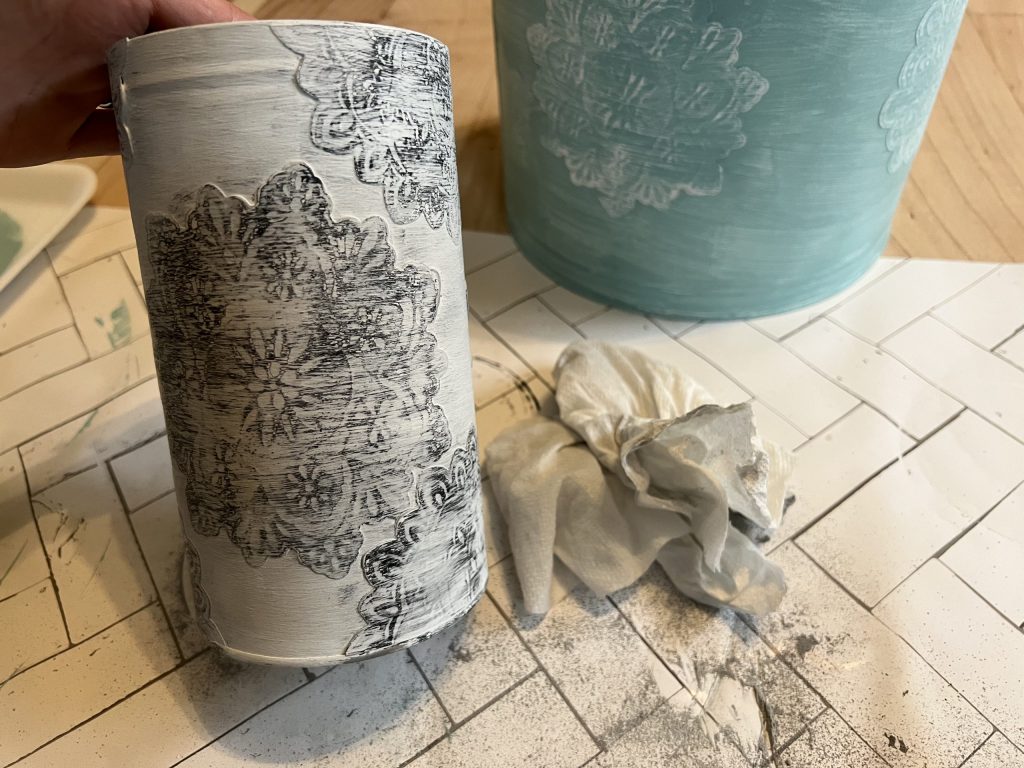
Now it was time to paint! I used the white chalk paint to paint the entire surface of both tins. You can see the texture of the stickers showing up under the paint.
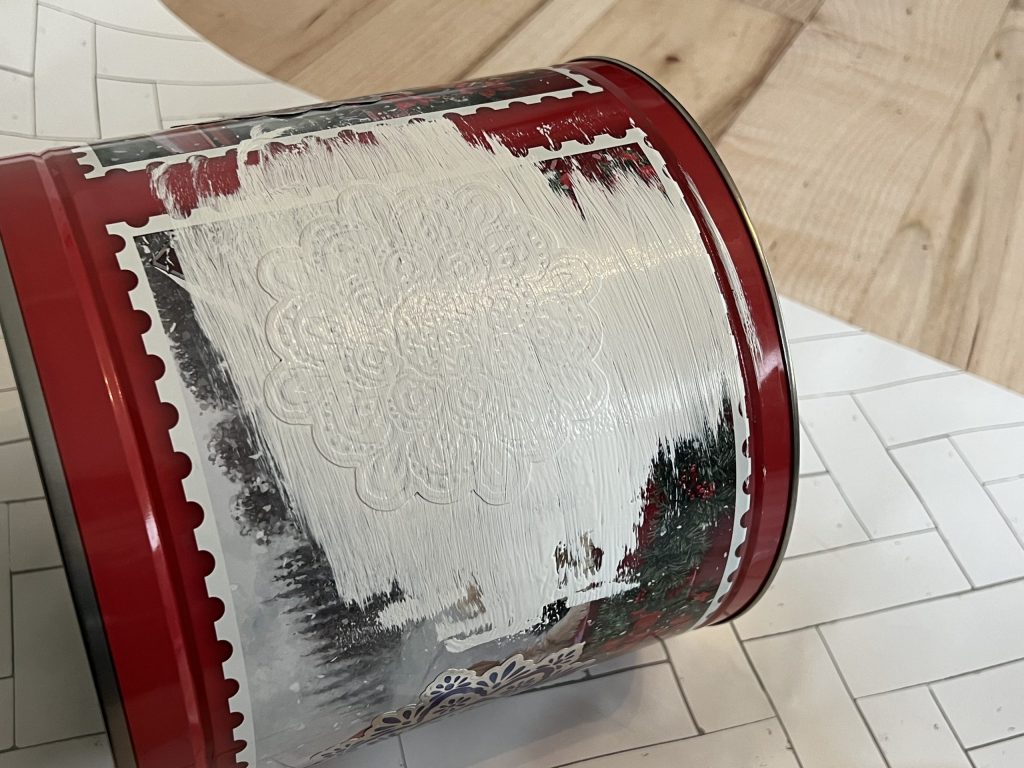

After the first layer dried, I applied a second layer to fully cover the pattern underneath.
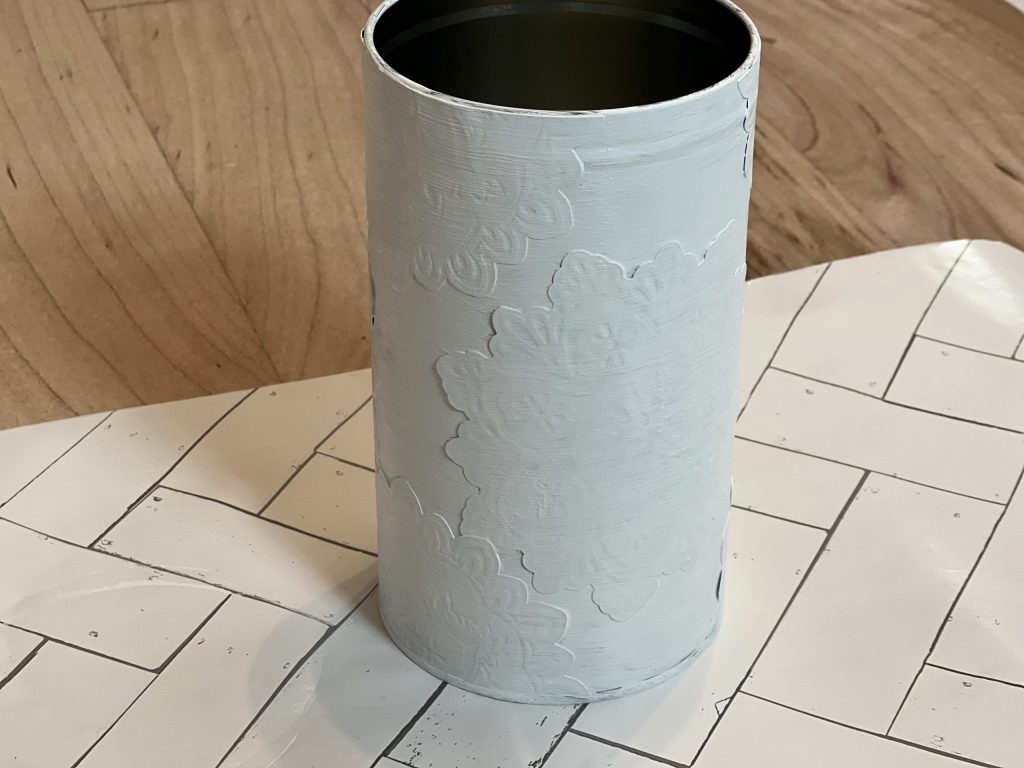
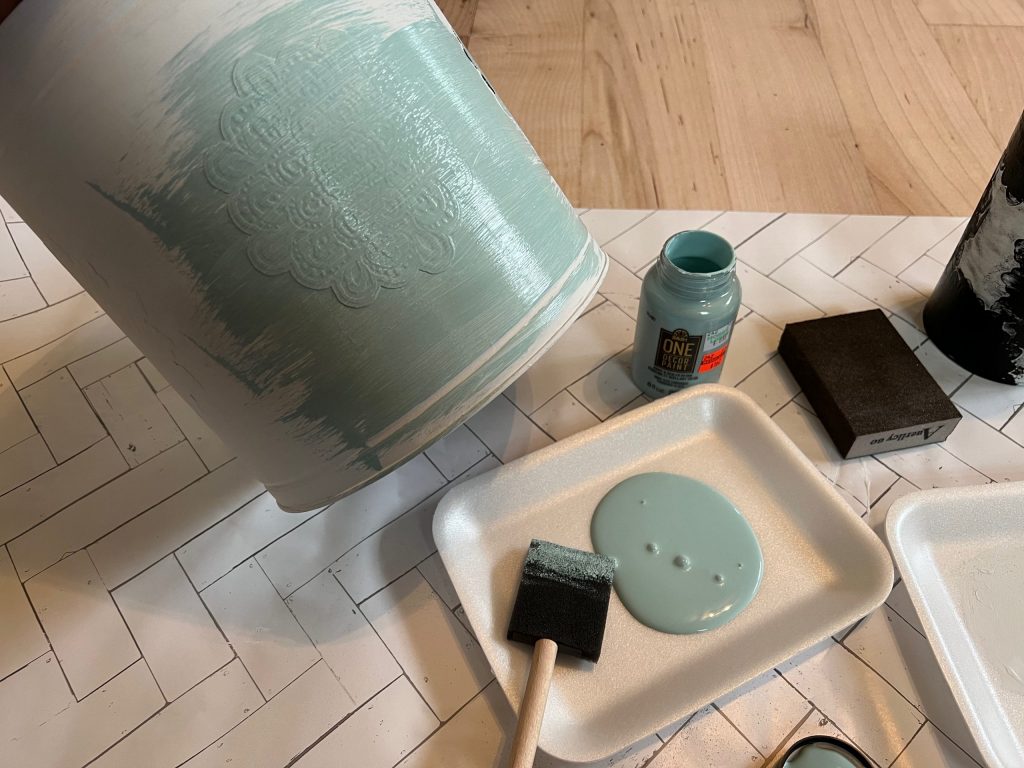
After the second layer had dried, I decided to paint each of the tins a little differently.
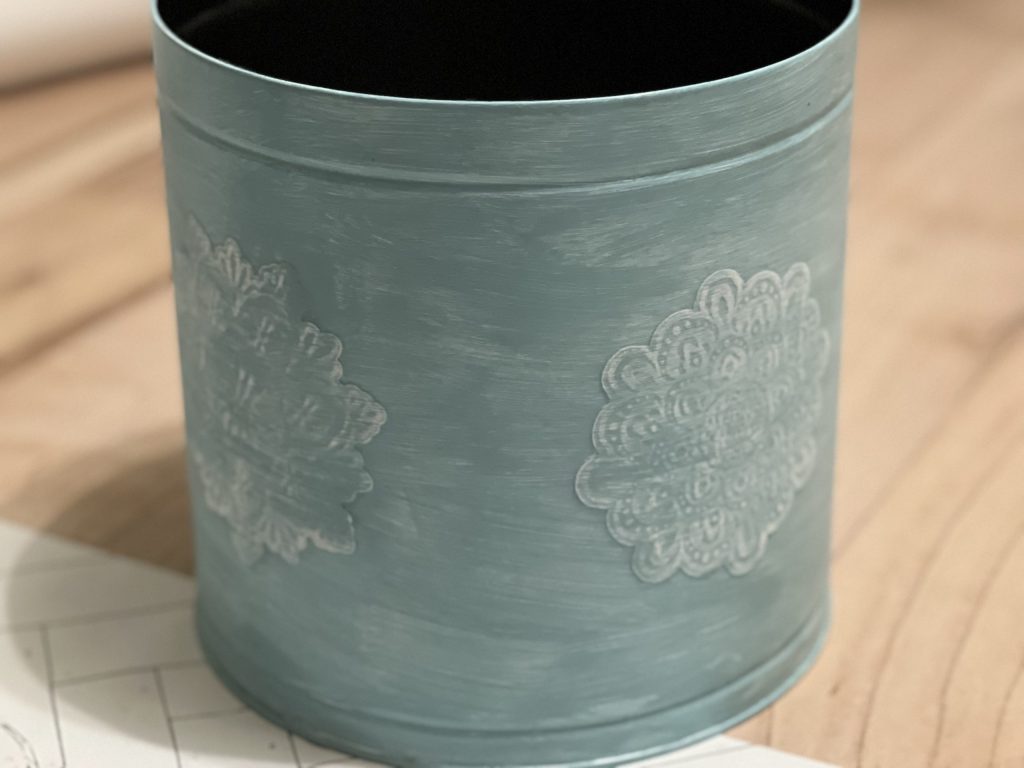
I started with the large popcorn tin and painted it with the Iced Turquoise paint color, completely covering the white.
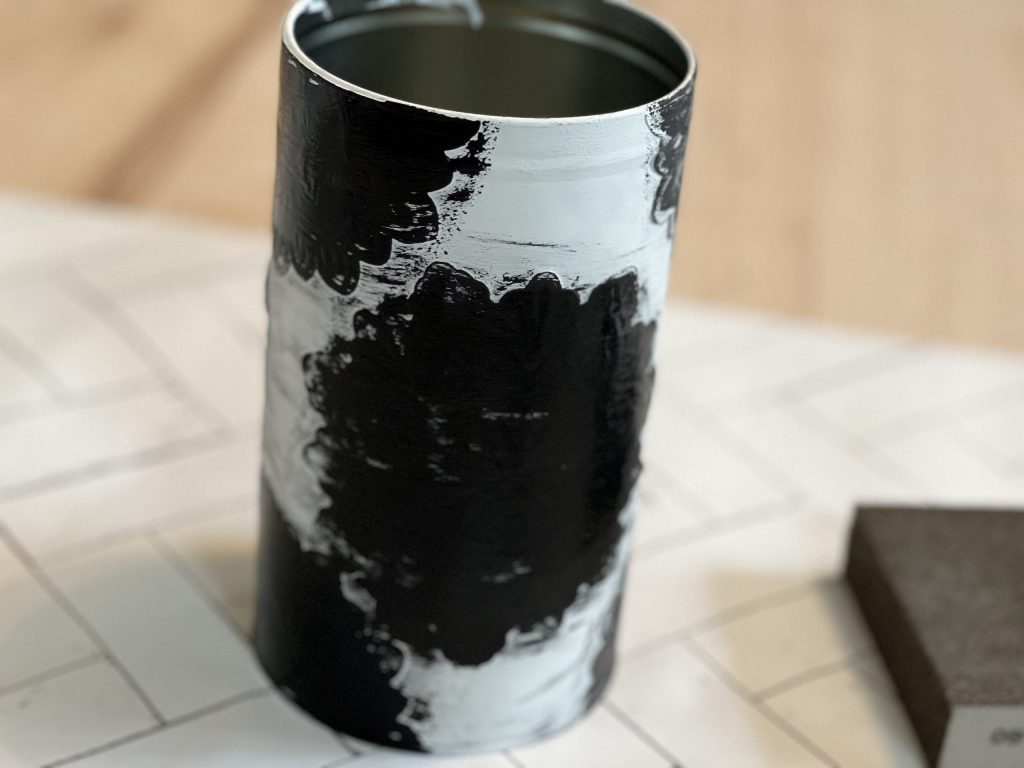
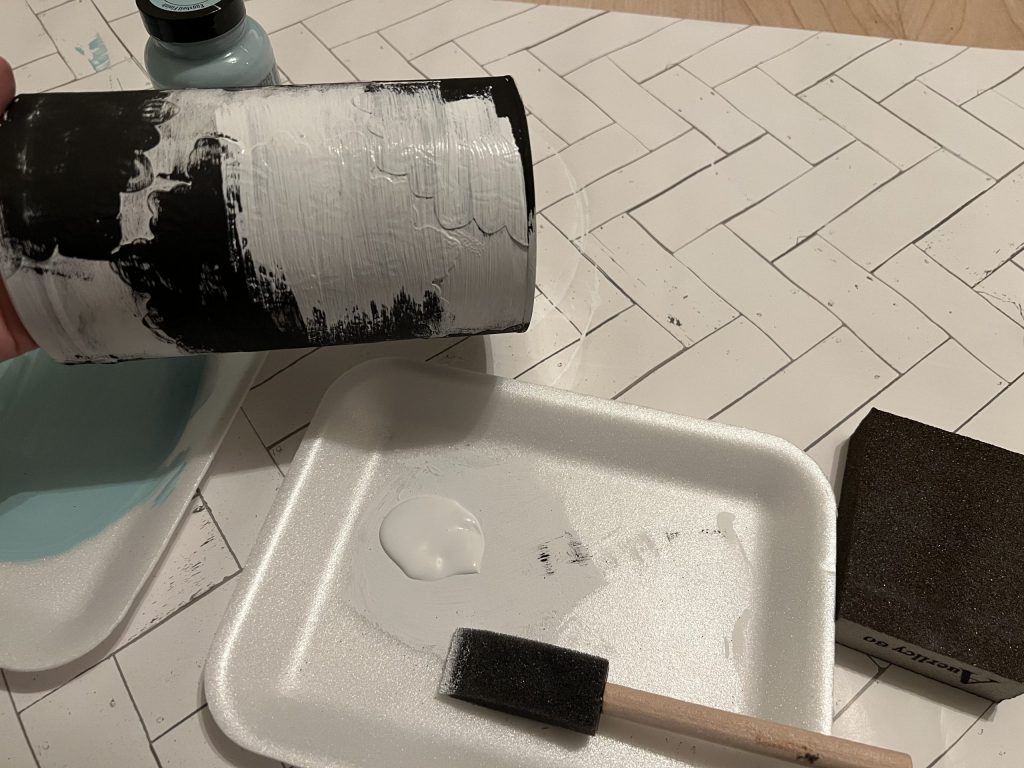
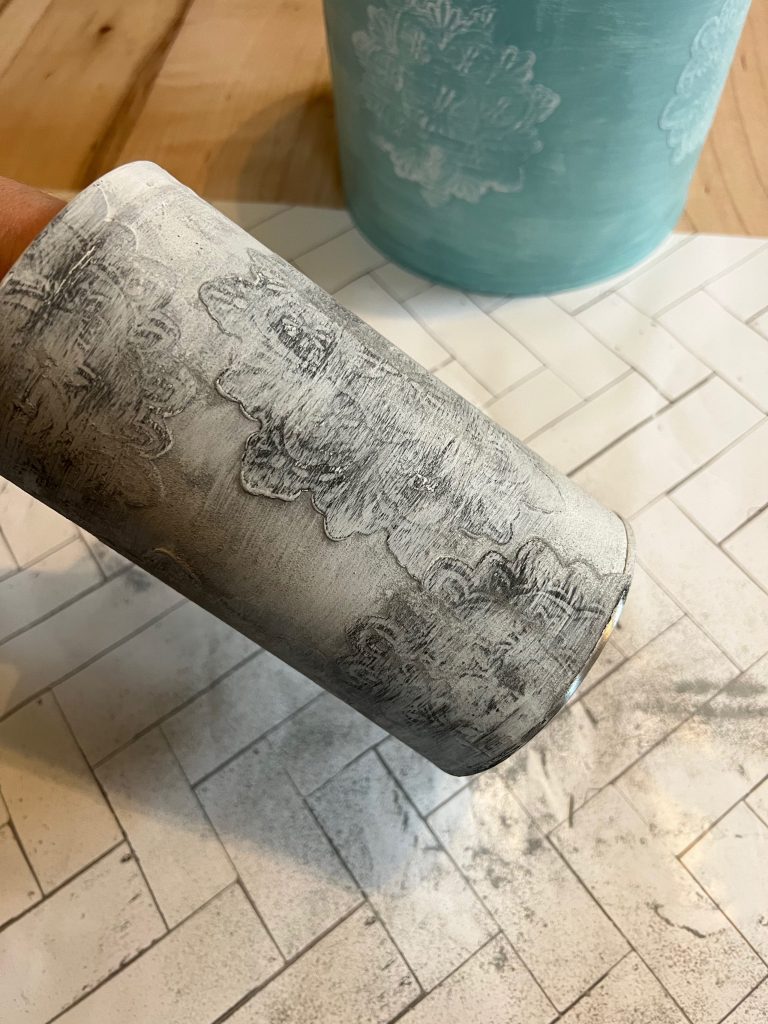
For the small tin, I painted the stickers first with the black chalk paint.
Once the black paint had dried, I went over the entire tin again with the white chalk paint. Although this seems tedious with the many layers of paint, the chalk paint dries fairly quickly, so it’s not very time consuming.
After the paint dried on both pieces, I took my sanding block and lightly sanded the tops of the stickers.
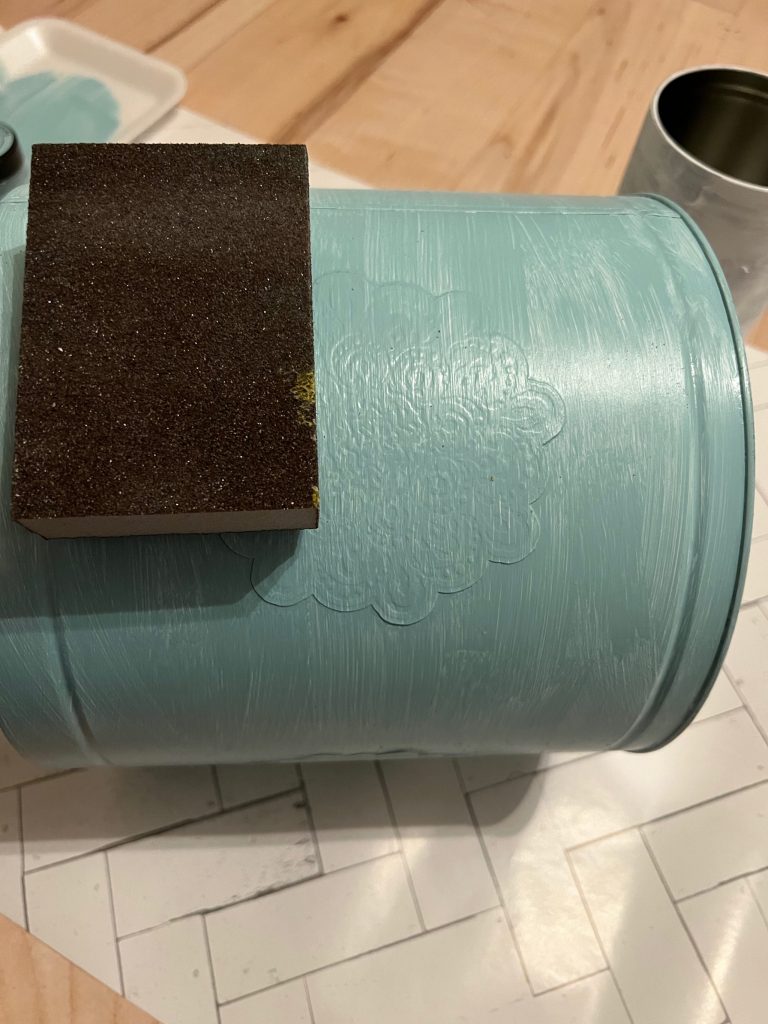
Sanding over the stickers revealed the color underneath and really brought out the texture provided by the stickers. It truly transformed the whole look of these tins!
I had to sand the smaller tin a little heavier to reveal more of the black embossing created by the stickers.
After sanding the tins, I wiped them down lightly with a damp paper towel to remove the sanding residue.
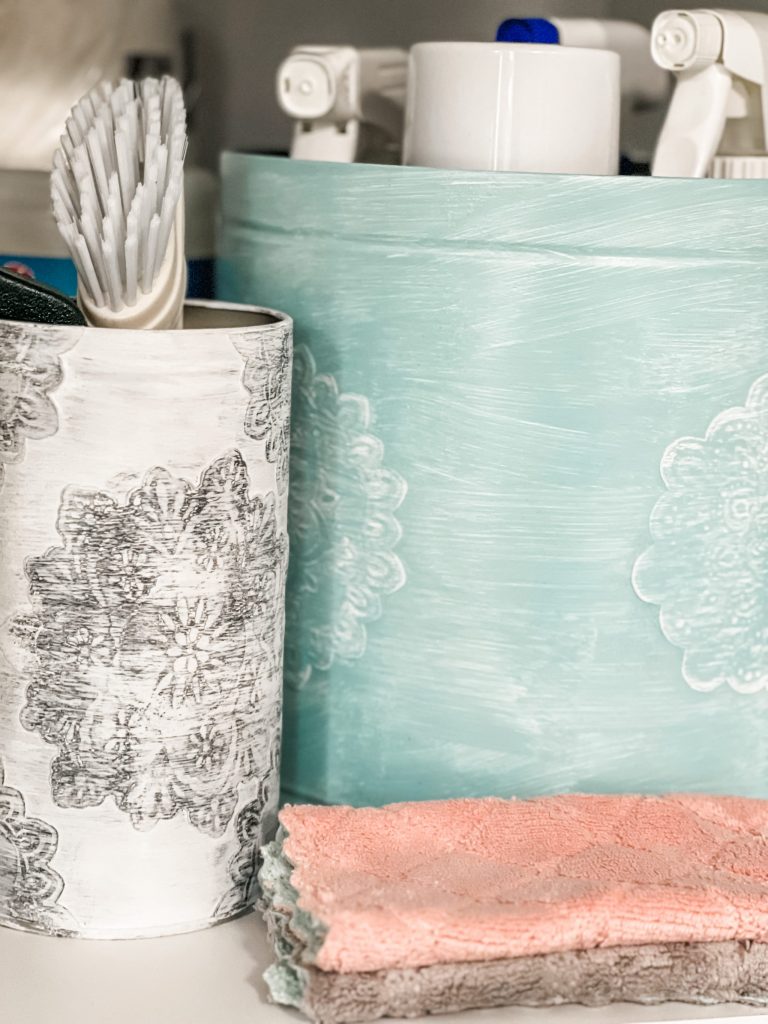
I absolutely love how these turned out! They are so versatile and can be used in many different ways. If you have a green thumb, you can easily add drainage holes and use them as planters for spring flowers. You can also use the larger tin to store card games and other small games in the living room for game night!
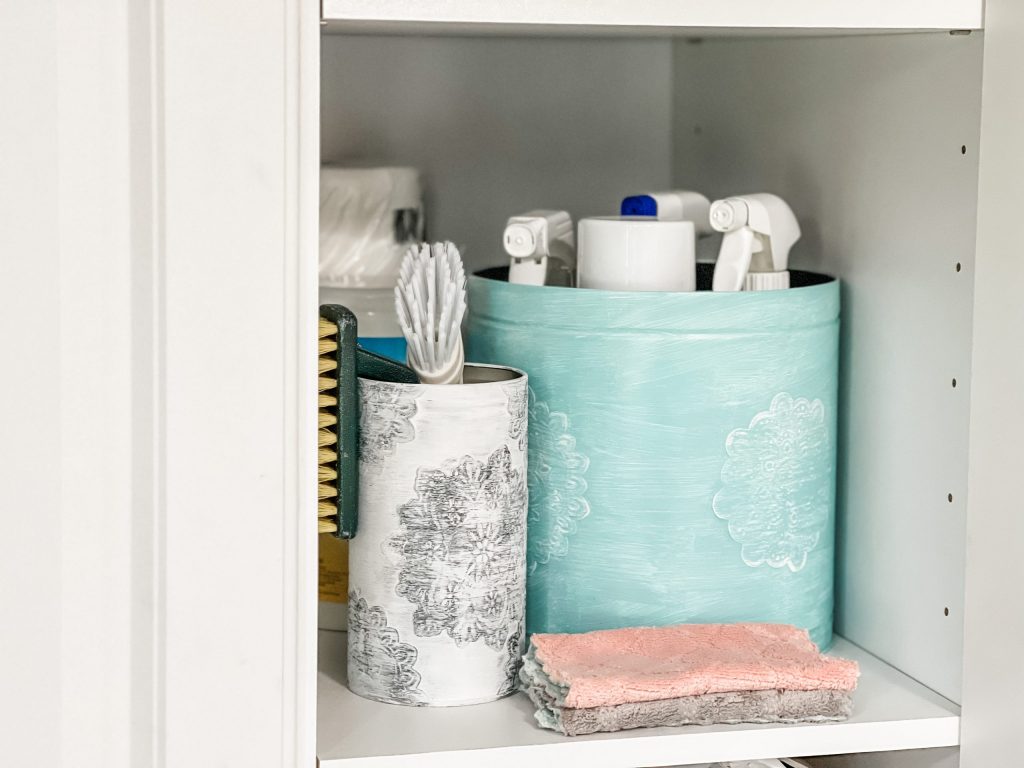
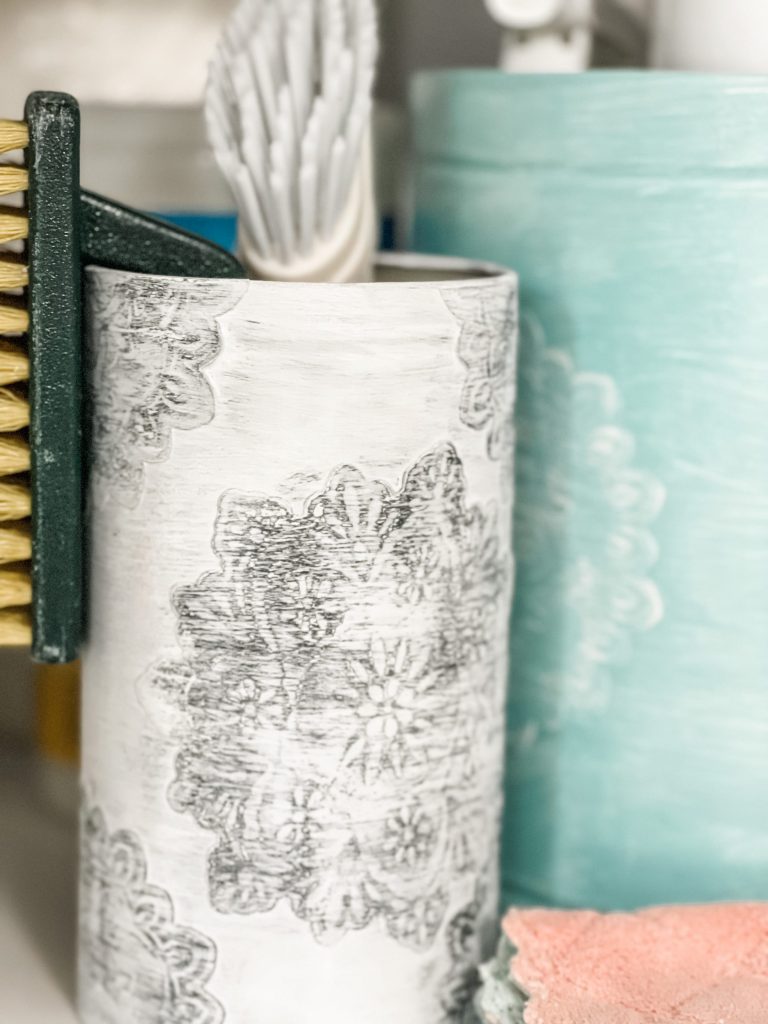
I actually thought they would be perfect for storing my cleaning supplies and brushes in the cabinet. I cannot wait to snatch up a few more tins to use around my home! What would you use them for?
Be sure to pin this for later!!
Last Updated on March 17, 2023

You are so creative, love the idea of recycling.
Love this idea!!! Thank u.!!!
What a great idea. Taking something that might have been throw away and making it beautiful and useful. I’m going to look around my basement and see what I have down there. Pretty sure I have some of these. I can see using them for storing some of my craft supplies.
So cute! I think I’d have to use them for art supplies!
Love the Tim’s!! Especially the turquoise colored one! Very pretty way to organize! Thanks for the inspiration!! ♥️♥️♥️♥️♥️♥️♥️♥️♥️♥️♥️♥️♥️♥️♥️♥️♥️♥️♥️
Hi Brooke, I am just crazy about you. Ever since COVID started I have been hooked on crafters. You were in your trailer and so darn cute. Love me some Ky accent. My grand parents and of course my Mother were from there.
I am from and still in Dayton Ohio. Many weekends and summers we headed to Ky. I love the area. Anyway I fell in love with “anything goes” when you took me there the first time. My daughter usually makes a 3 day weekend of my birthday and last year she took me to Paducah and “anything goes”. The best day I’ve had in awhile. It’s not that far about 6 hours but I am not a good traveler. If it were about an hour away I ‘d be there once a month. Haha. Just love it when you take me. Take care and keep shining. Your love and happiness over flow. PS. I got one of your t-shirts. Love you much you doll baby. I am redoing Christmas tins Next.
I LOVE this idea!!! Once I have a tin, I’ll try this method.
Turned out great love the color
I loved the tins make over. I have 2 flat tins from colored pencils and I knew that I could make them over. Thanks
This is genius Debbie! I have two Christmas popcorn containers that I am going to make over after reading your blog! Fabulous
I’ll be doing this for my cleaning supplies and bathroom cleaners. Awesome idea. Thank you
Now that is a fantastic idea!! You could even use them in your craft room to hold your tools!!
What a great idea! Love this!!