Have you ever done one of those projects that looked like you really had some “true talent”? One that had that little extra wow factor and set your display off just right? Well, today I am sharing one of those with you. It has turned out to be one of those projects that I LOVE…but it is also one of those projects that literally took about 10 minutes from start to finish. Those projects are a win win in my book, and they don’t come along often enough!
I love to decorate, but that doesn’t mean that I love to spend a ton of money to decorate. Don’t get me wrong, over the past 10 years of decorating for the season, I have accumulated quite a bit of goodies, but I always like to add new, unique pieces. With the recent success of my pallet coat rack, I have ended up with more than my fair share of pallet wood. Sometimes it feels like my garage is about to explode, and you can forget ever parking a car in there. Who needs to protect your car when you have pallet wood and projects to protect!? But anyway, with all of this extra pallet wood, it made perfect sense to incorporate some of those extra boards into my holiday decor this year…so I did.
Let’s get started…
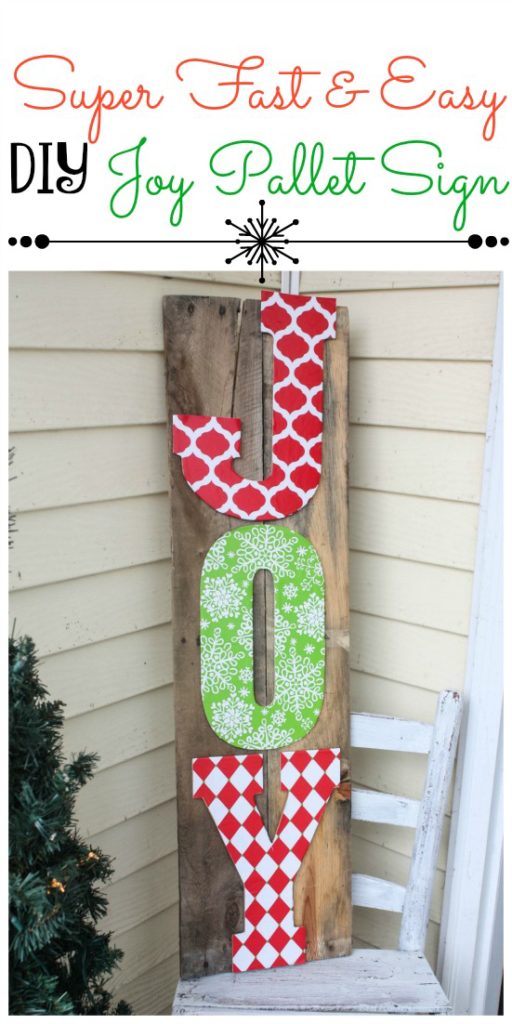
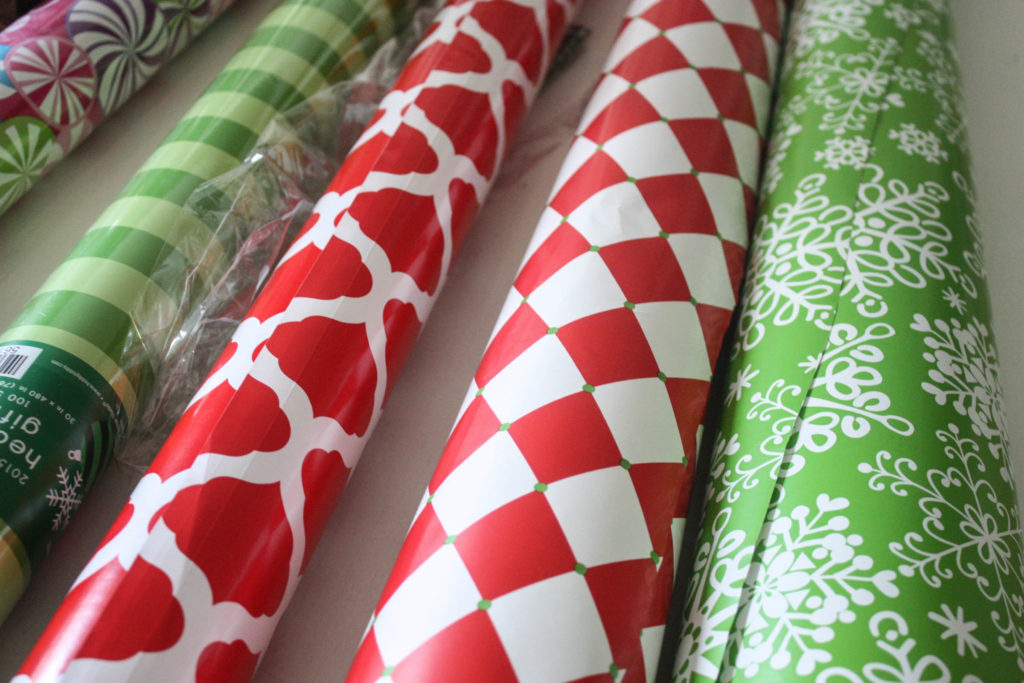
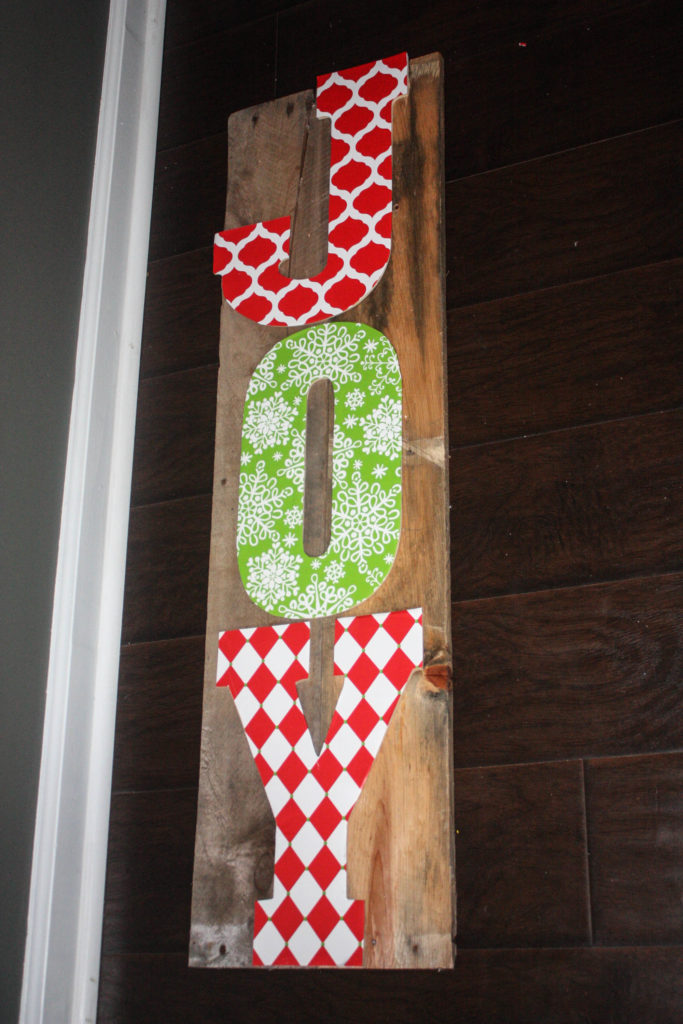
I found these large letters at Hobby Lobby for half off of $3.49. At the time, I wasn’t sure what I would do with them, but for that price, I knew I would do something, so I grabbed them up. I decided to cover them with Christmas wrapping paper (also from Hobby Lobby) and Mod Podge. There is a full tutorial on how to do this in a previous post.
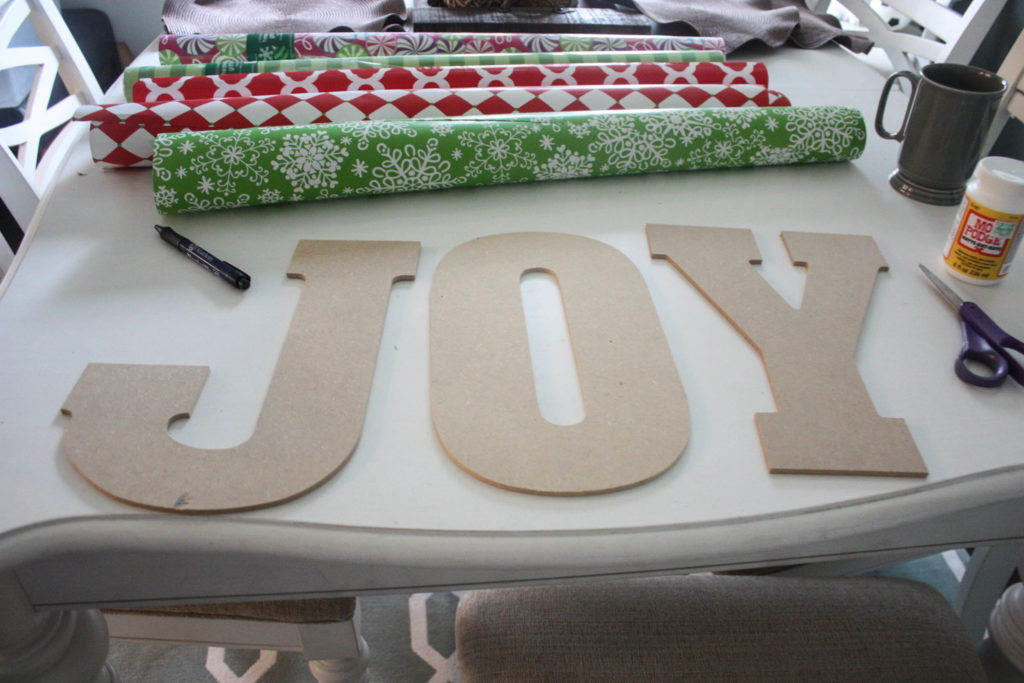
How cute are these designs?! I love the traditional red, green and white for Christmas (and you will see this more when I show you my living room a little later!)
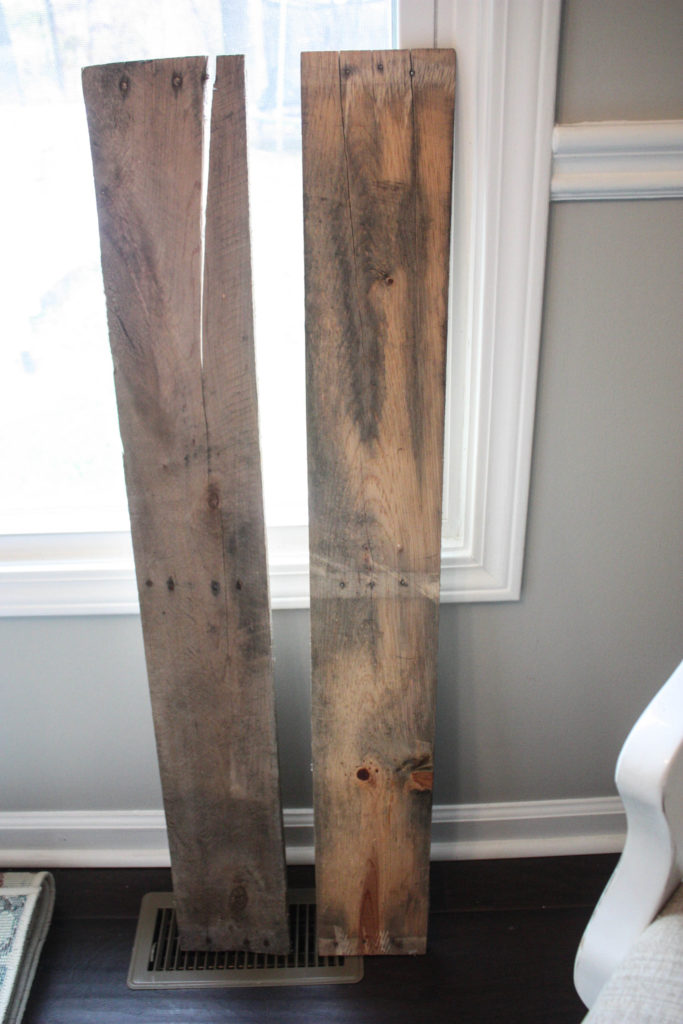
After covering the letters, I took 2 pallet boards that I had and placed them together on the floor…and then I placed my letters on top to arrange them just the way I wanted. I did not stain, sand, or do anything to these boards. They were already “seasoned” by the weather perfectly. (And in case you are wondering about height, they are 39″ tall.)
Ignore the dirty floors. Projects are messy, you know? I mean, they would totally be spotless if it wasn’t for that! (Insert major sarcasm)
When I had the letters placed right where I wanted them, I glued them on with liquid nails to ensure the best adhesion. After that, VOILA- you are done! Easy peasy…10 minute project that looks like you put a whole lot more effort than that 🙂
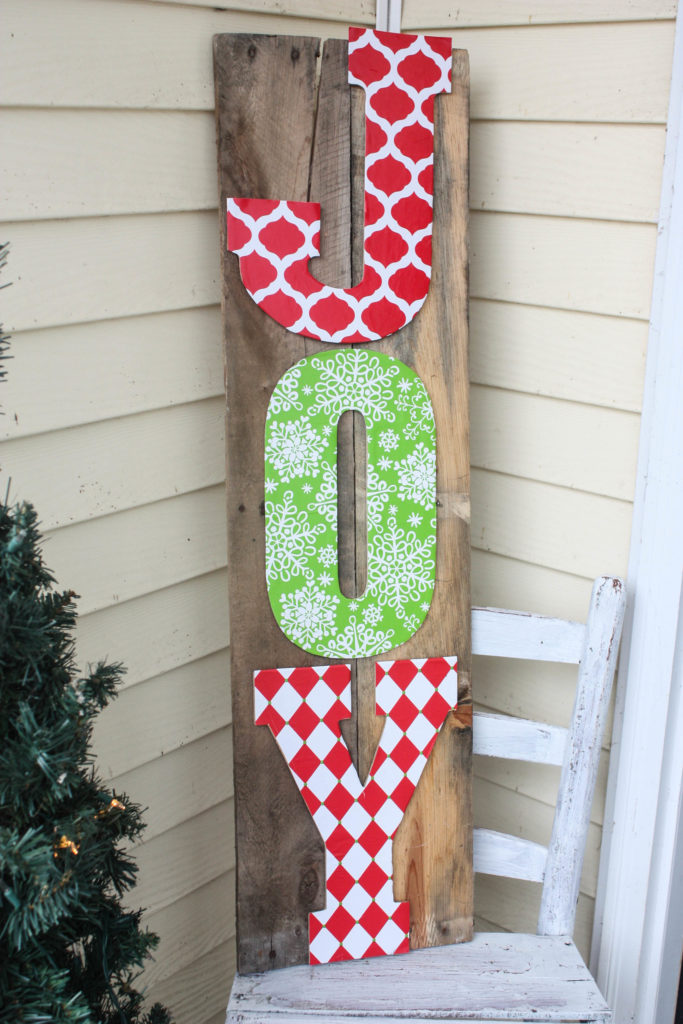
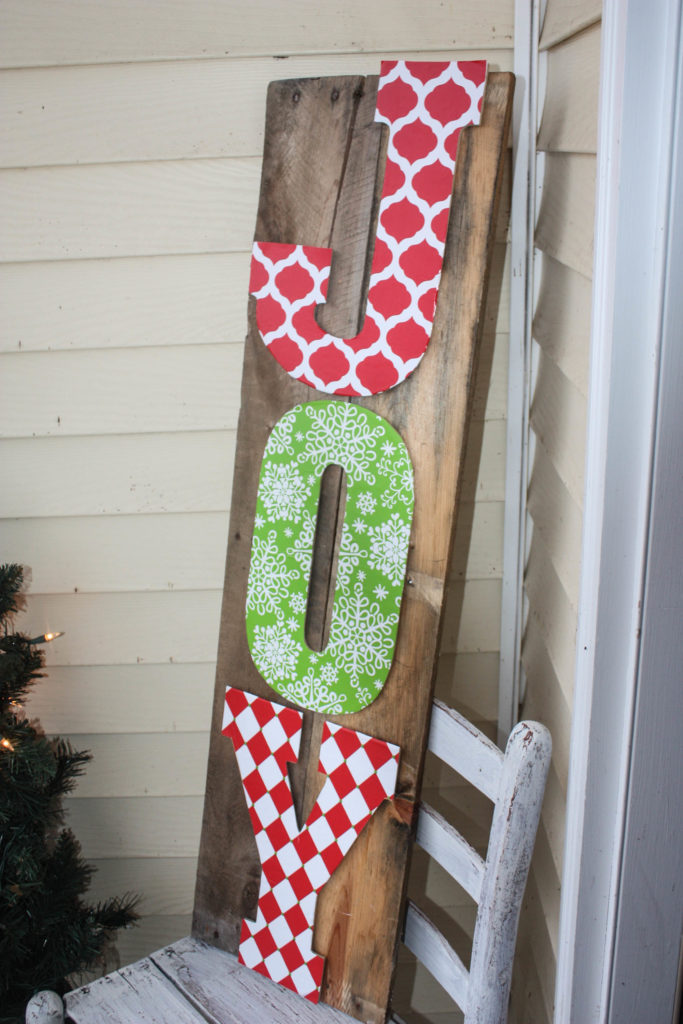
What do you think? Is this a project you would want to tackle for your holiday decor? I really think this would also be cute propped up beside a fireplace, or even hanging on a wall. The possibilities are endless! Tis the season!
If you like it, put a PIN on it!
Sign up to receive Re-Fabbed’s emails so you never miss any of my upcoming holiday posts!
Facebook/Pinterest/Instagram/Twitter
Linking up at:
Last Updated on November 11, 2016

Now that was a really good Christmas 10 minutes project. I love it. It looks fabulous!
Carol P-K
Thank you very much, Carol! Can’t bear cute and easy! 🙂
It looks so good!!!
Katie
Thank you, Katie!!
love cheap and easy that turns out fabulous love it xx
Thank you very much! Me too 🙂
LOVE! This is great!!
Thank you, Glenna! Cheap, easy and cute! The perfect trifecta!
Love it and I love the fact it doesn’t take a lot of time to do. I always want to do projects, but don’t find the time to do them. I may have to do one of these this year. Super cute!
Thank you Kim! You should definitely give this a whirl! 10 minutes and you are DONE!
Jason is gonna have to snag me a pallet from work… Love it!
Yes!! You need to do this!
Very cute!!! I’d love it if you shared this post and some of your other recent posts at Worthwhile Wednesdays!
Allie (www.craftyallieblog.com)
Thank you! I surely will do that 🙂
I loved this last Christmas and did it but had such a hard time wrapping the letters so nice like you. It is sitting in my dining room to be revamped as I write this.
I hope you have better luck this year, Jody! Don’t wrap the letters fully- just in case you are. Just Trace and cut them out and adhere with mod podge! 🙂 Maybe that will help!
Oh Wow, u really do make this look easy! I have the pallet boards & now I have an ‘excuse’ to go browsing at Hobby Lobby! (2 find the letters….). Will have to hit the Dollar Tree to pick up Xmas paper too…laugh out loud! You sure this won’t cost me very much Brooke?! ~ Great project, can’t wait to try & make this sign ~ The seasons are upon us! Thanx!
Looks very nice and its easy to do also… we are all soon to get busy with holiday decoration, year is ending… good post(: …
This is one I need to do. I have lots of pallets to use. Thanks for the inspiration Brooke!
Quick is the key for holiday decorating! So much going on…so little time. And Super Cute is bonus ????