The other day in my MVP group on Facebook, I made a fabric flower LIVE! It was so much fun, and it turned out ADORABLE…so I wanted to do another one for you today, with a step by step written process so that you can make one too!
This project is absolutely perfect as a shelf sitter or in a Spring vignette…or even on a gallery wall somewhere. You can truly use it anywhere!
LIST OF SUPPLIES:
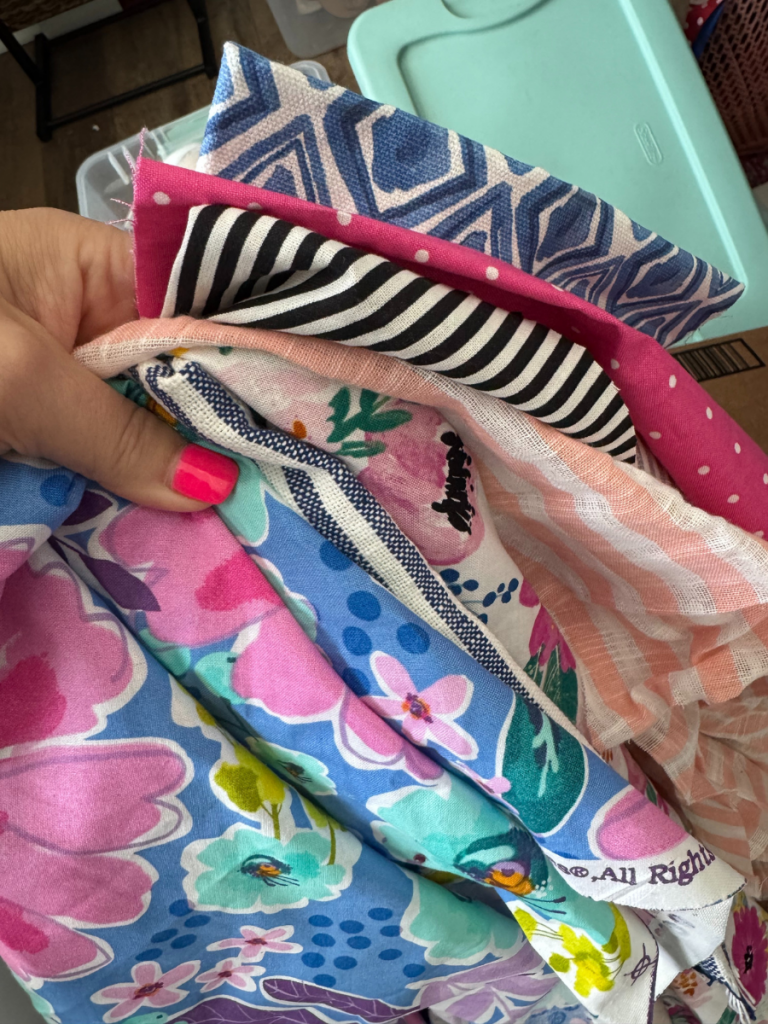
– Random pieces of fabric to use as petals (whatever style you want for your flower)
– Stick for stem
– 1 felt ball (color of your choice)
– 1 flat surface for flower to be adhered to
– hot glue gun
– paint (if you want to paint your surface) and paintbrush
– ribbon or fabric for the leaves
First step:
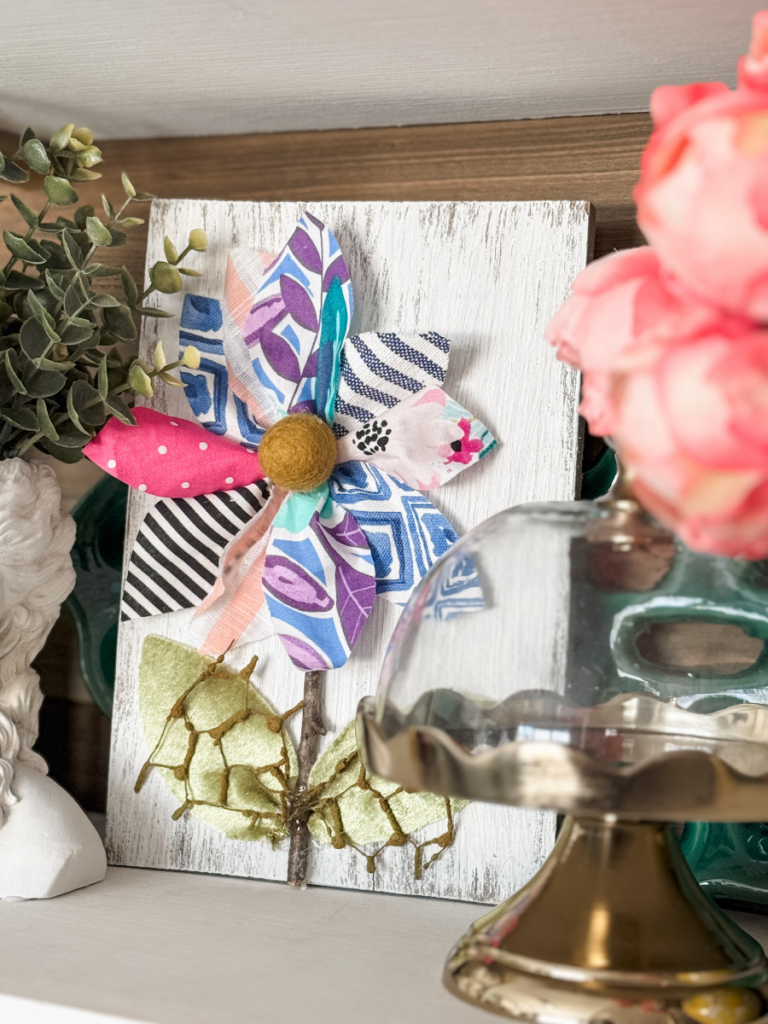
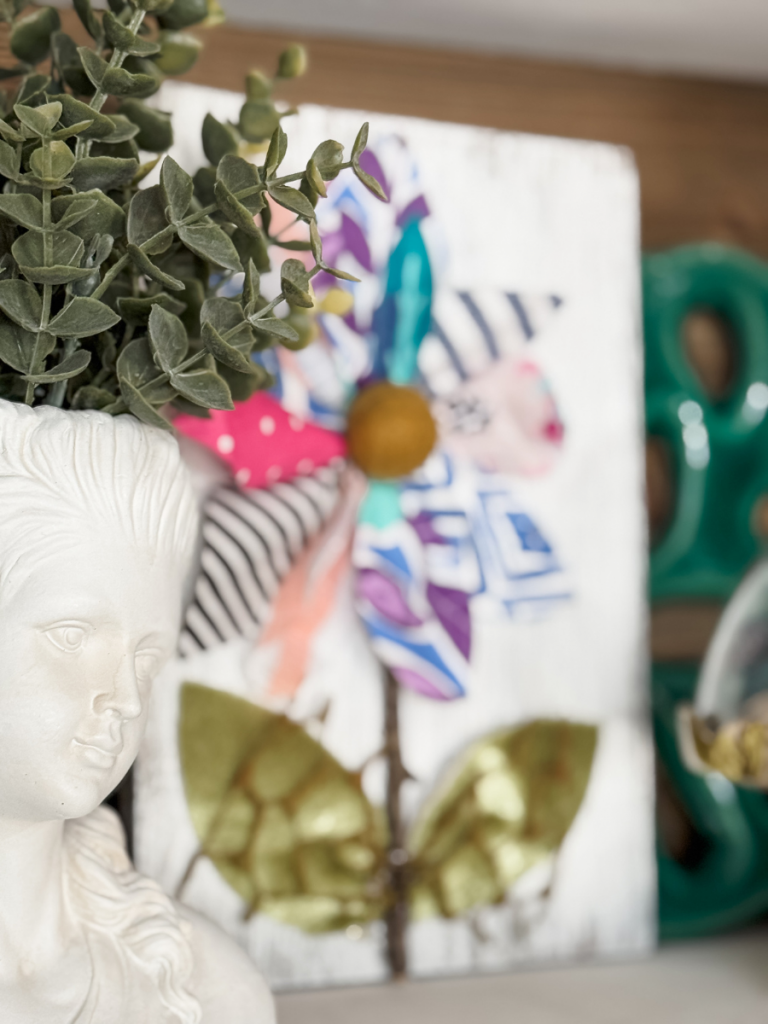
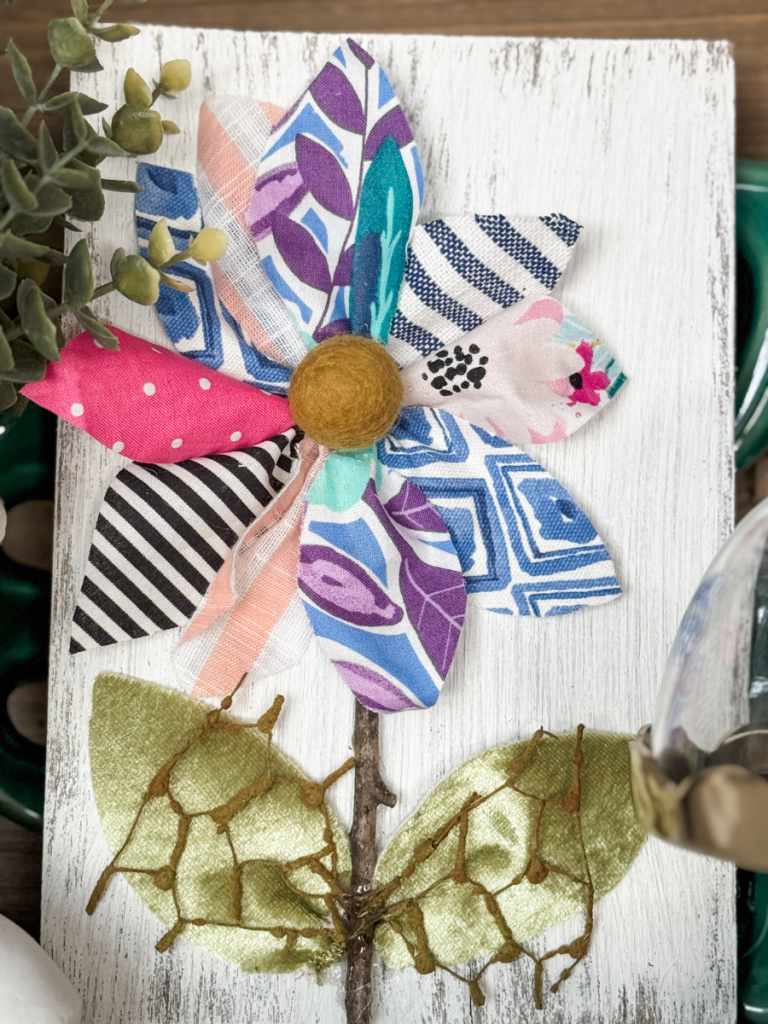
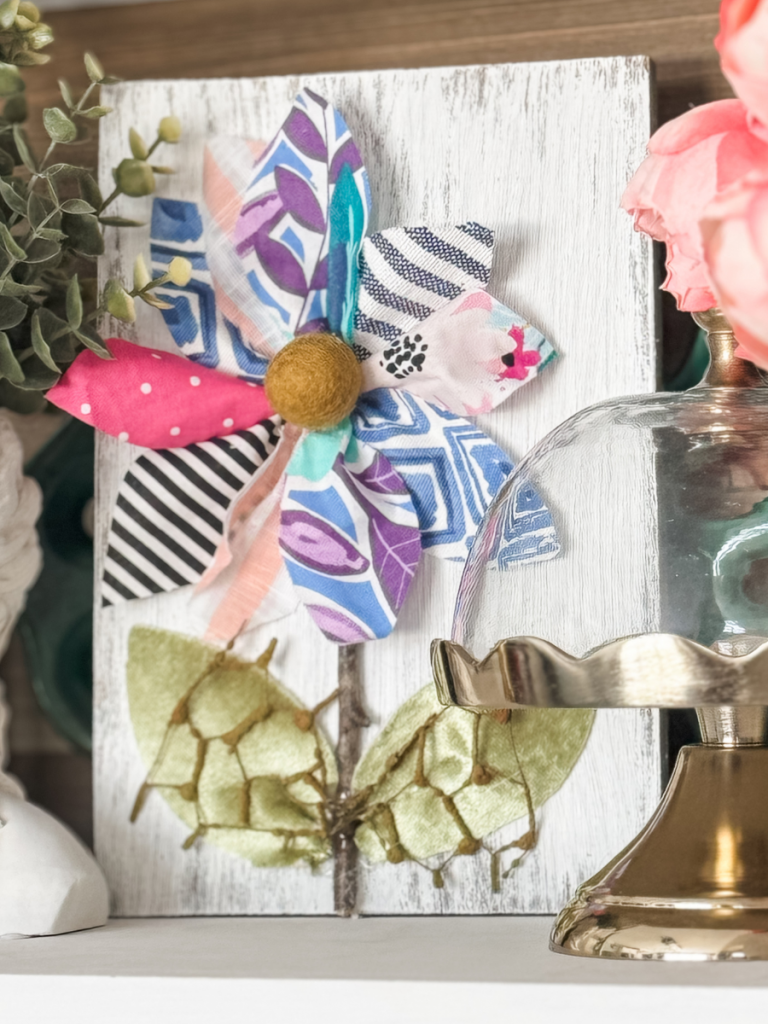
Gather up several different pieces of scrap fabric! It does NOT take much, so you don’t have to have large pieces. Pick pieces that fit the vibe of the flower you want to create. I went COLORFUL, imagine that!
Next Step:
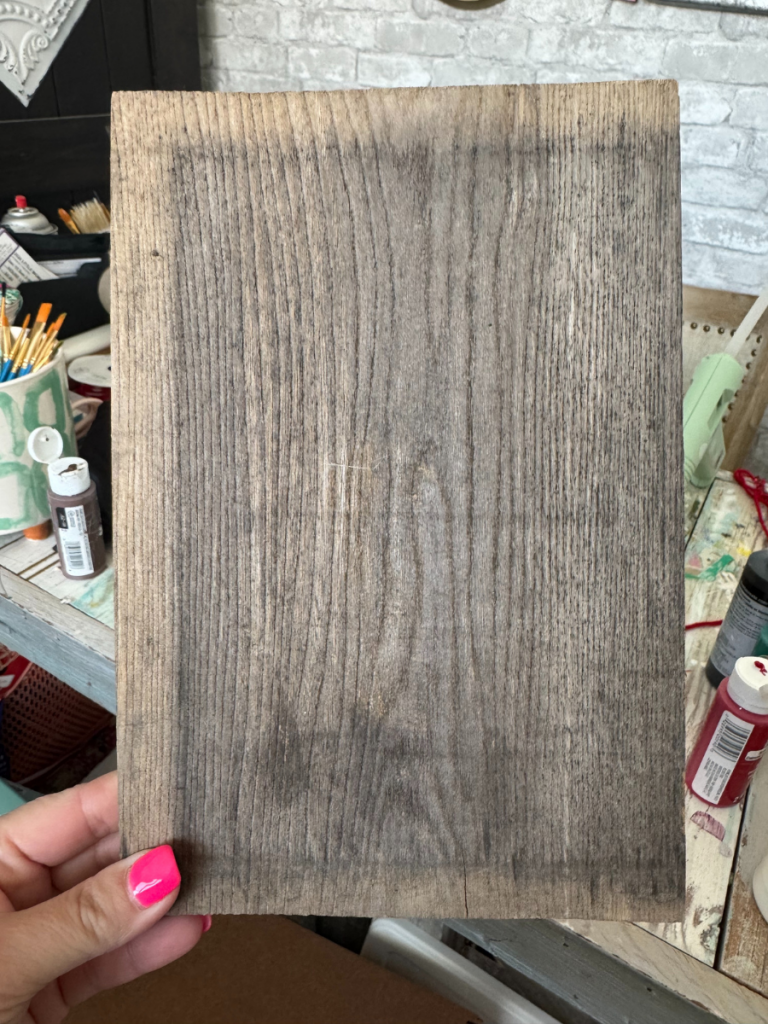
Pick a surface! I picked a scrap wood board as my surface because I wanted it to be full of texture!
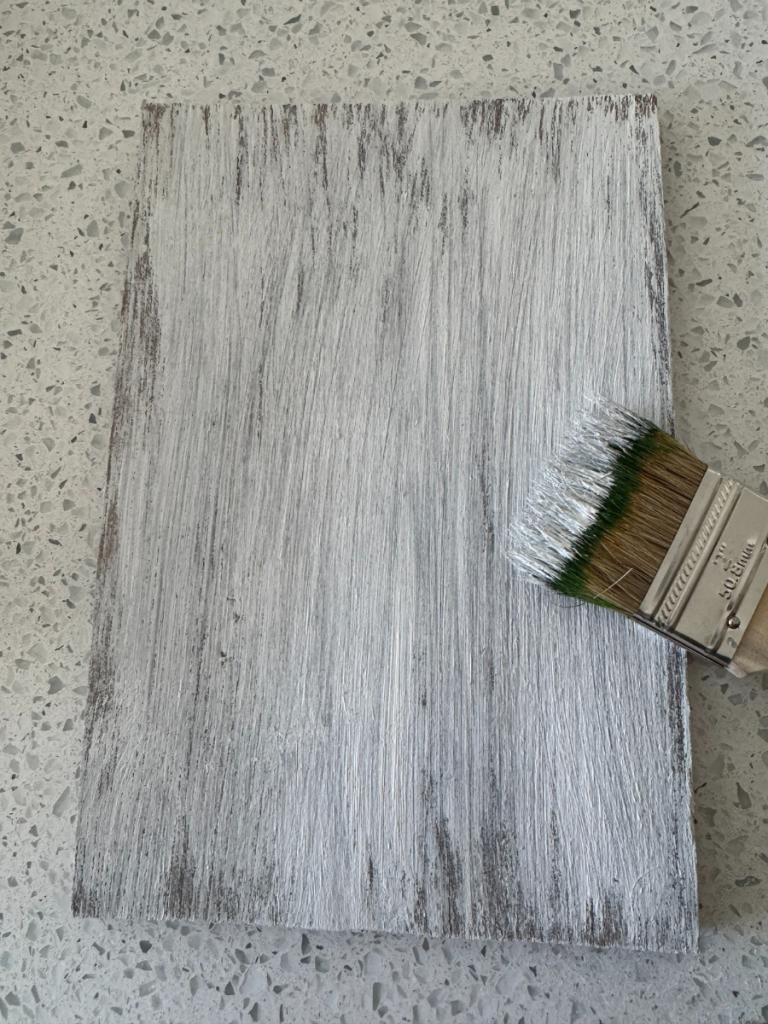
I went ahead and painted my board white, because I wanted the colors of my flower to really show up nice and BRIGHT!
A few other supplies I forgot to mention:
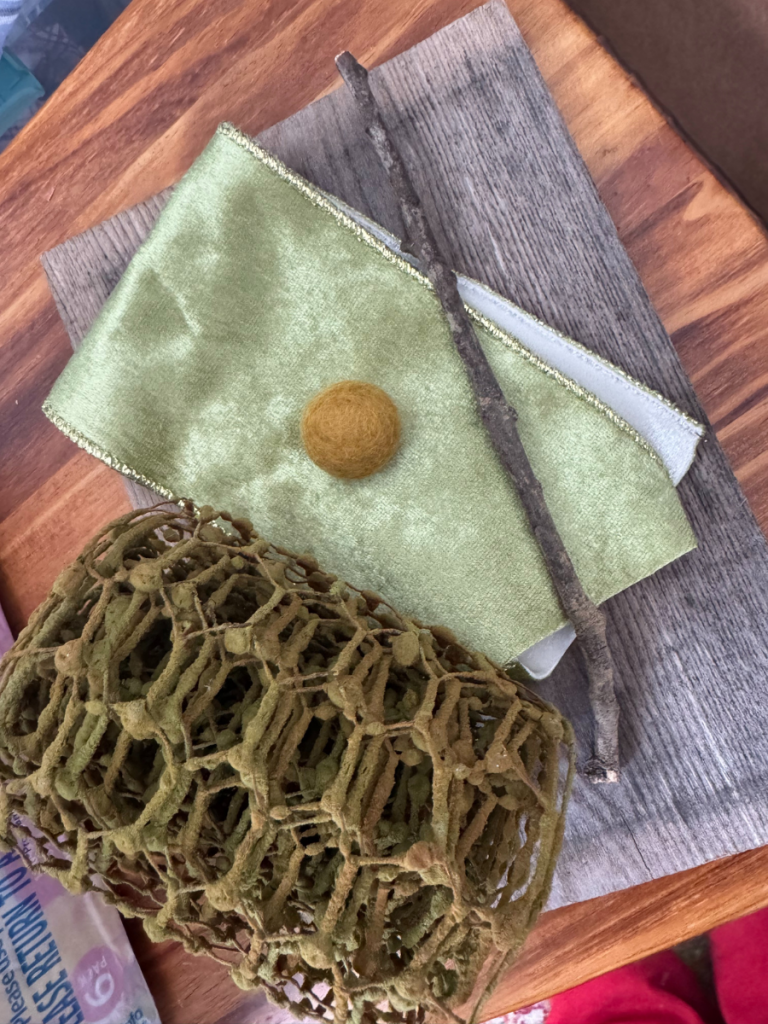
For my stem, I used a stick from my yard.
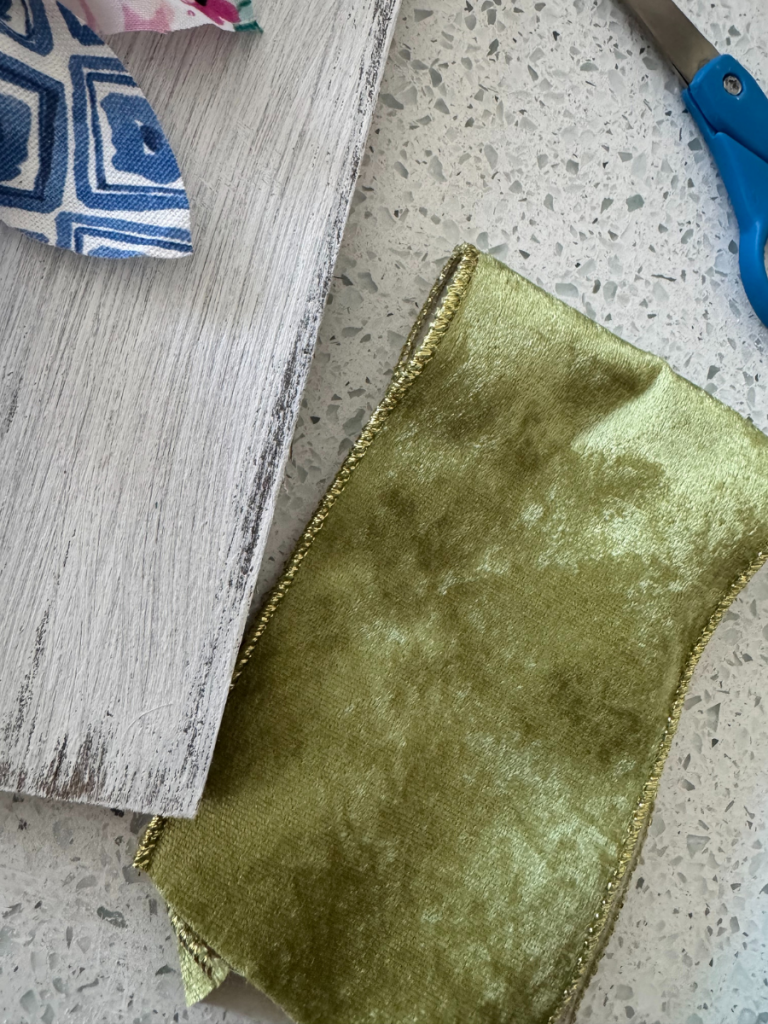
For my leaves, I used a thick piece of velvet ribbon. Any green fabric will do.
I also had some extra “ribbon” (if that is even what you would call this) left from a few years ago. It is pretty much just wire covered in green. I used it with the green velvet to give my leaves some extra texture. You will see at the end.
Next Step:
Cut a small piece of each of your fabric choices. You truly don’t need much…but it also depends on the size of your flower, so plan accordingly.

Next Step:
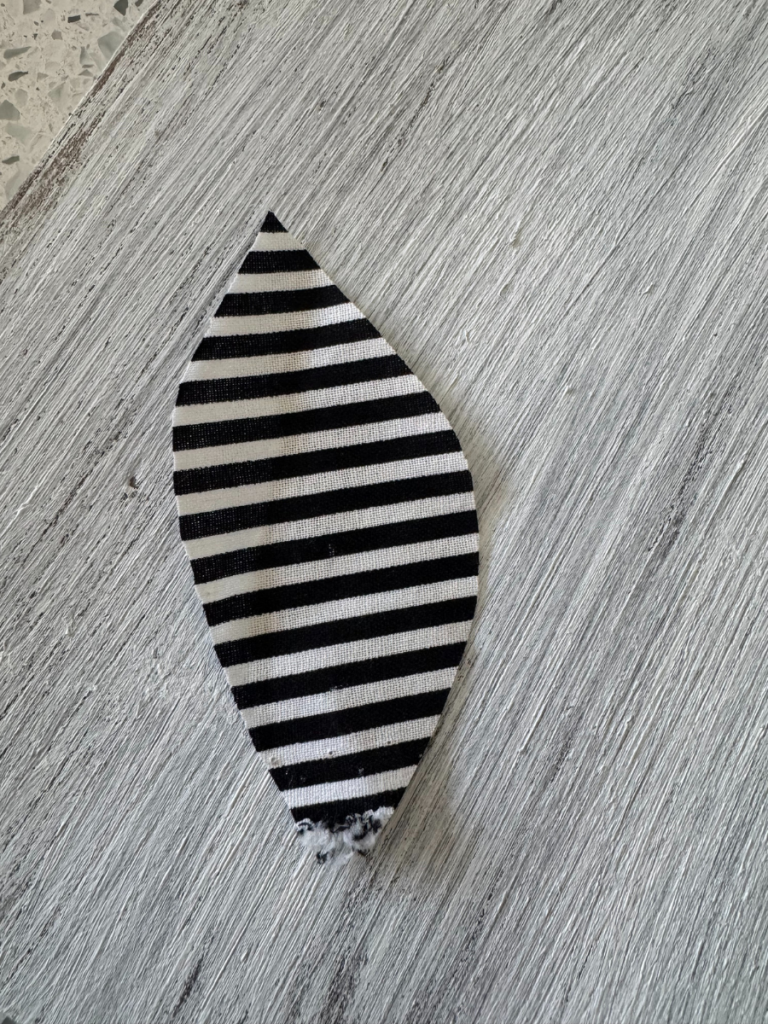
Cut out your petal in the shape of a teardrop.
Next Step:
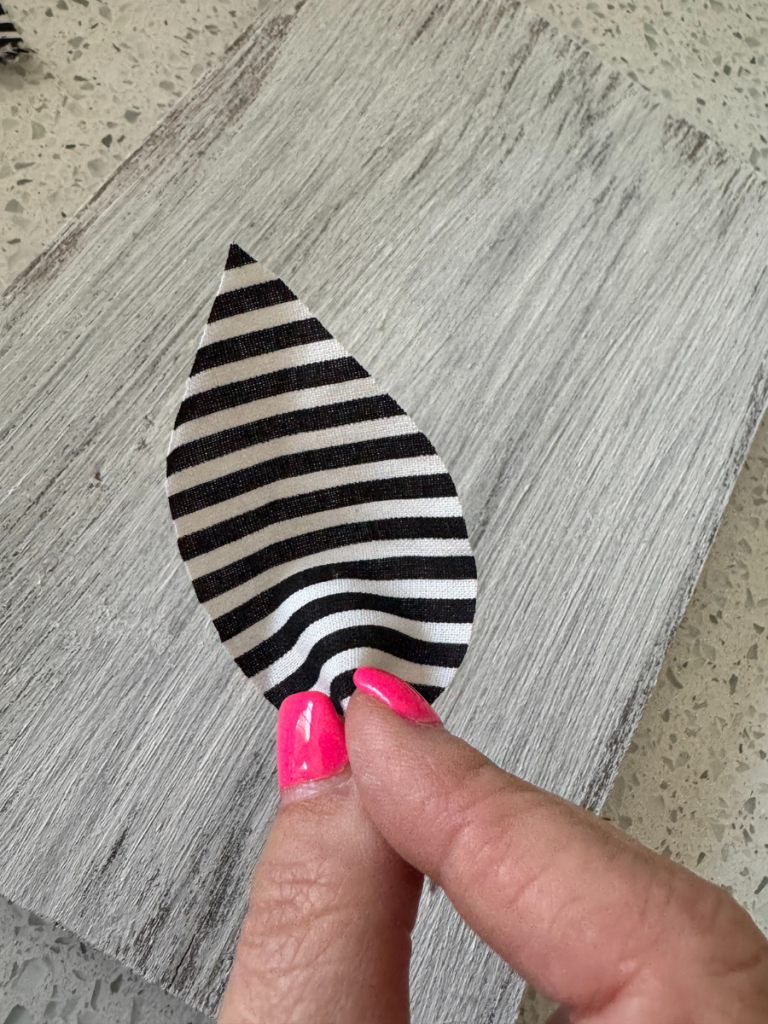
Pinch the end together with your fingers. As you can see, this makes it look like a petal and not as “flat”.
Next Step:
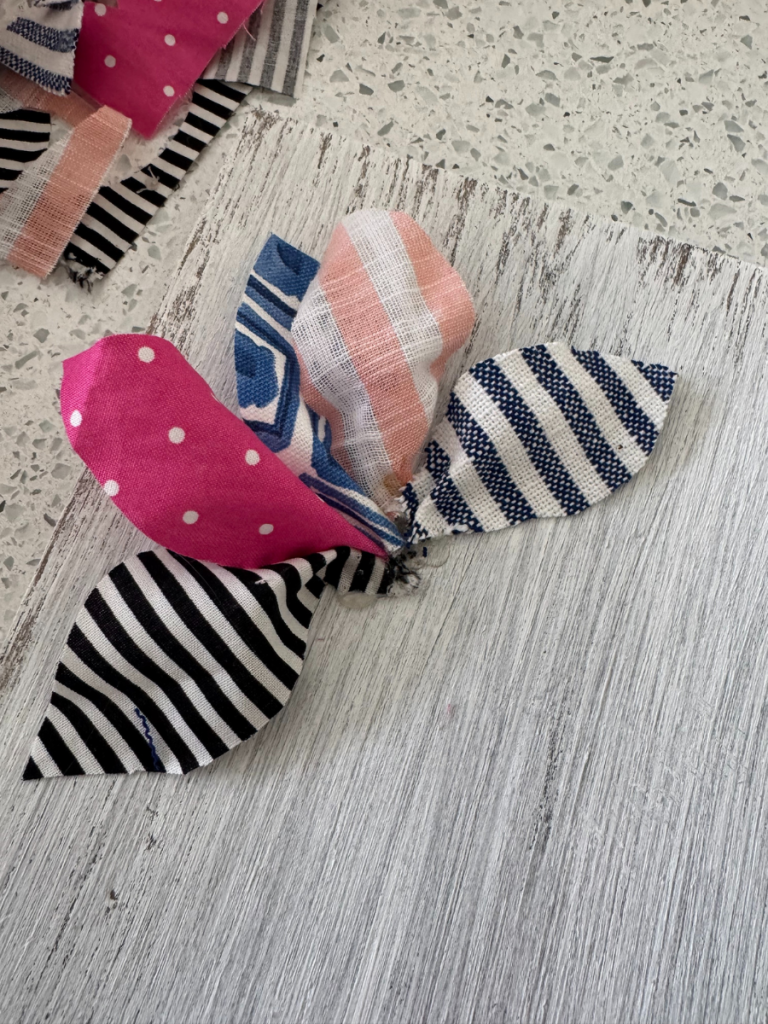
Hot glue the petal onto your board where you would like to start your flower.

Next Step:
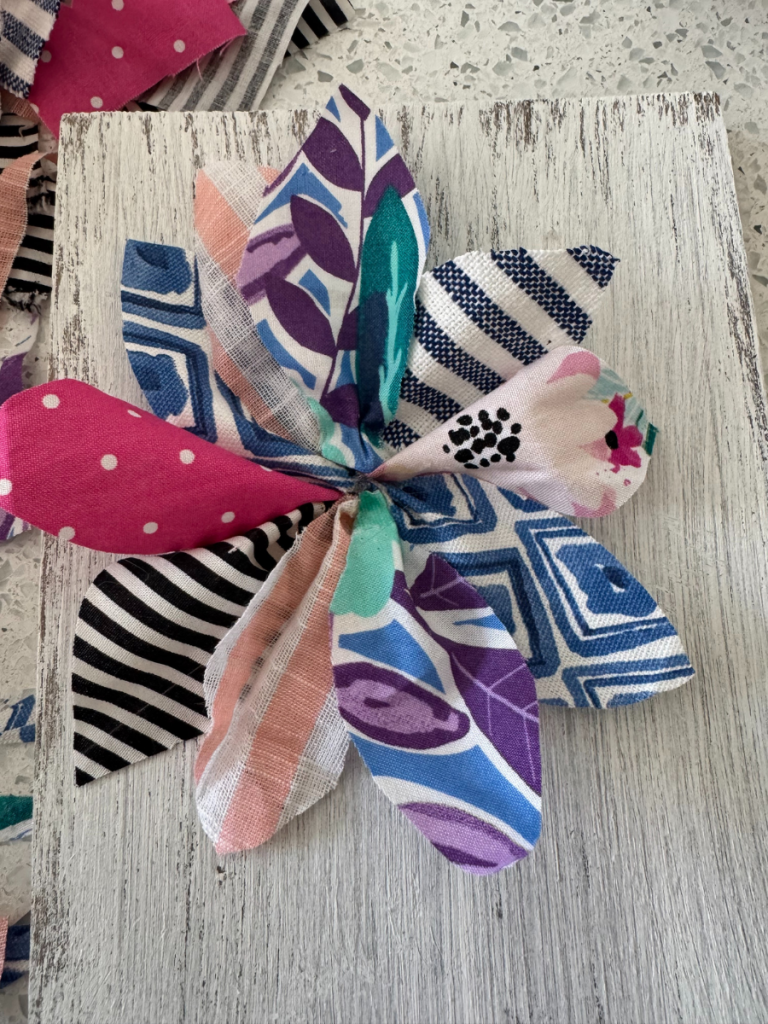
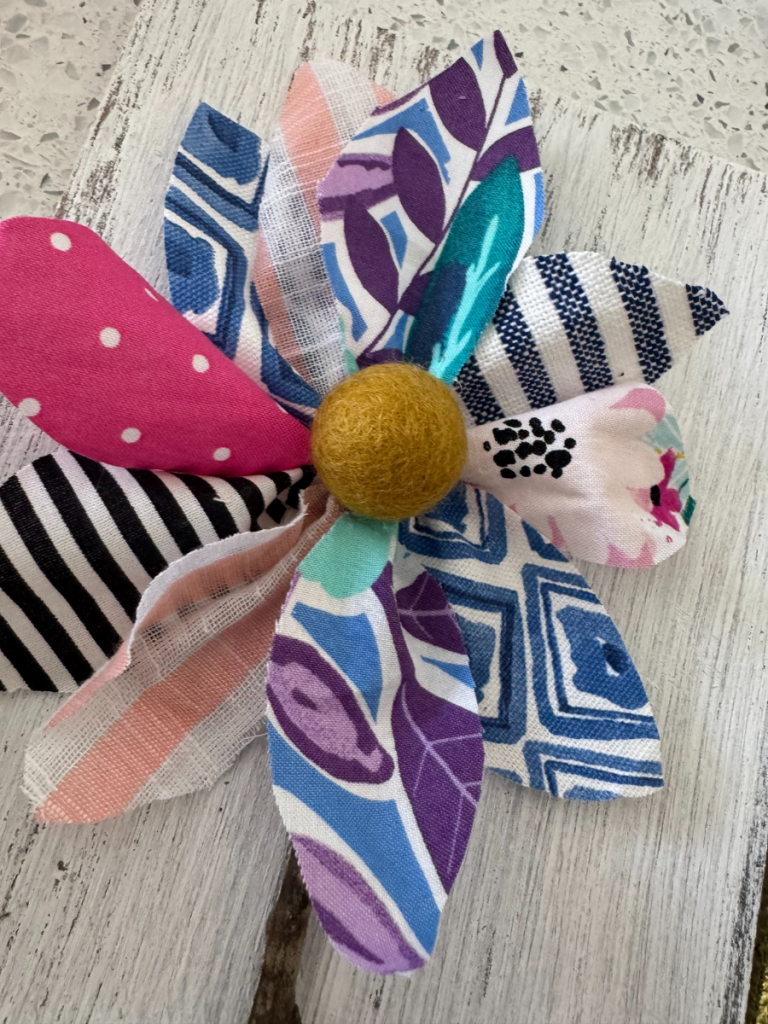
Proceed with each and every petal until you have a full FLOWER!
Next Step:
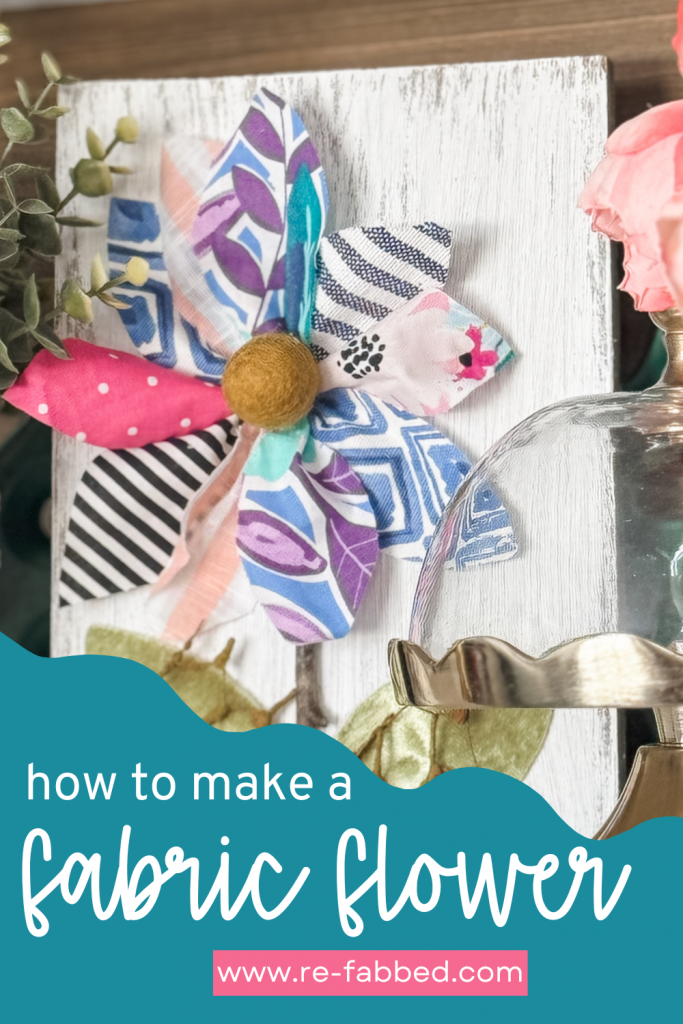
Hot glue a felt ball in the center of the flower!
Next Step:
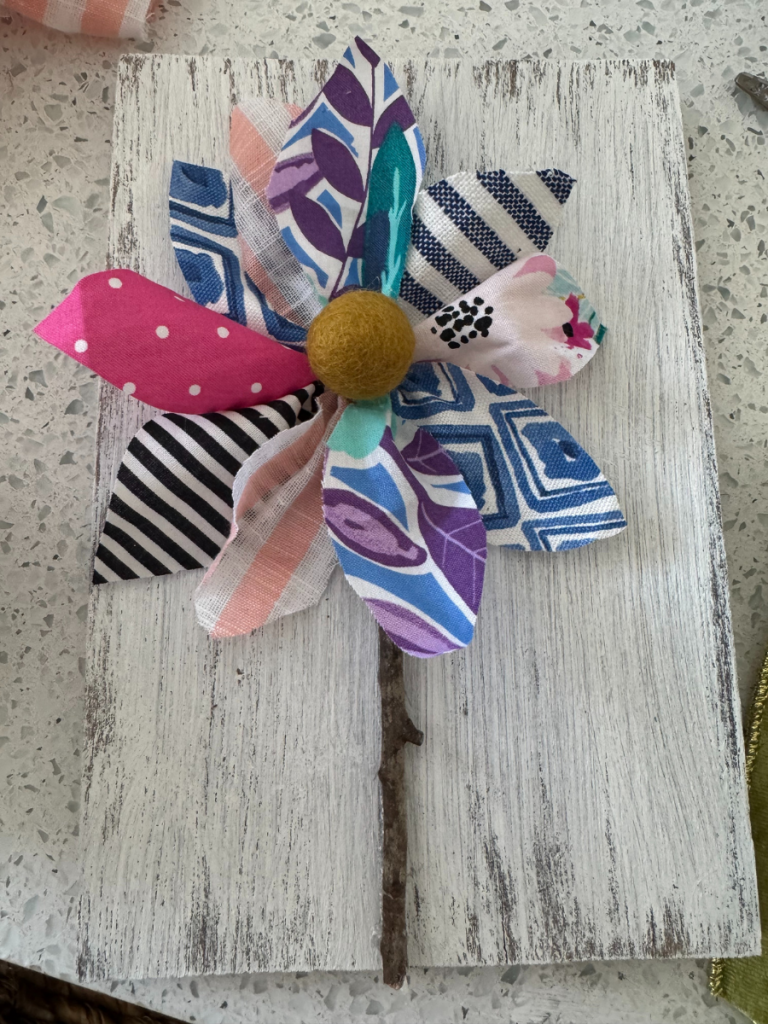
Glue your stick down for your stem!
Next Step:
Cut your fabric into 2 leaves, the size you need for your flower! After that, glue one long piece of the wired ribbon over top of it and bunch it in the center!
Ta-da! You are done! How stinkin’ CUTE is this?!?!?! You can make it as colorful or neutral as you want, and it can span a ton of different styles!
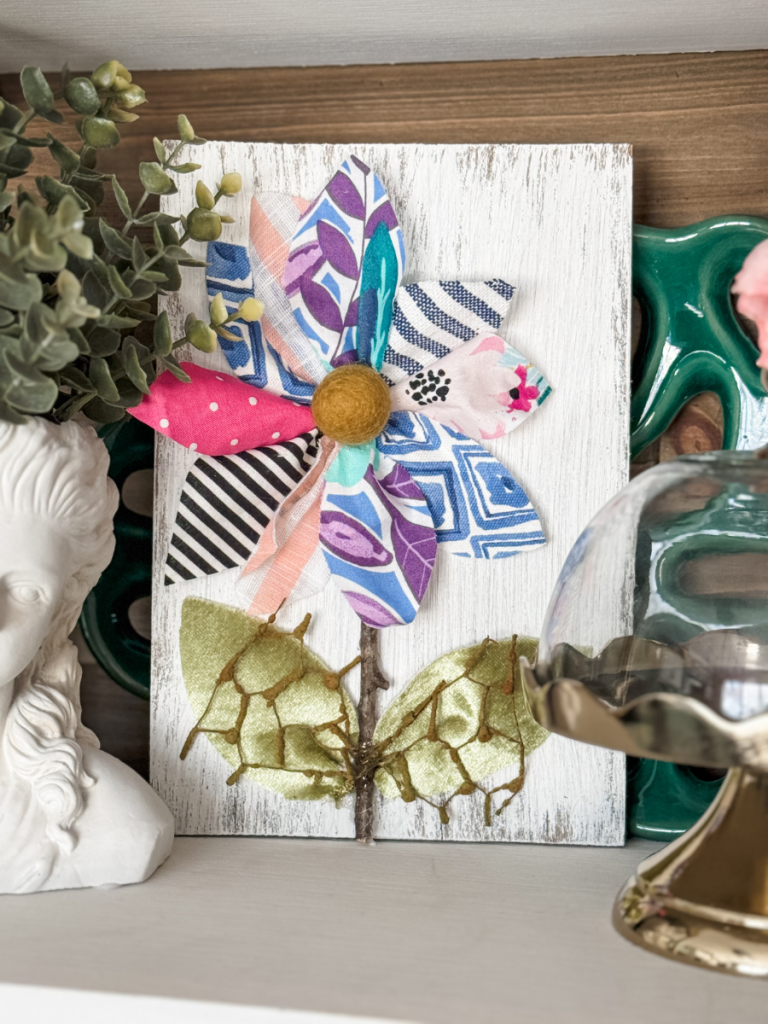
You could even make several different ones in different sizes and set up as a little vignette!

This was such a fun little DIY! I hope you loved it and will try it for yourself! If you do, be sure to share it with me on Facebook so I can see it!
Also, if you want to become a member of the MVP group, be sure to JOIN HERE!
Be sure to pin for later!!!
Last Updated on February 24, 2025

Really cute! This would also work with wrapping paper too!!
Oh my gosh…this is so pretty!! Definitely gotta try this!!
Adorable idea! I’ve got to try it
That is so adorable yet so simple! A must try!
Very cute! Spring is in the air!
Love this craft and how you take simple supplies and take it to the next level!
Thank you so much!