When you are on a tight budget, it doesn’t take long before you start thinking pretty far out of the box. You start to get pretty creative actually, or at least I have! You see, one day we will be building our dream house on our farm- but until then, I am living in a single wide mobile home that we literally need to put as little money into as possible! I mean, after all- the goal is to build our house, so we need that money to go THERE! But, as you know…I can’t stop decorating or not make this house a home for us. I need it to be as cute as possible, of course! I also need it to be on as little of a budget as possible!
When I first saw our kitchen, it was an eye sore. It lacked any character at all. See all before pictures HERE. The cabinets were lacking any kind of pizzaz, and I wanted to paint them. I didn’t want to paint them white {although I am the biggest white fan out there}…I wanted something different and extra fun. I wanted this whole house to be fun, actually. I decided on a color {I will disclose all details when I do the actual kitchen post- but that part isn’t ready just yet}-“Mint to Be”! It is actually more of a light aqua {which you will see in a minute}- but it is amazing. Absolutely gorgeous.
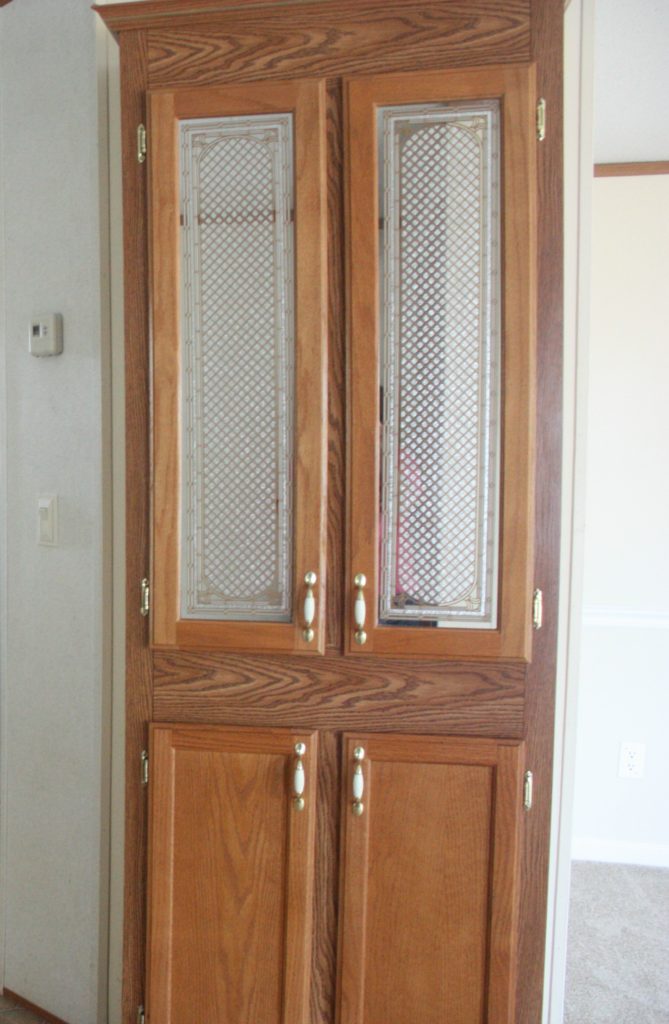
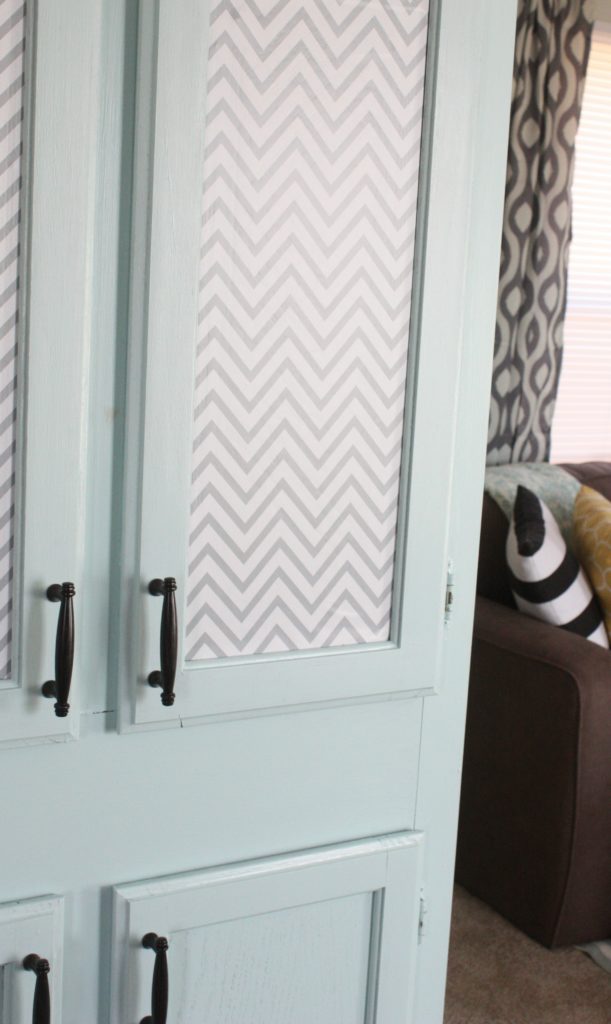
One of the areas of the kitchen was this stand up pantry. You can see some more of the kitchen in the background- but for this post, I am focusing on this pantry and those UGLY mirrors!
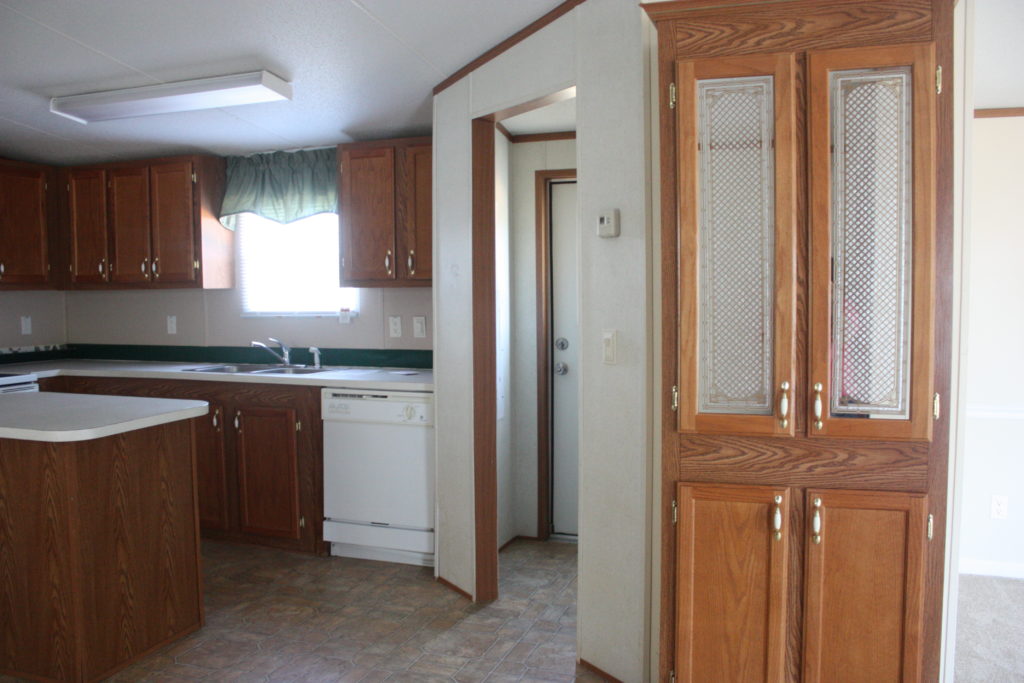
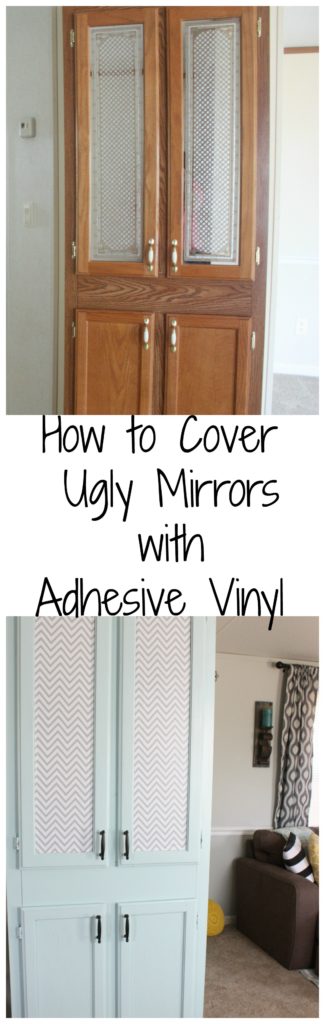
So- do you see those long mirrors in the top 2 cabinets of the pantry? Well, let’s just said those HAD TO GO. I was not a fan. I am sure they were totally in style back in the day, but today- they had to go. I didn’t want more mirrors, because truthfully, I couldn’t really see the point in having mirrors on my pantry. While the mirrors were in waiting for me to figure out what to do, one of them got broken {actually pretty badly!} I bet you won’t even be able to tell in the end b/c guess what? Gorilla tape works amazing! You need some in your life.
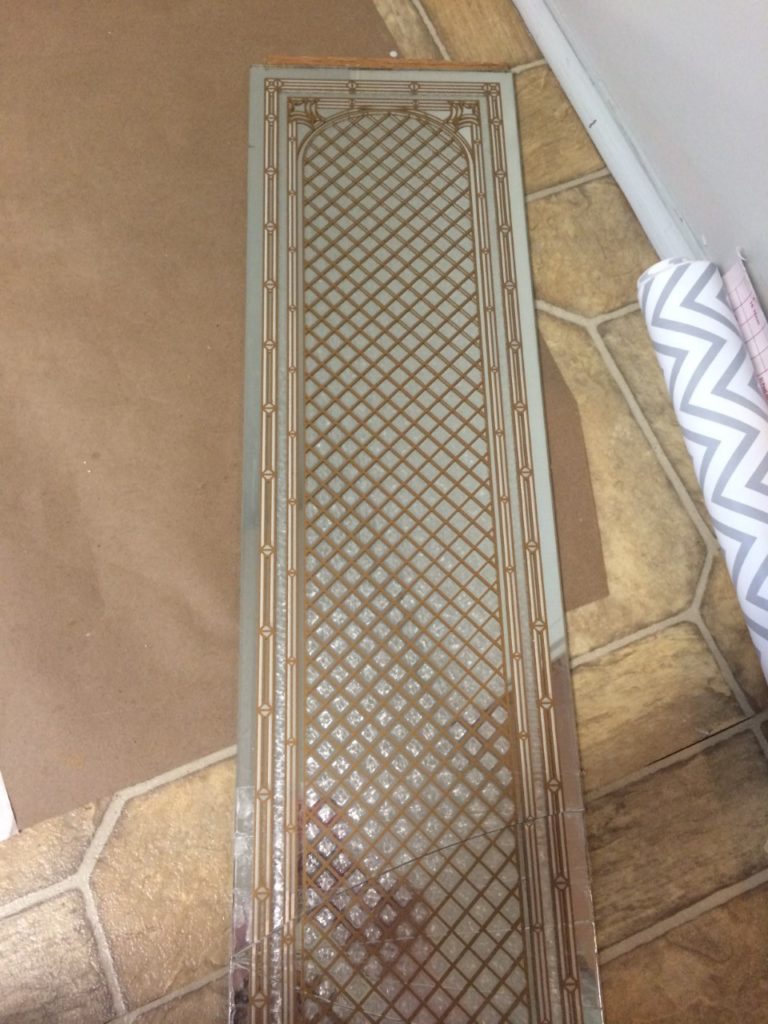
I decided that I wanted to “keep” the mirrors because I didn’t want the shelving to show. I am totally not going to keep a gorgeous pantry here that I want everyone looking into!
I have used adhesive vinyl once before and LOVED how easy it was to use, so I thought it would be a great idea to try it out on these mirrors. I thought it would make them stand out and be extra fun- and boy was I right!!
Even though some say chevron is on its way out- I say- nahhh…I still like it- so I use it. Do what you like! Who cares what “they” say.
I used a chevron pattern of Duck Adhesive Vinyl for under $6, and it was perfect. It looks like wrapping paper, in a little roll. I wish I had a picture! BAD BLOGGER moment right there. {I got mine from Wal-mart, but any kind will work!}
I simply rolled it out over my mirror, cut the excess with scissors, took a credit card to get any bubbles out, and then I wrapped it around the back just a little bit to make it stick to the back. It’s that easy. I slipped it right back in place in my pantry, and I could NOT BE ANY HAPPIER with the look!
Let’s do another before to remember 😉
And AFTER! Holy cow.
{And I forgot to mention, along with painting, I changed out the hardware. I will tell more about that in the kitchen reveal}
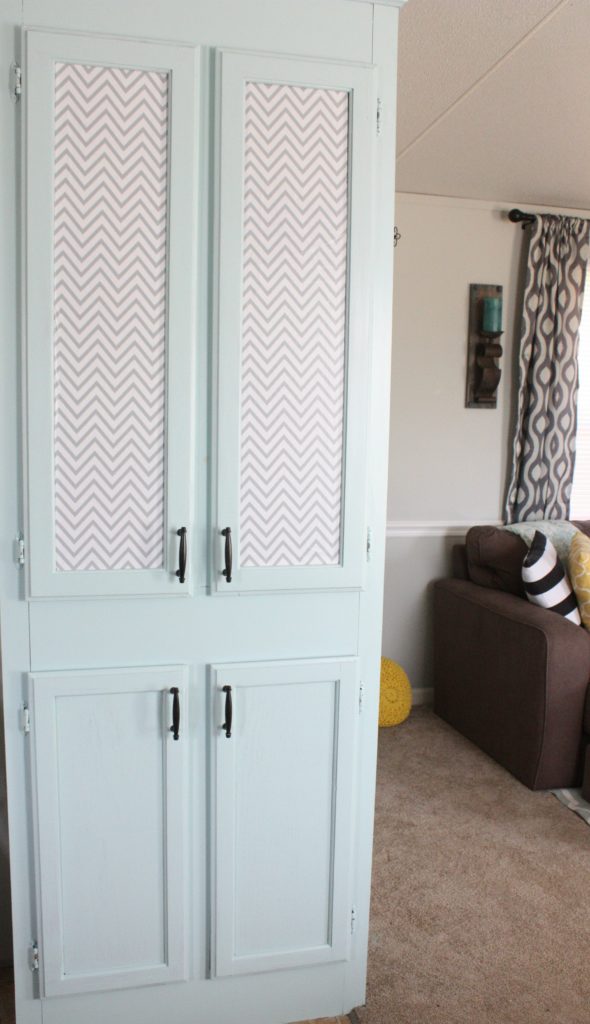
What a difference! When you are on a super tight budget, but you still want to have a cute space- this is a great product to use!! You can use it on most anything- and it is super easy to use. If it bubbles up, you can take it right off and re-do with absolutely no trouble at all.
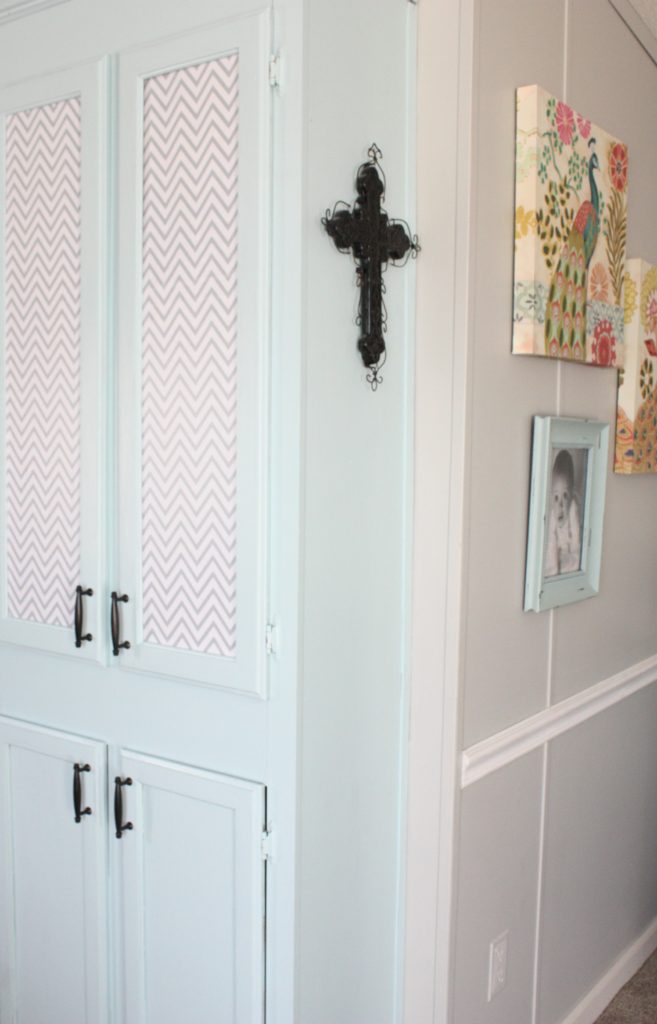
So, you also have a peek at the kitchen cabinet color too {except for the island- I did that in a different color}- What do you think so far?? It is totally different, but so fun! I will be honest, I am LOVING it. This mobile home is so full of life, energy and fun colors and textures. I hope you end up loving the projects as much as I do!
How do you feel about the adhesive vinyl? Was that a good choice to cover those ugly, outdated mirrors?
Sharing is Caring! If you love it, put a PIN on it—or SHARE with your friends!
Follow Along on this Crazy DIY/Renovating Adventure!
Follow on Social Media!
Facebook/Pinterest/Instagram/Twitter
Sharing at The Dedicated House
Last Updated on December 13, 2019

I love the adhesive vinyl! We covered doors in a house we lived in in Ohio. It was a steel house….studs, doors, trim, etc. The closet doors were awful! My husband and I covered them with Contact Paper. Wood grain for two bedrooms and the hall closet, yellow gingham check for the nursery. It was great and cheap!!
Awesome idea! Haven’t thought to use on my doors…and they haven’t been painted yet! Could be an idea for them!
I love the colour and the doors look perfect with the vinyl on ? I’ve used this before for inside kitchen drawers which also work well. Glad your making your ‘part-time’ mobile into a beautiful home – can’t wait to see your kitchen ‘reveal’ ?
Thank you so much, Denise! Finishing up a couple of things in the kitchen and it will be ready to show 🙂
Love it! Quit teasing us…we want to see the kitchen!
Haha I know, Donna! I promise it is coming soon!!
Such a great idea – and what an amazing update for only a little time and money! LOVE it!
Thank you very much, Jenny!
its so beautiful your so talented Brooke….
IS that adhesive vinyl tape you used happen to be renter friendly you think?Could it be applied as a backsplash over builders plain fake marble counter tops or on bedroom walls perhaps to remove later?
Yes! It totally should be bc it comes off very easily without sticking to the wall.
Love it! What color did you use?